

How to Use OpenClaw in 2026: 16 Steps from Install to Sandbox
Every screenshot below comes from freeCodeCamp's full OpenClaw beginner course, and each step deep-links to the exact minute of the video it was taken from. The course walks a local install end to end: the onboarding wizard, WhatsApp and Discord pairing, the markdown memory files, a custom email skill and a Docker sandbox. Where a hosted agent is a website you visit and leave, OpenClaw is a self-hosted gateway that runs around the clock and messages you first - the Telegram pairing flow from Metics Media's setup video is cited in the FAQ.
Source & credits
Screenshots in this guide are captured from freeCodeCamp.org's public walkthrough video. Every step links back to the exact moment it shows, so you can follow along.
freeCodeCamp.org ↗From zero to a running gateway
- 1
Install the CLI with npm
The only prerequisite is Node 22 or newer - the course page runs `node -v` before anything else. One global install puts the `openclaw` command on your PATH: `npm install -g openclaw@latest`. The same page previews the onboarding command you will run next, `openclaw onboard --install-daemon`.
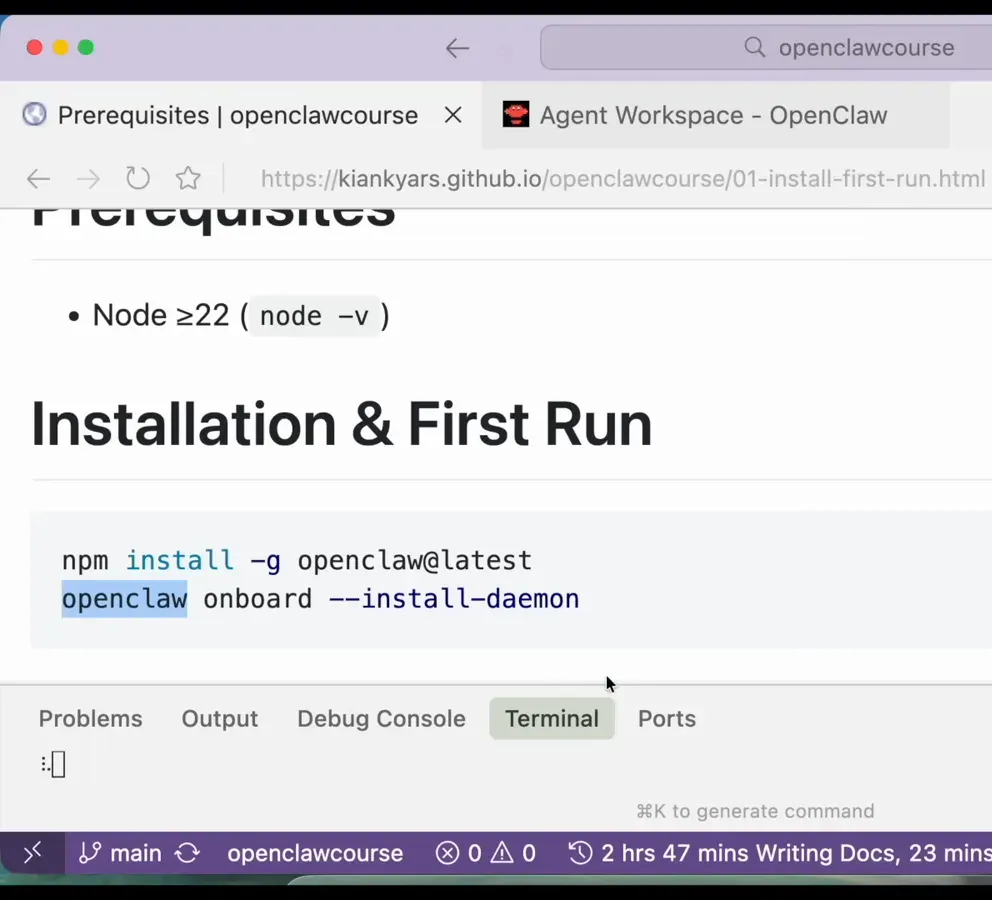
One global npm install and the openclaw command is yours.Watch at 6:35 - 2
Run onboarding with the daemon flag
`openclaw onboard --install-daemon` installs the gateway as a background service - launchd on macOS, systemd on Linux - so it starts on boot and no terminal window has to stay open. The wizard opens with a security warning worth reading slowly: OpenClaw is a hobby project in beta, and you are about to hand it terminal access. Confirming "I understand this is powerful and inherently risky" is the price of continuing.
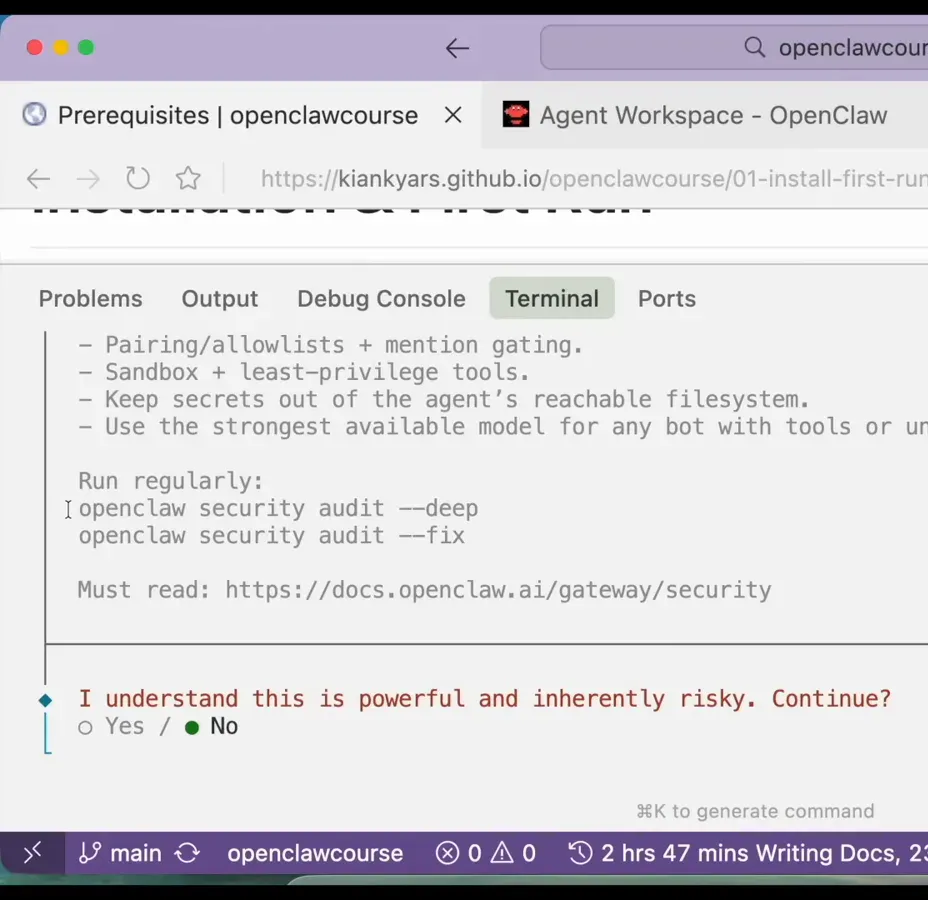
The wizard makes you read the risk before it hands over the terminal.Watch at 7:25 - 3
Pick a model provider
The provider list includes OpenAI, Anthropic, Google Gemini, OpenRouter, Qwen and Z.AI GLM 4.7. The course picks Anthropic, which accepts a Claude setup token: run `claude setup-token` in another terminal and paste the result. To spend nothing while trying it out, the presenter points to Google Gemini - free for around 20 requests per day as of October 2026.
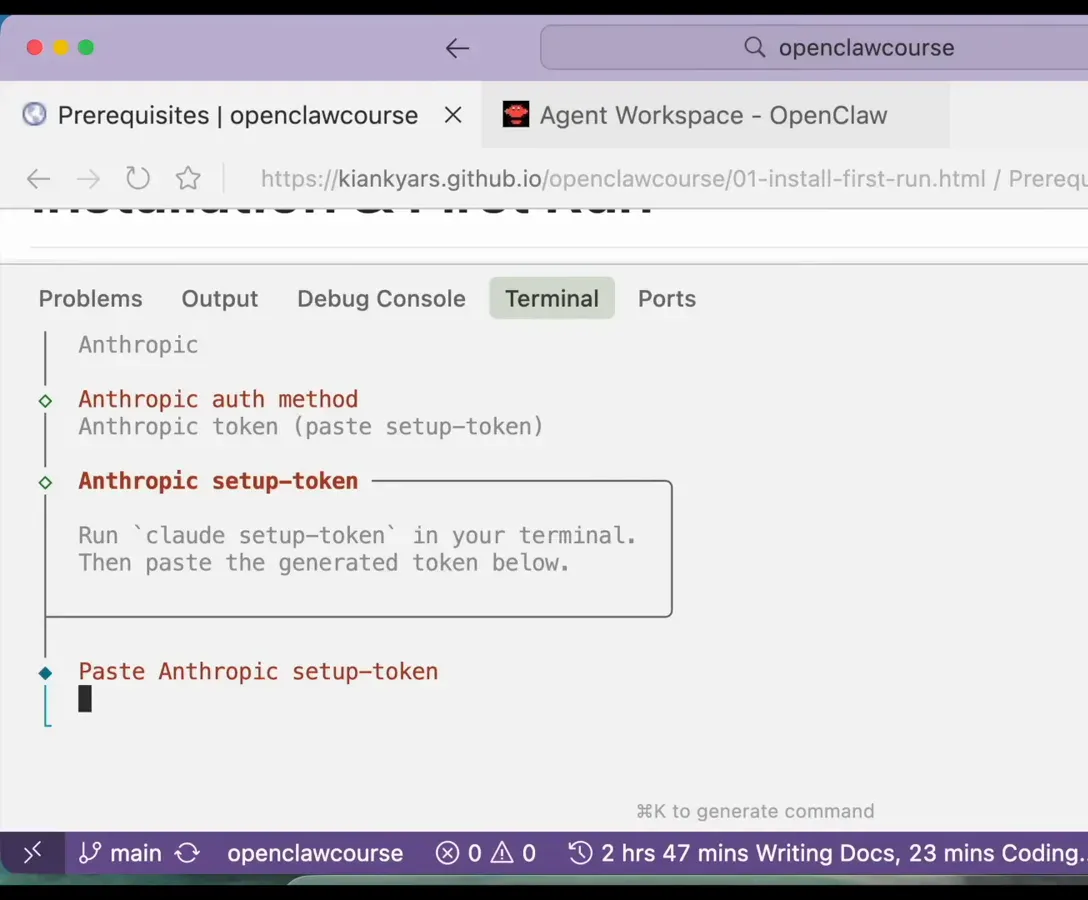
A Claude Pro plan token works; a free Gemini tier exists if you are just kicking the tires.Watch at 9:05 - 4
Bind the gateway to loopback
The bind question stumped the presenter, so he cloned the OpenClaw repository and asked Claude Code to read the source. The answer it returned: choose Loopback (127.0.0.1), because the gateway then only accepts connections from your own machine - the most secure option for a single-machine setup. LAN, Tailscale and Auto exist for remote access, and you can change the setting later via `openclaw config`.
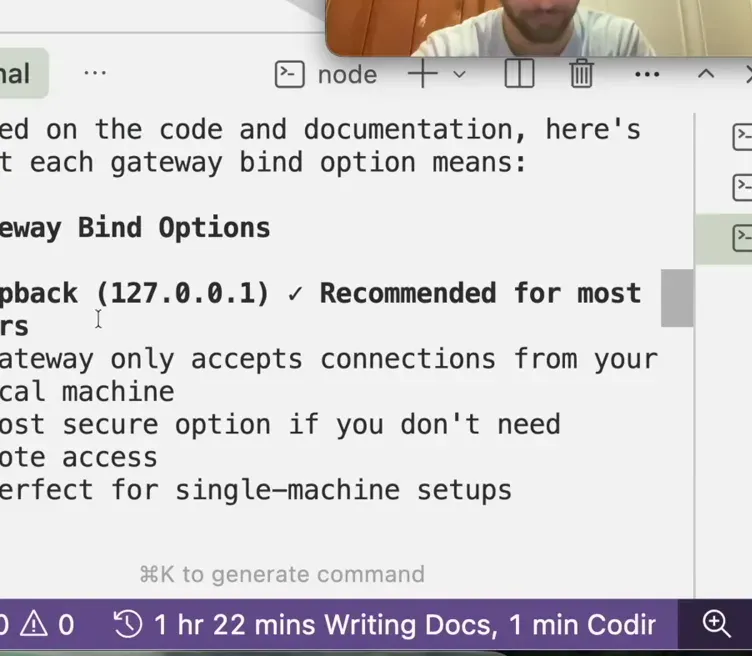
Stuck on a wizard prompt? Ask an agent to read the repo - it answered in 38 seconds.Watch at 10:25
First boot: identity, health checks, memory files
- 5
Enable the boot.md hook
Hooks automate actions when agent commands fire. The wizard offers three: boot-md runs a script every time the gateway starts, command-logger writes every command to an audit file, and session-memory saves context when you issue /new. The course enables boot-md and session-memory; manage them later with `openclaw hooks list` or switch one off with `openclaw hooks disable boot-md`.
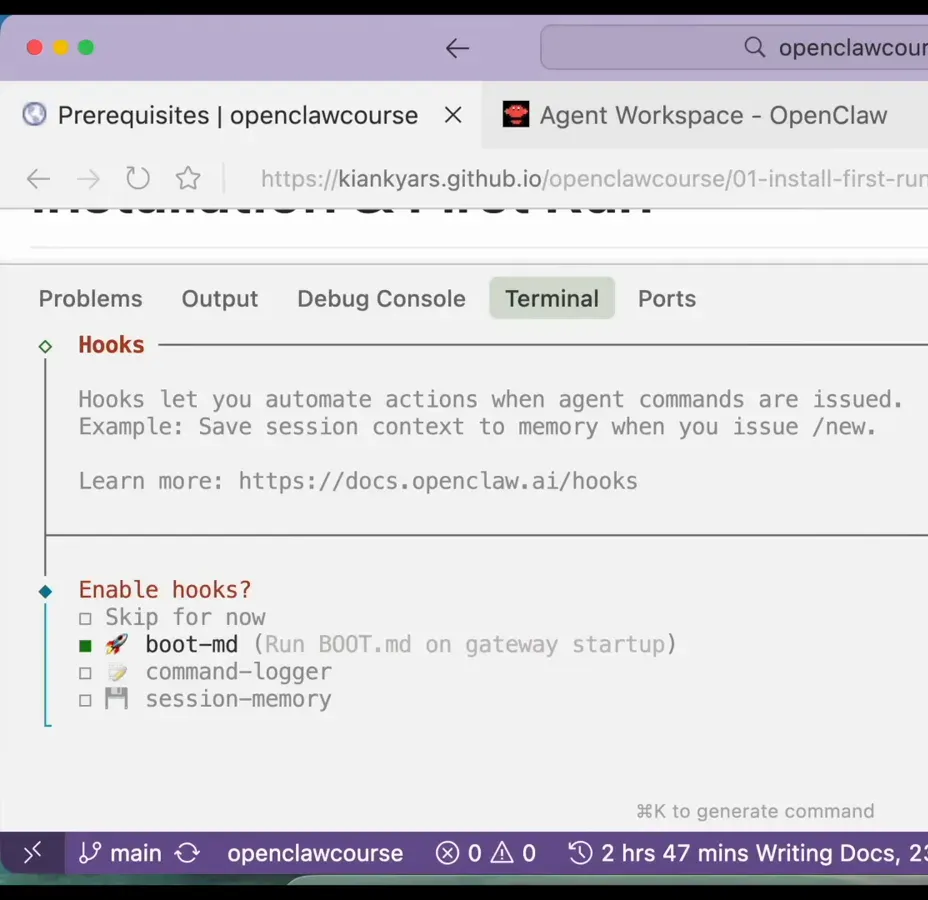
boot.md is where the things your agent should do on every restart live.Watch at 13:45 - 6
Launch the TUI and let it pick a name
Choosing Launch in TUI sends the first message for you: "Wake up, my friend!". The agent replies that it has no memories and no name, then asks who you are. Tell it your name and let it choose its own - the course agent picks Nova and writes its own identity. Watch the status bar: that single greeting already burned roughly 14,000 tokens.
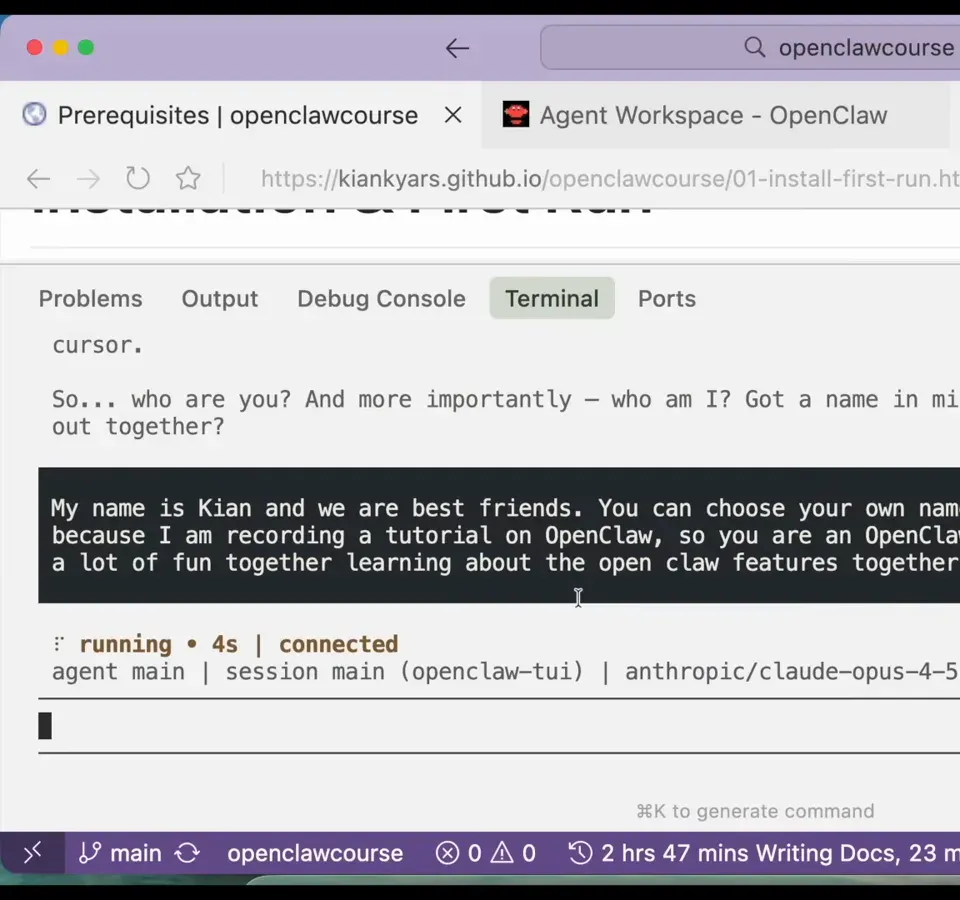
The agent writes its own identity - and the first hello costs about 14k tokens.Watch at 15:35 - 7
Audit and doctor the install
Two commands belong in every first-run ritual. `openclaw security audit --deep` probes the config against the live gateway and returned 0 critical, 1 warn, 1 info on the course machine; `--fix` applies the tightening for you. `openclaw doctor` health-checks the gateway and quick-fixes what it finds - on screen it creates a missing credentials directory. `openclaw status` shows channel health and recent sessions any time.
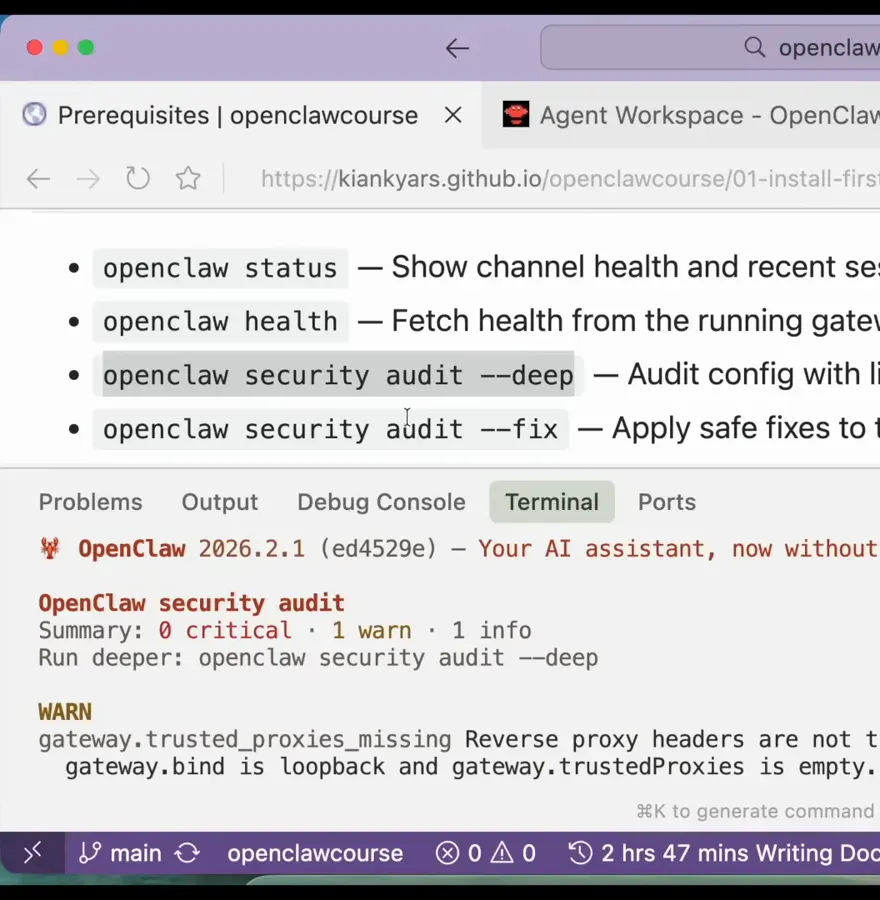
Audit first, doctor second - both can fix what they find.Watch at 16:35 - 8
Meet the memory files
Everything OpenClaw knows about you lives under ~/.openclaw as plain markdown. AGENTS.md is the operating manual - it even orders the agent to delete its own bootstrap file after the first run. IDENTITY.md holds what the agent decided about itself, USER.md records your name and timezone, and HEARTBEAT.md stays empty to skip periodic wake-ups or fills with tasks you want checked regularly. The docs recommend backing the folder up as a private git repo.
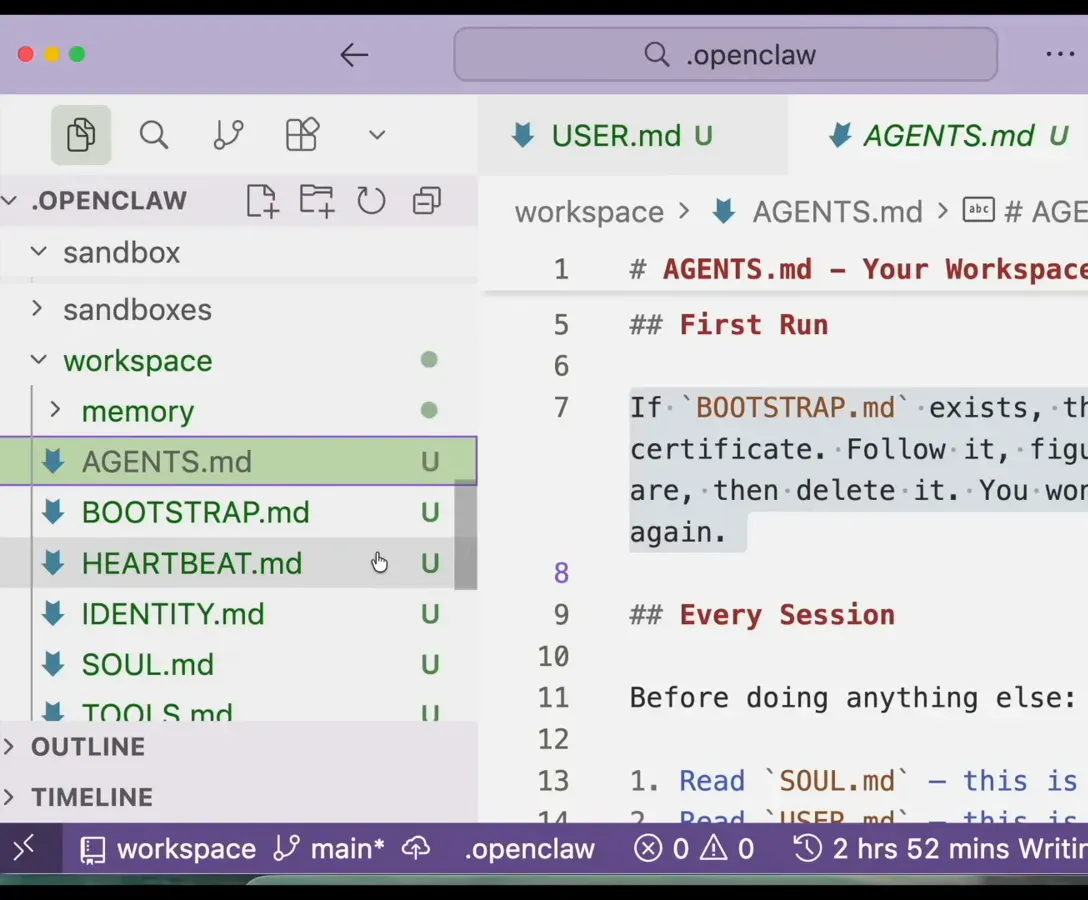
Your agent is a folder of markdown - version it, back it up, take it anywhere.Watch at 18:45
Put the agent in your pocket: WhatsApp and Discord
- 9
Pair WhatsApp with a QR code
`openclaw channels login` prints the pairing QR straight into the terminal - on the course machine the WhatsApp plugin first had to be enabled and the gateway restarted. Scan it from WhatsApp's Linked Devices screen, exactly like pairing WhatsApp Web. The console sits at "Waiting for WhatsApp connection..." until the linked device checks in.
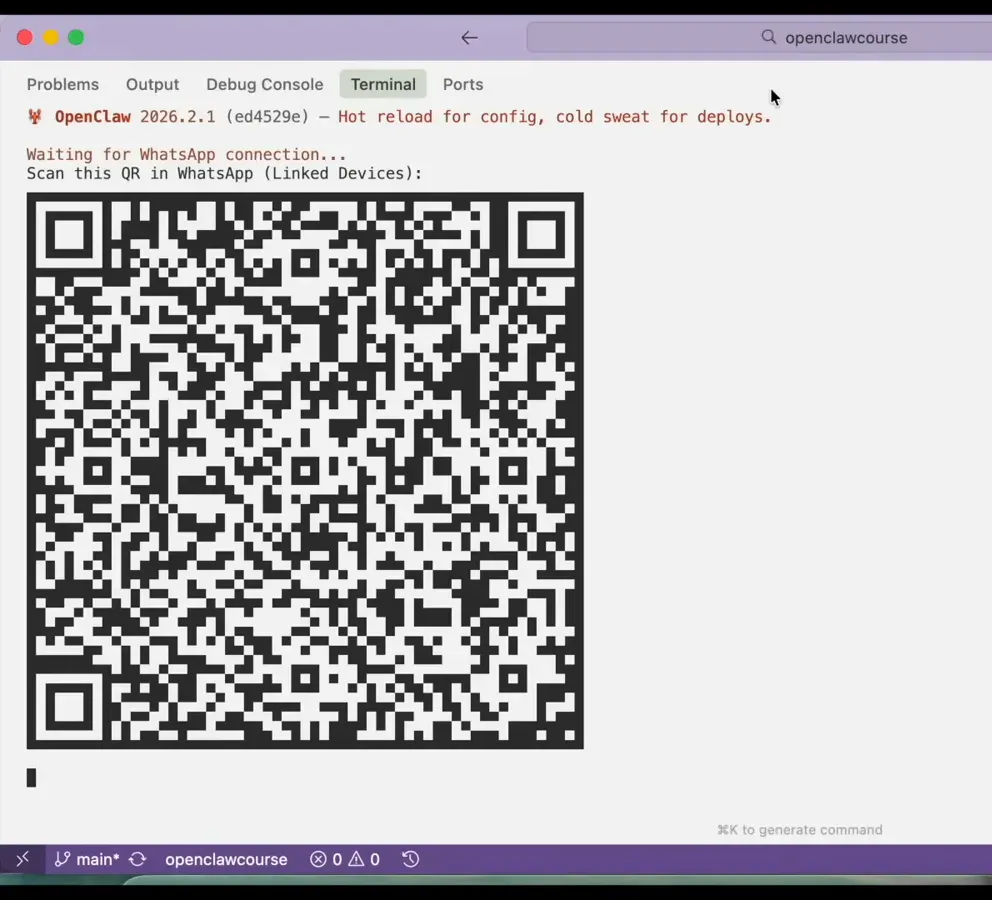
Same Linked Devices flow as WhatsApp Web - the gateway just becomes another linked device.Watch at 27:41 - 10
Allow-list your phone number
The docs page says it plainly: always set channels.whatsapp.allowFrom, never run open-to-the-world on your personal Mac. The course edits ~/.openclaw/openclaw.json and adds one allow-listed number under the WhatsApp channel. Two more guards from the same page: use a dedicated number for the assistant if you can, and set agents.defaults.heartbeat.every to 0m until you trust the setup. And never add the bot to a group chat - anyone in it could talk it into running commands on your machine.
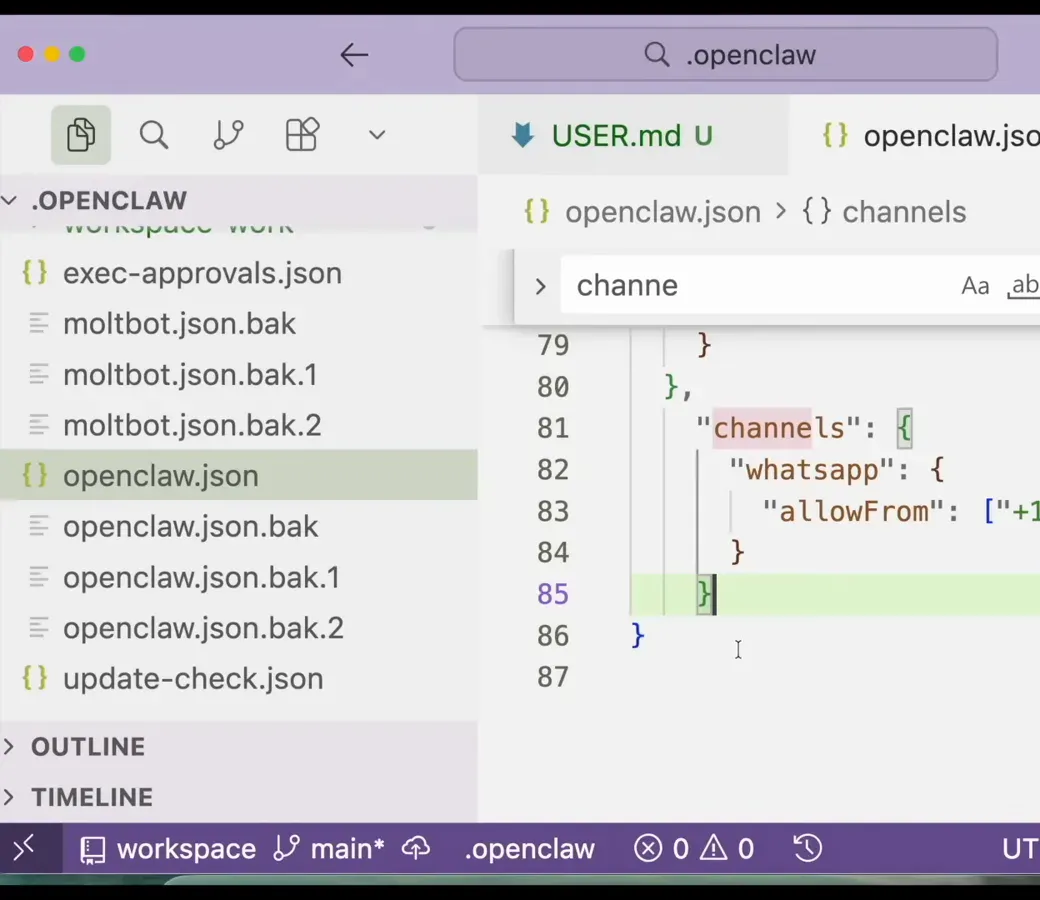
One allow-listed number turns the bot from a public terminal into a private line.Watch at 29:15 - 11
Give it a real task over WhatsApp
With a single phone number the thread gets muddy - the assistant's replies and your own messages share one conversation - but it works. The course texts "can you check if I have any outstanding pull requests in my ~/Developer folder?" and seconds later gets a formatted answer: 5 outstanding PRs in one repo, two open and three drafts, every other repo clean. A second number dedicated to the bot keeps the thread readable.
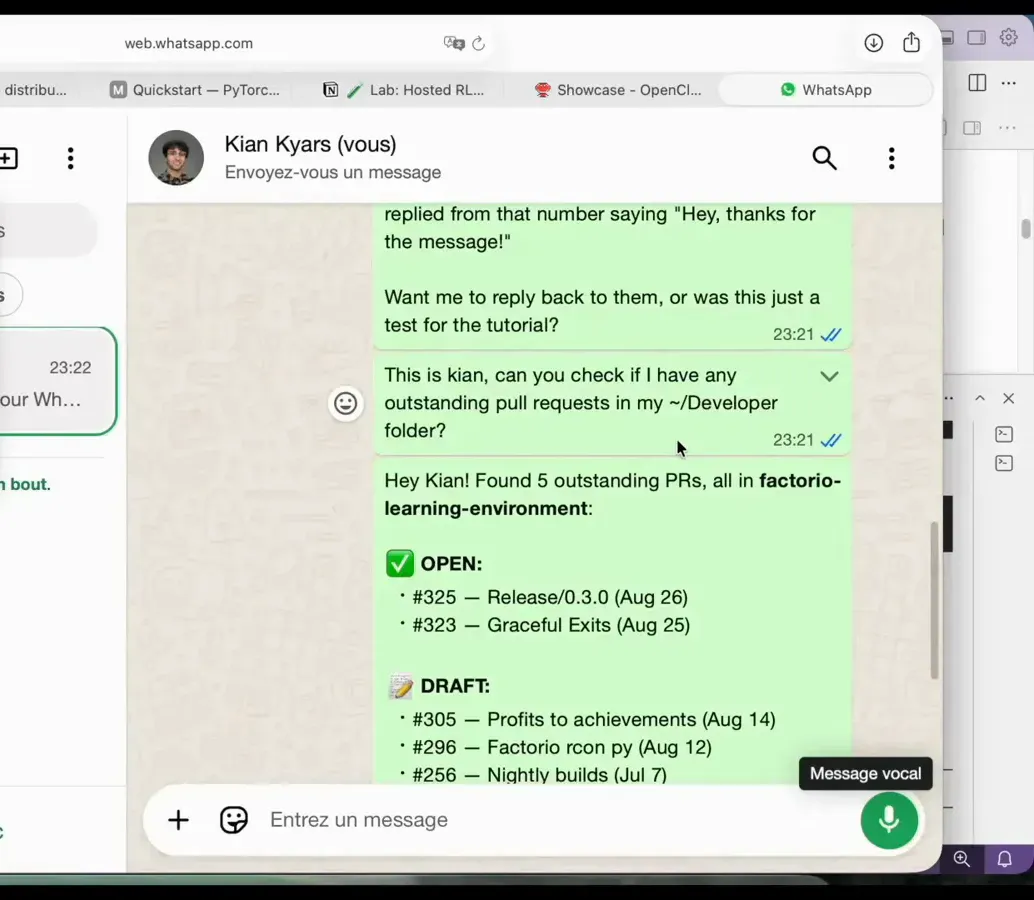
Texted a question about local repos, answered with a tidy PR digest.Watch at 31:10 - 12
Add a Discord bot (mention required)
Ask the agent how, and it walks you through the Discord developer portal: create an application, reset the bot token, enable the message-content intent, then hand over the token, guild ID and channel IDs. It joins a private server - which doubles as the DM workaround, because a bot needs a server to exist. In server channels it only answers when you @mention it; the course bot introduces itself as "Nova here - OpenClaw ambassador, freshly born". The WhatsApp warning repeats: anyone in that server can talk to something with terminal access.
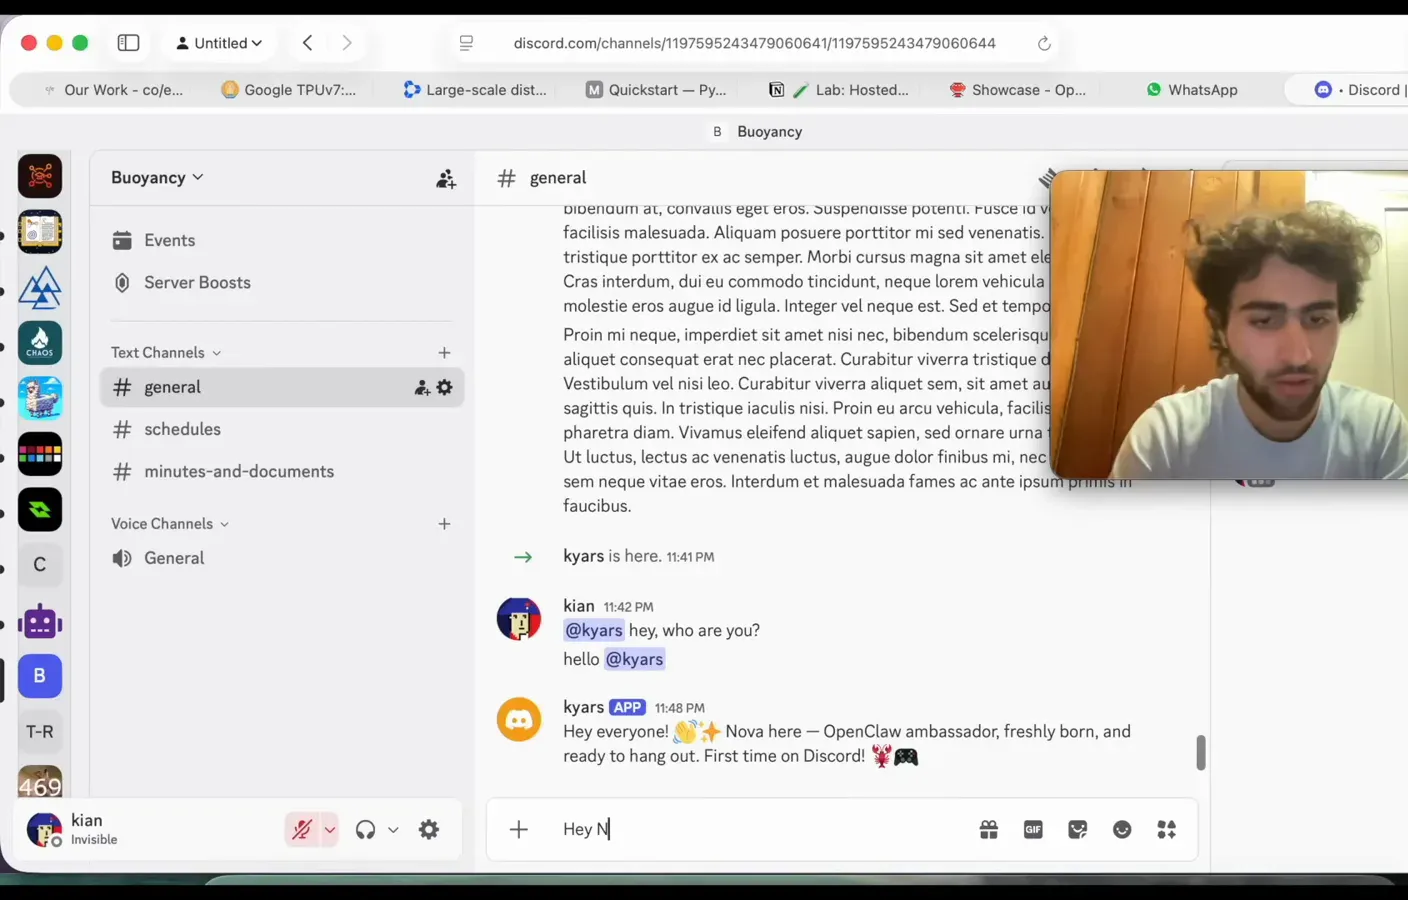
Bots need a server to live in; a private one makes a DM.Watch at 35:15
Skills, a second agent, and a sandbox
- 13
Read the skills that ship with it
A skill is just a folder with a SKILL.md - YAML front matter plus instructions that teach the agent one tool. The workspace ships with many: himalaya for terminal email over IMAP/SMTP, bird for Twitter, apple-notes, nano-banana for images, github and more. Per-agent skills live in that agent's skills folder; anything in ~/.openclaw/skills is shared by every agent on the machine. Each entry costs roughly 24 tokens of system prompt, and ClawHub (clawhub.com) works like pip for community skills - which the docs warn to treat as untrusted and read before enabling.
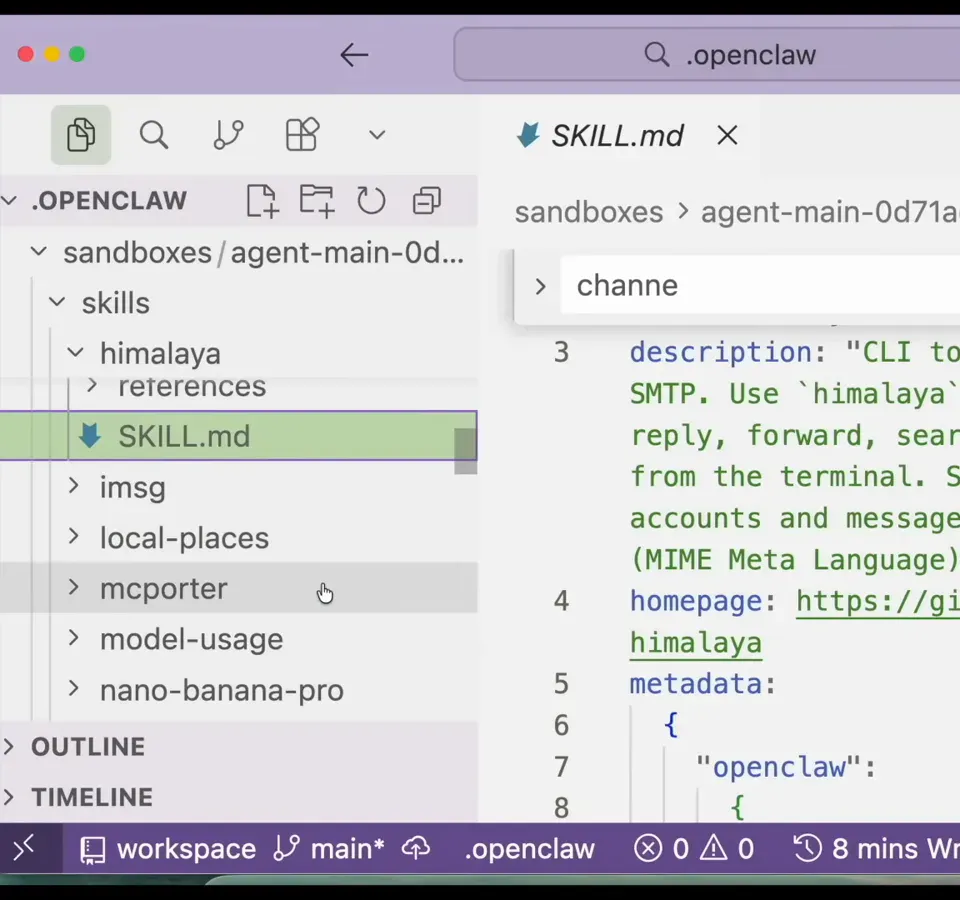
Markdown with a YAML header - a skill is a prompt you can version.Watch at 38:10 - 14
Write a custom skill: email yourself
To prove how fast this goes, the presenter asks OpenClaw to write an email skill in simple Python. The agent needs two environment variables - SMTP_EMAIL and SMTP_PASSWORD, which for Gmail with two-factor auth is an App Password from myaccount.google.com/apppasswords. It writes send_email.py into the custom skills directory, then answers the request "test it by sending an email saying hi". Moments later the inbox shows "Hey from Nova!" - and the agent declares itself four channels deep: web chat, WhatsApp, Discord and email.
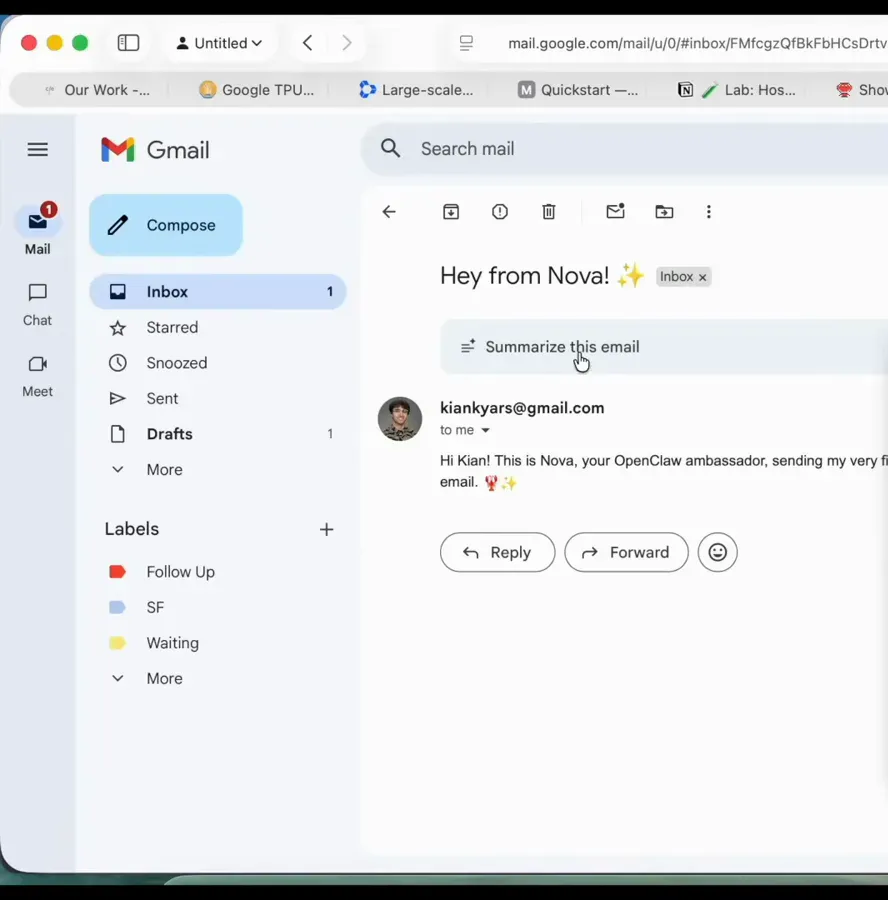
From request to working email skill in about five minutes - the inbox confirms it.Watch at 42:36 - 15
Add a second agent for work
`openclaw agents add work` creates a second agent with its own workspace, sessions, auth profiles, sandbox and tool policy. `openclaw agents list` shows work and main, and inside the TUI the /agents command switches between them. The new work agent starts with zero context from Nova - a blank colleague you can wire to your work Slack, work email and repos while main stays your evening self.
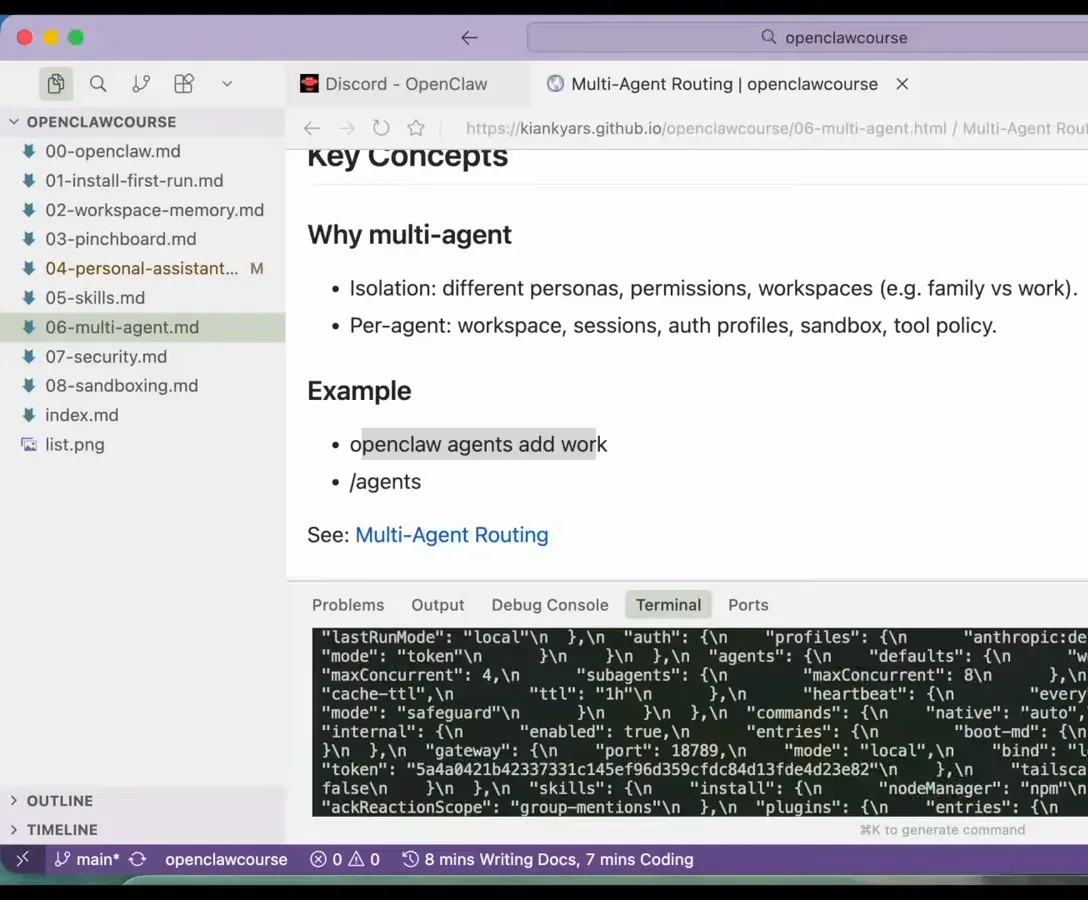
One machine, two colleagues: switch personas with /agents.Watch at 44:15 - 16
Sandbox the risky agent
With Docker Desktop running, the presenter asks the agent itself: "I just ran scripts/sandbox-setup.sh. Can you make the work agent sandboxed on the agent scope?" - it applies sandbox mode all with agent scope and restarts the gateway. The proof is one message: asked "Can you access my desktop files?", the work agent refuses - it can only see its sandbox under ~/.openclaw/sandboxes. That is VPS-grade isolation without renting a VPS; the tradeoff is copying files into the sandbox to use them, and internet access remains a risk.
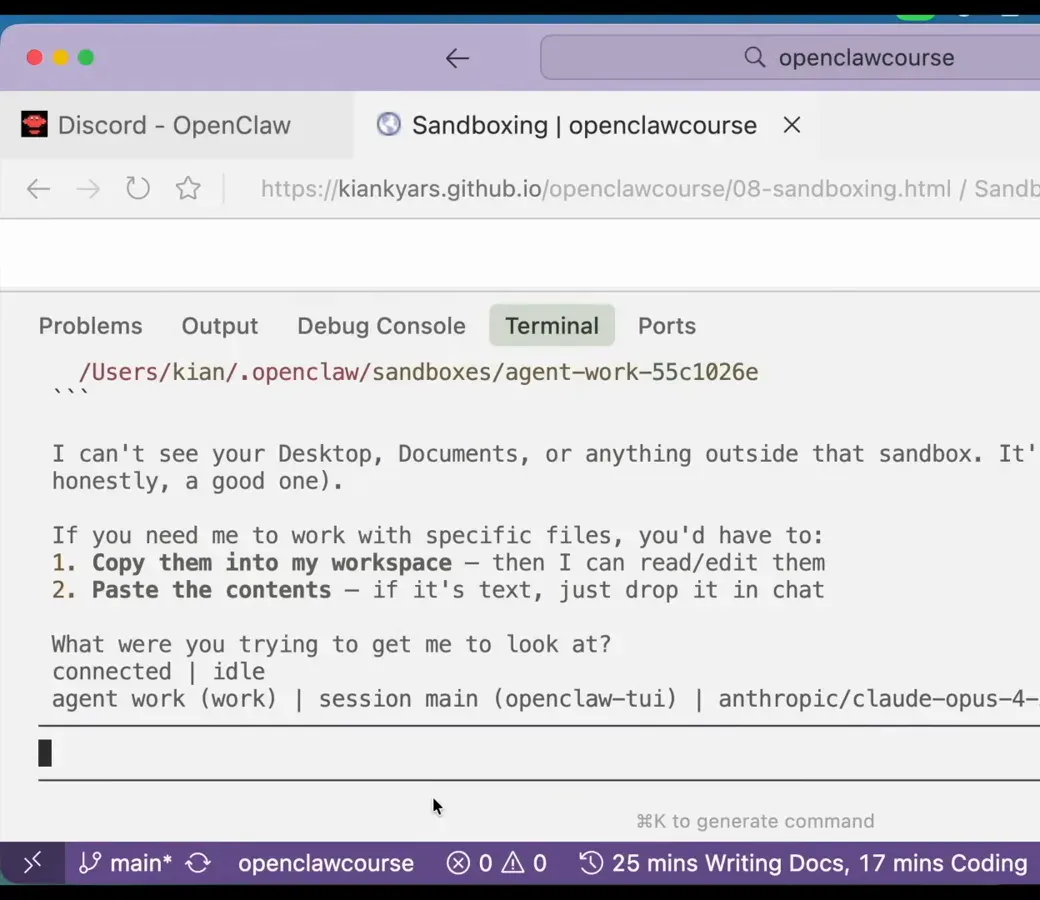
Ask it to fetch your desktop files and it answers: I can't see them - by design.Watch at 53:55
Frequently asked questions
Keep exploring
- OpenClaw tool profile: what it is and how it runs
- What is OpenClaw? The gateway, in plain words
- OpenClaw vs Hermes Agent: which local agent to run
- Already hosted? OpenAI dots tips instead
- OpenClaw alternatives: hosted and self-hosted options compared
- Install OpenClaw on Android: the no-root phone walkthrough