

How to Install OpenClaw on Android in 2026: the No-Root Walkthrough
OpenClaw on Android comes in two shapes: an official companion app that pairs the phone to a gateway running elsewhere, and the setup this page walks - the phone itself becoming the machine. Three recent videos show that path end to end; this guide rebuilds it from their frames: Tech Jarves' no-root install is the frame source for the Shizuku and Telegram route, while Ali Solanki's old-phone-to-24-7-agent and thevoidkernel's Termux self-hosting videos are fact sources for the Ubuntu detour, WhatsApp linking and the Control UI. Every screenshot was checked against its source video, and each step deep-links to the exact second. It covers what the official docs' Android page does not: Shizuku pairing quirks, the Termux network-interface error, and gateway pairing on the device itself.
Source & credits
Screenshots in this guide are captured from Tech Jarves's public walkthrough video. Every step links back to the exact moment it shows, so you can follow along.
Tech Jarves ↗Prep the phone for no-root control
- 1
Watch what no-root control looks like
The walkthrough opens live: from a second phone he sends "Open Play Store, search for WhatsApp, install it, and open it" through the Telegram bot, and the Android phone opens the Play Store, types the search and installs WhatsApp with nobody touching it - the creator stresses it is live, not a screen recording or remote-control trick. A follow-up command makes it compose and send a Gmail message, then confirm by chat. That is the end state this page builds toward: an agent with real hands on Android, installed without root.
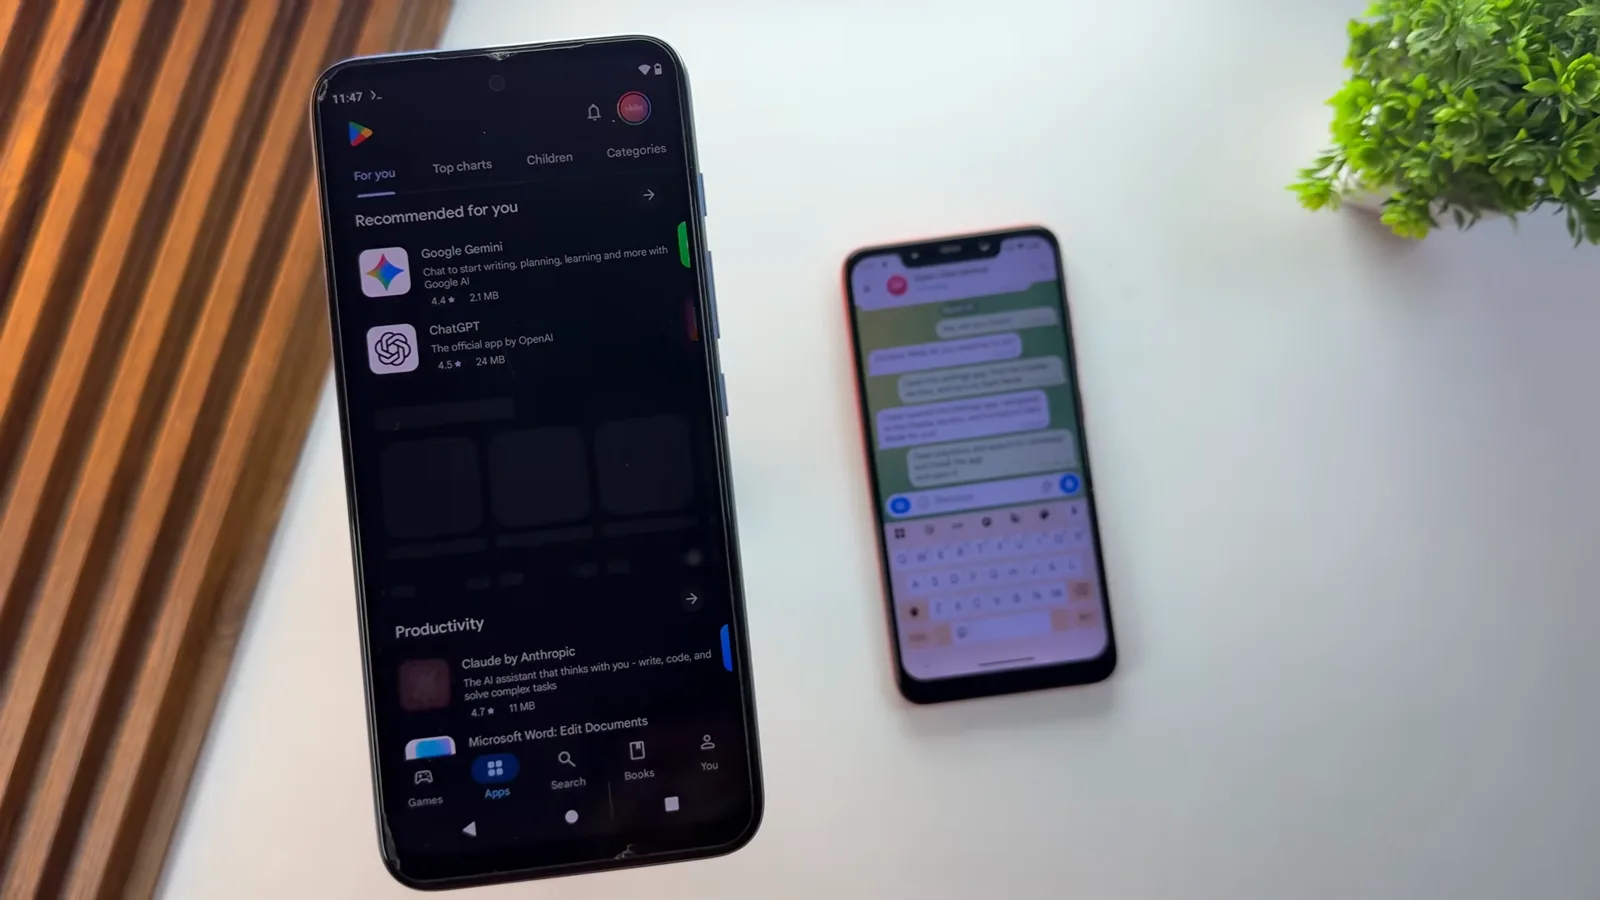
One Telegram message, and the phone shops for itself.Watch at 0:20 - 2
Choose no-root and let Shizuku do the privileged work
Two roads exist. Root gives full system control but is not for everyone - warranties, banking apps and bricking risk come with it. The no-root road borrows system privileges from Shizuku, a small Android utility that shares ADB-level access with terminal apps, which is exactly what OpenClaw needs to drive the phone. The walkthrough runs it on a non-rooted Android 12 phone on purpose: if the setup works on an older Android, newer devices behave the same. Decide this once before installing anything.
Root is the road most people should skip - Shizuku stands in for it.Watch at 1:51 - 3
Grab the one-script repo and its two apps
The creator maintains a GitHub repo, linked in the video description, whose script automates the whole install. Before running anything, install its two prerequisites - and mind the sources: Termux must come from F-Droid because that is where current builds live, while Shizuku installs from the Play Store. Ali Solanki's requirements card adds the rest: an Android 10-or-above phone and any LLM API key, Gemini, OpenAI or Anthropic.
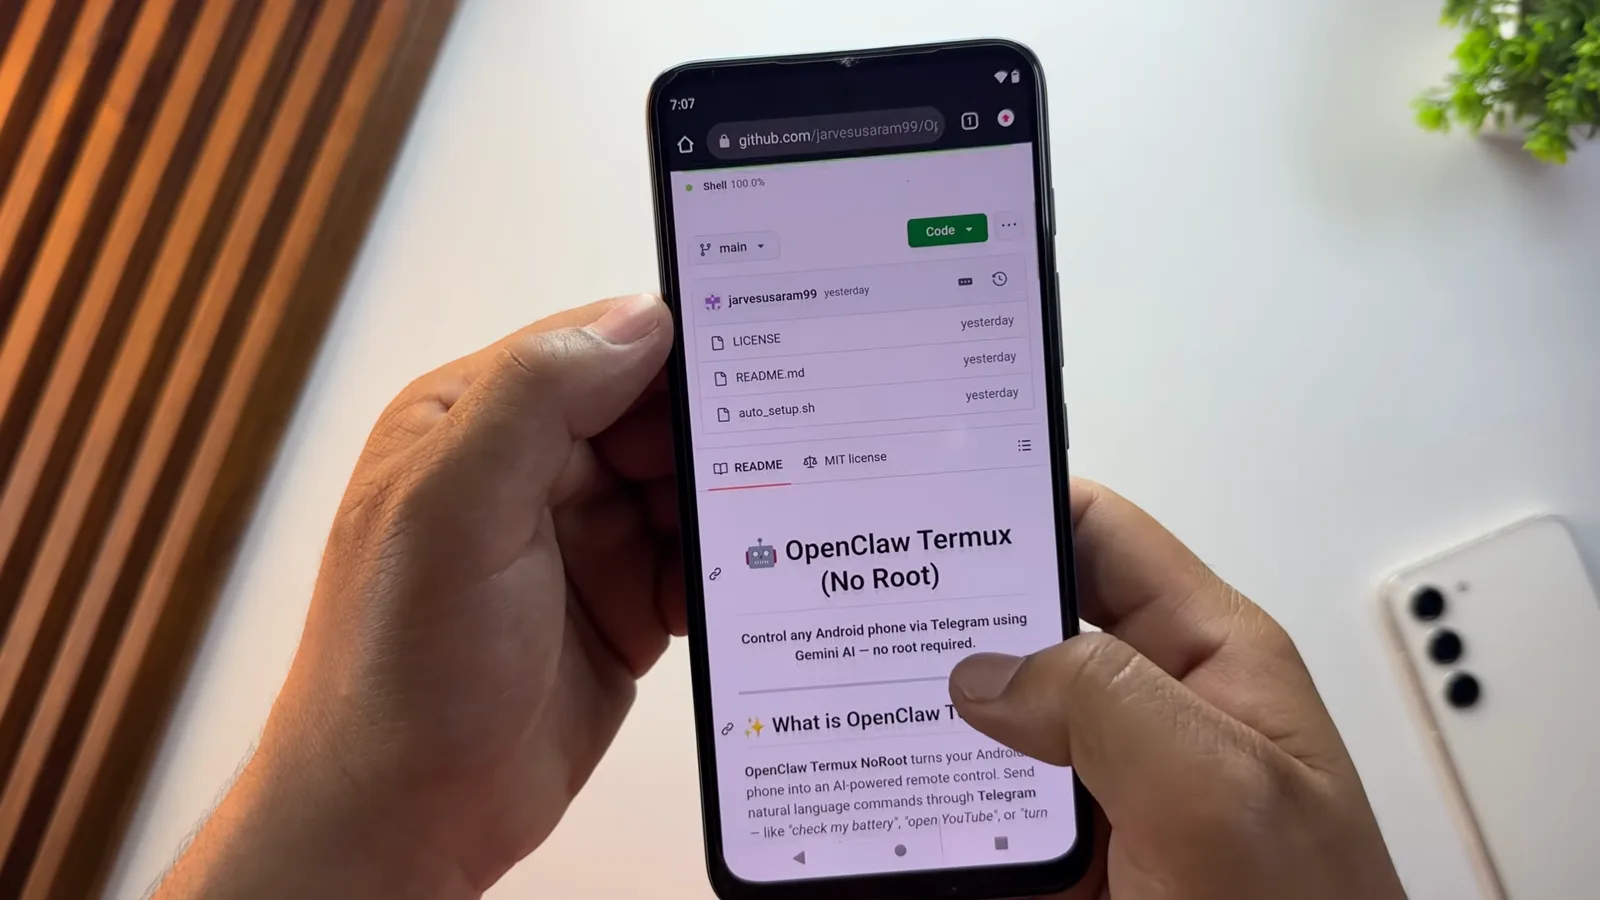
One script, two apps - and the download sources matter.Watch at 2:16 - 4
Pair Shizuku over wireless debugging
Shizuku starts disabled: open the app and it reads "Shizuku is not running". Turn on Developer options, enable Wireless debugging with the phone on Wi-Fi, then in Shizuku tap Pairing and follow it back to "Pair device with pairing code". A six-digit code appears; enter it in the Shizuku notification and the banner flips to "Pairing successful" - tap Start. If an error interrupts, repeat the same steps. Finish with "Use Shizuku in terminal apps" and export the files into a folder named Shizuku (capital S) for Termux to use later.
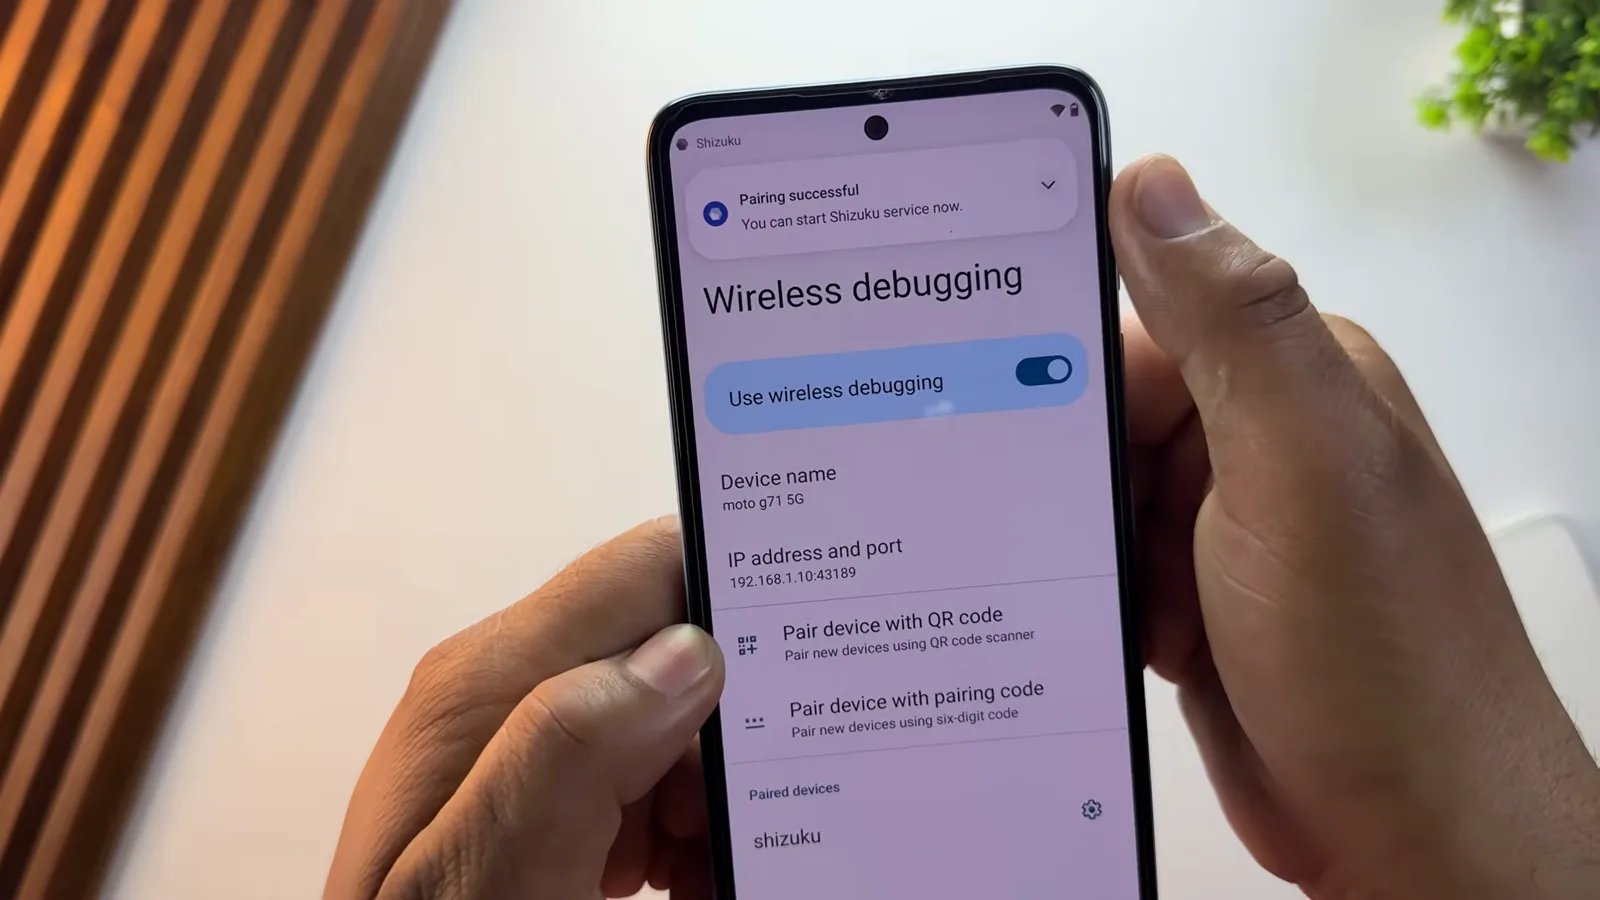
Code entered, pairing done - next stop: Termux.Watch at 3:40
Install OpenClaw inside Termux
- 5
Run the install script inside Termux
In Termux, run termux-setup-storage first and allow the permission prompt. Then paste the script command from the repo and let it run - around 8 to 10 minutes. Answer Y to the yes-or-no prompts and approve the Shizuku-access and background-running permissions when Android asks. When the script offers optional tools, decline with N; this setup does not need them. The output also prints a line worth knowing: Gateway service install not supported on Android, marked optional and skipped - the gateway is started by hand later.
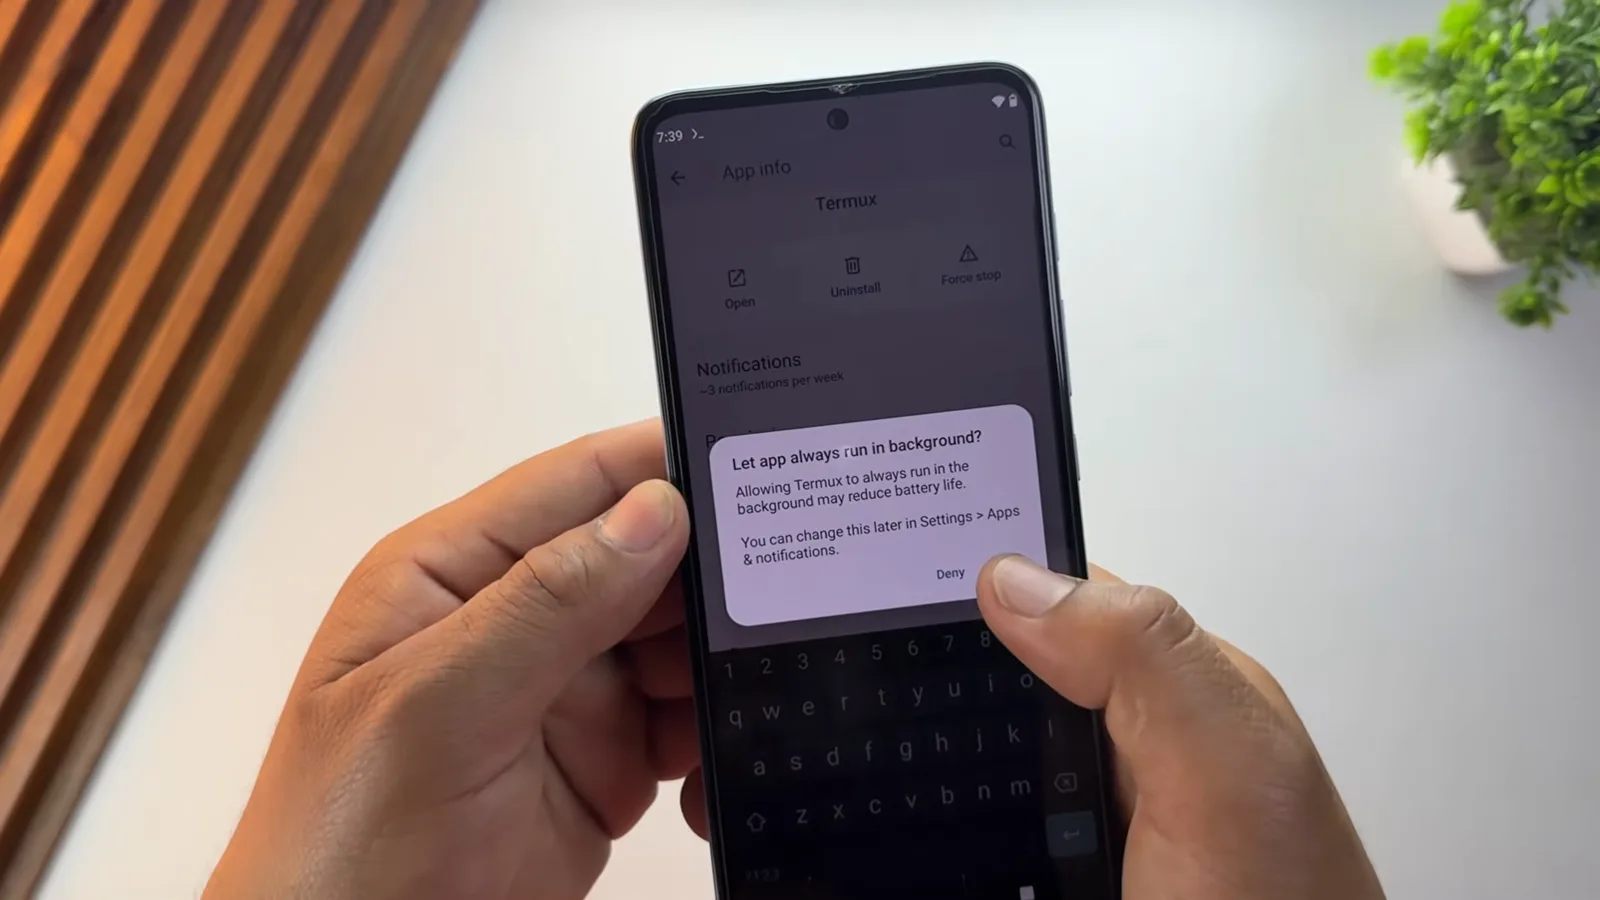
Answer Y to hooks, N to extras, and let the skipped service slide.Watch at 5:00 - 6
Go manual with Ubuntu when the script fights back
If the one-line script stalls on your phone, the manual route from thevoidkernel's repo reaches the same place. Install the proot-distro package, pull Ubuntu with it, and log in via proot-distro login ubuntu. Inside, update the system with apt update and apt upgrade, install curl, add the NodeSource repo, install Node.js and verify with node -v. Add git, then npm install -g openclaw@latest and confirm with openclaw --version. Slower than the script, but every step is visible, copyable and repeatable.
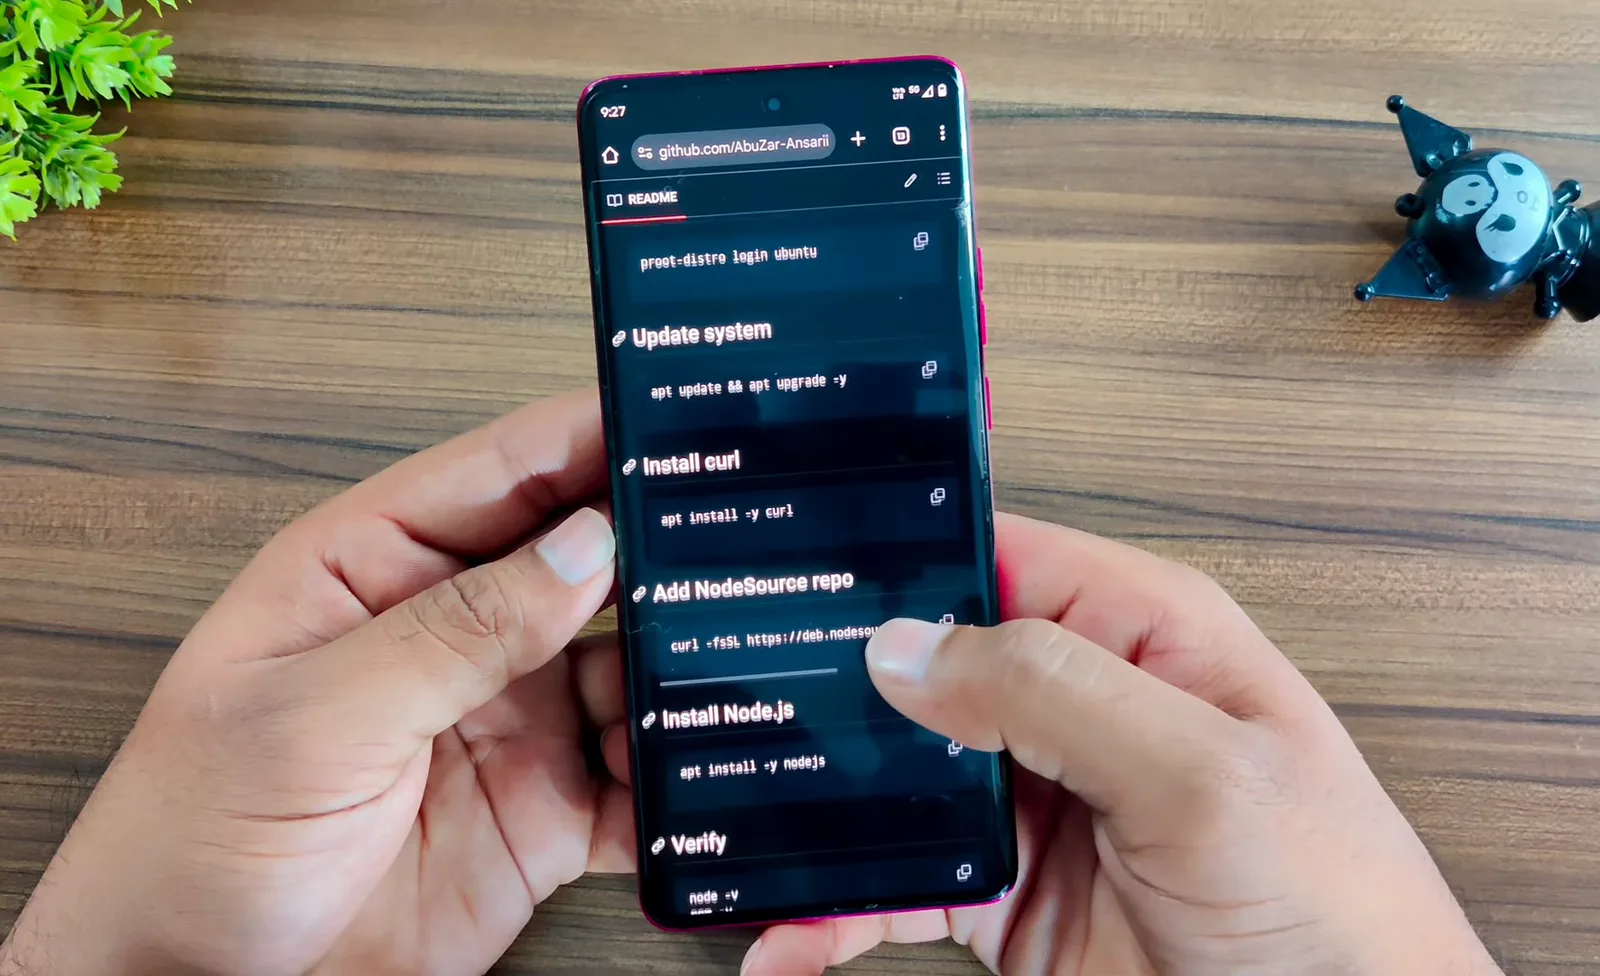
No script? The manual Ubuntu route covers stubborn phones.Watch at 3:25 - 7
Fix the Android network-interface error
Termux installs have a known tripwire: OpenClaw can fail with an error about the Android network interface. thevoidkernel's walkthrough hits it and fixes it from the repo's own "Fix Android Network Interface Error" section: one command writes a small hook script into Termux's profile, and a second export NODE_OPTIONS line makes every future session load it automatically. Paste both as-is. After that, the node process sees the phone's interfaces and the install proceeds - this is the pit the official docs do not mention.
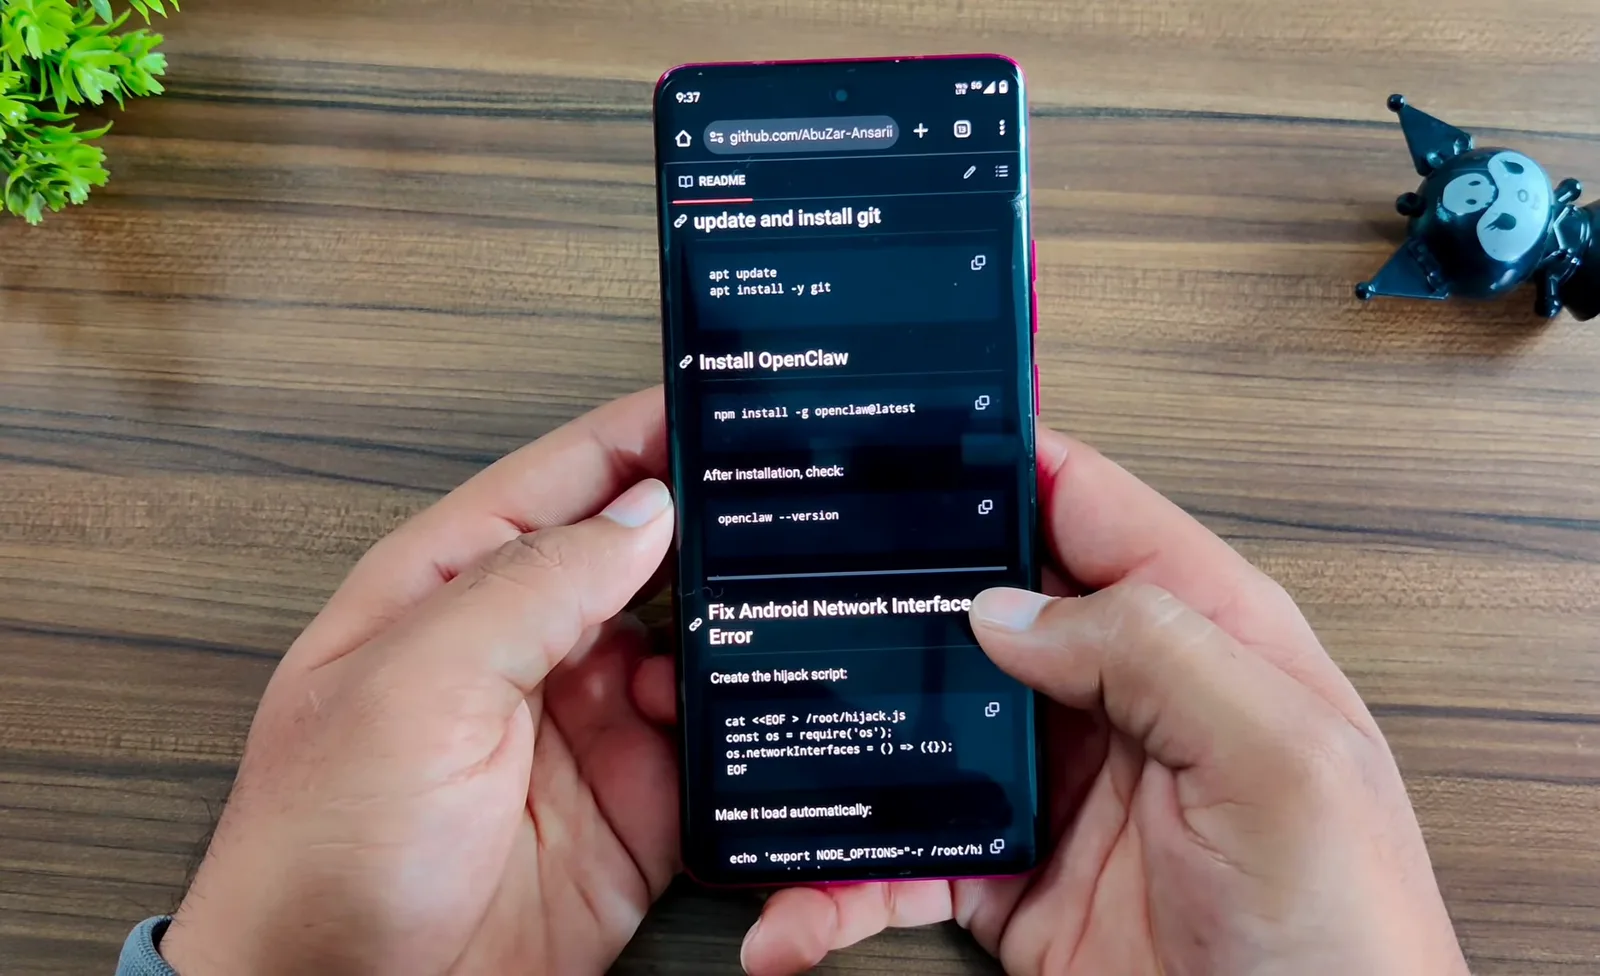
The error that bites Termux installs, and its two-line fix.Watch at 4:35
Keys, bots and chat channels
- 8
Create a free Gemini API key
For the model, all three creators use Google's free Gemini API key. In a browser, open Google AI Studio, go to the API Keys page and click Create a new key. Name it, keep the Default Gemini Project or create one, and copy the key the moment it is shown. One hygiene note from the walkthroughs: the on-camera key gets deleted after recording - never reuse a key that appeared in a video, generate your own.
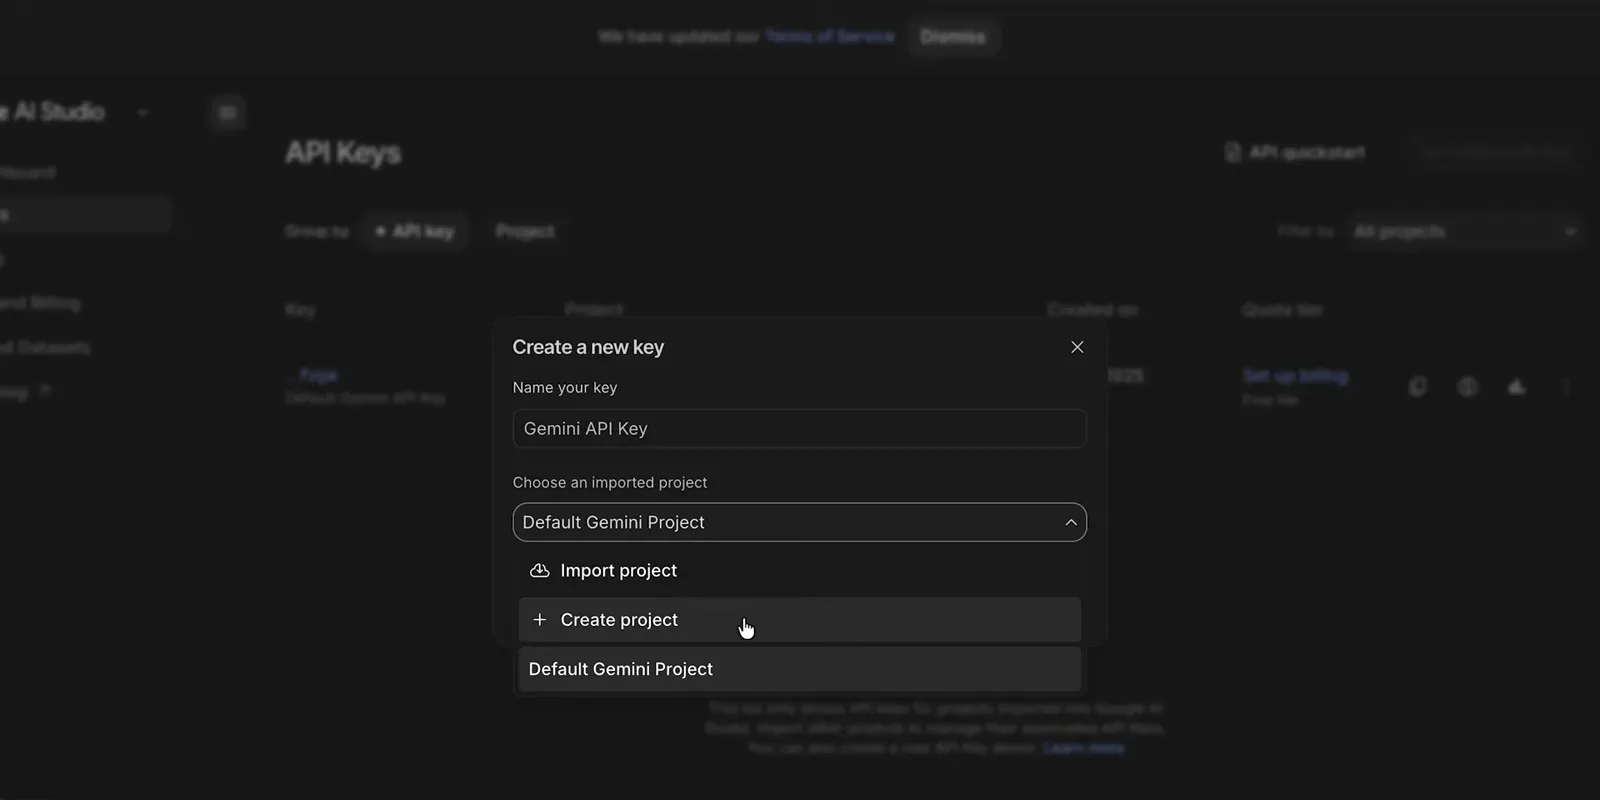
A free Gemini key starts with this dialog in Google AI Studio.Watch at 5:48 - 9
Mint a Telegram bot with BotFather
Telegram is the easiest control channel because commands reach the phone from anywhere. In Telegram, open BotFather, tap Start and choose to create a new bot. It asks for a display name - anything works - and a username that must be unique and end in bot; the walkthrough's own bots are @Openclawtermux_shizuku_bot and @Jarvesclawdbot_bot. BotFather answers with an HTTP API token. Copy it and stash it somewhere safe: the onboarding wizard asks for it in two steps.
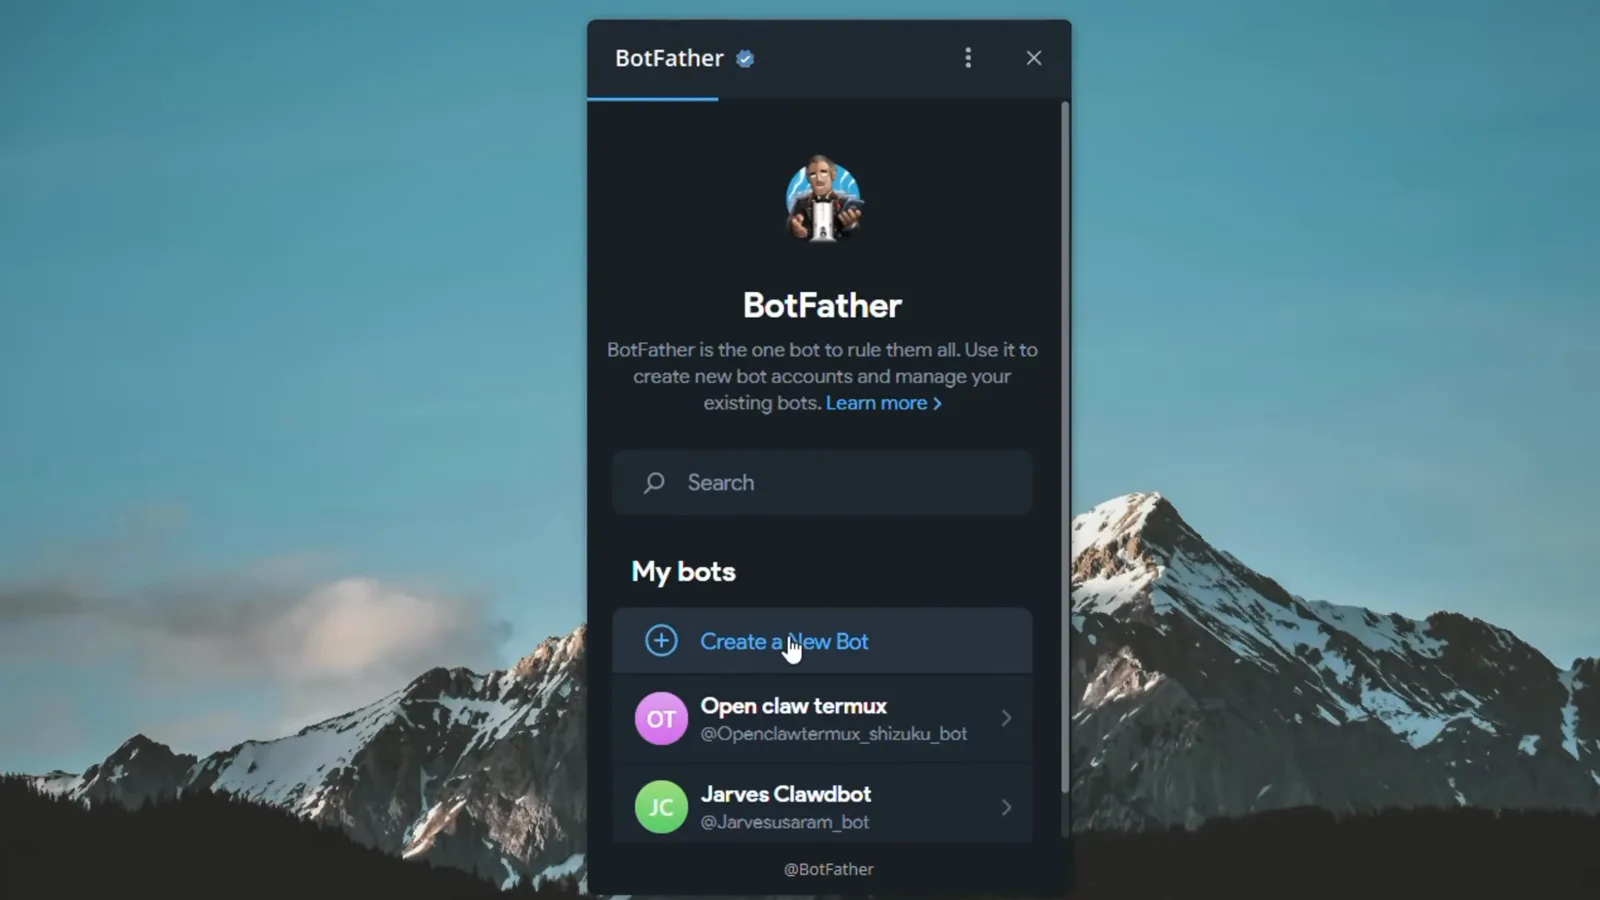
BotFather mints the token the wizard will ask for.Watch at 6:00 - 10
Onboard: quick start, Google, your key
Run openclaw onboard. Arrow through "yes I understand", pick quick start, and when the wizard lists model providers choose Google - the free Gemini key pastes right in. Next pick a Gemini model; the walkthrough takes a 2.5 Flash-class option, Ali Solanki a newer preview. Then the channel: choose Telegram here and paste the BotFather token. Keep the rest default, pick npm as the node manager in the skills prompt, and decline the extras - Google Places key, image tool, hooks - until it reports onboarding complete.
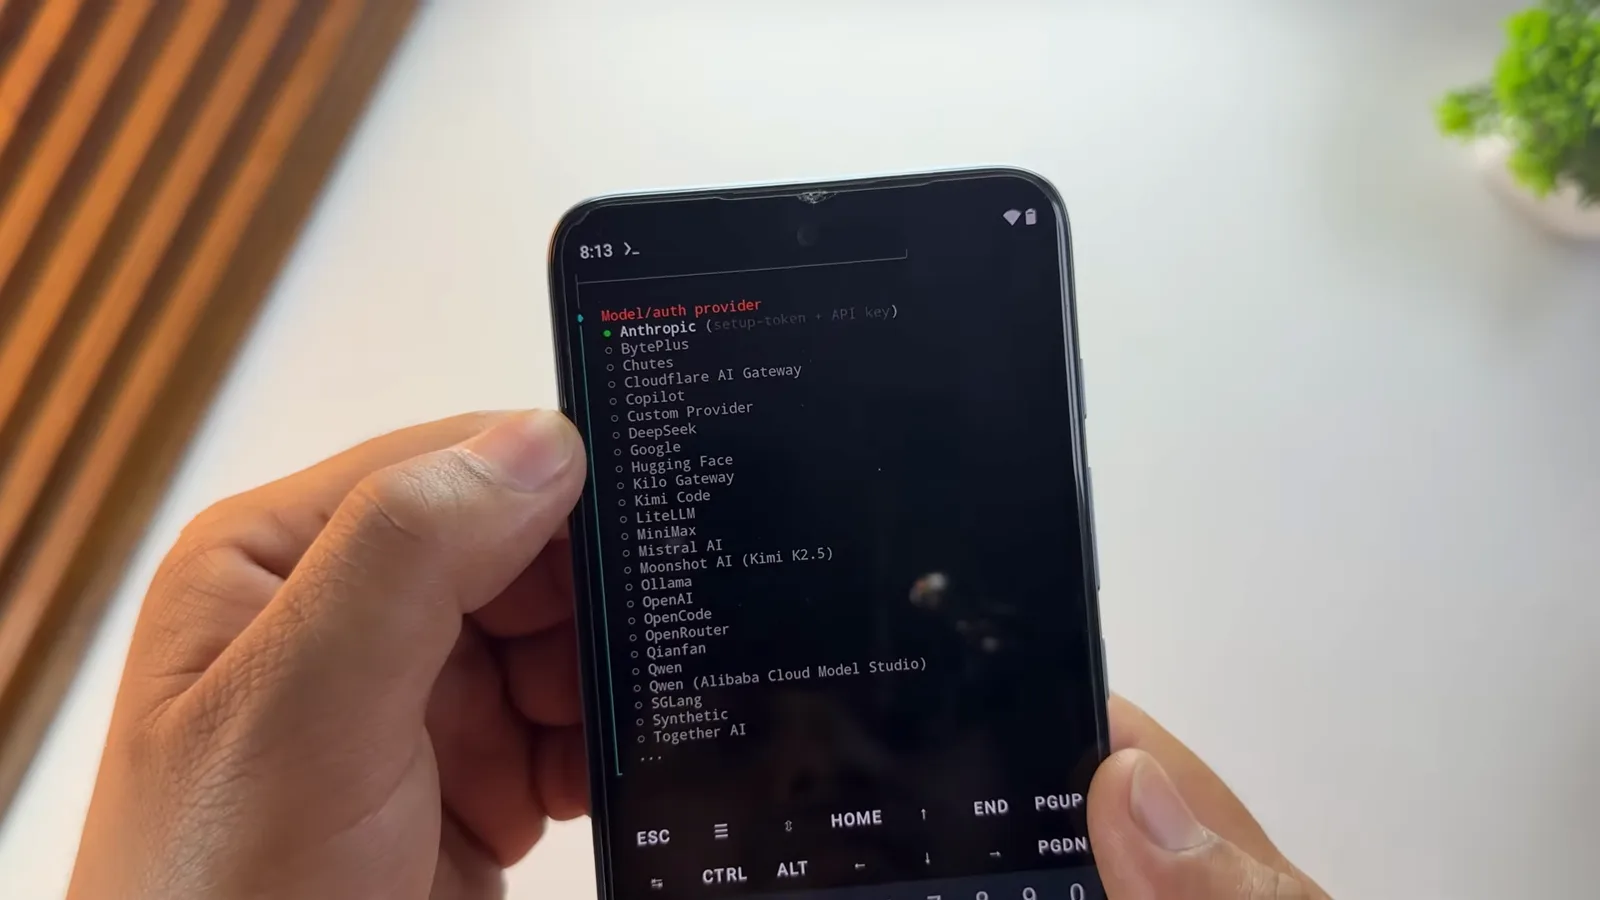
Quick start, then Google, then your key - the wizard walks you through.Watch at 6:36 - 11
Link WhatsApp by QR instead
Prefer WhatsApp over Telegram? The same wizard links it by QR. Choose WhatsApp as the channel, then on the same phone open WhatsApp, go to Settings, Linked devices, and scan the QR the wizard shows. It confirms with a connected state in green; answer that this is your personal phone number and type the number in. The wizard continues into the same skills prompt - npm as the node manager, then no to the optional keys and hooks - and closes with onboarding complete.
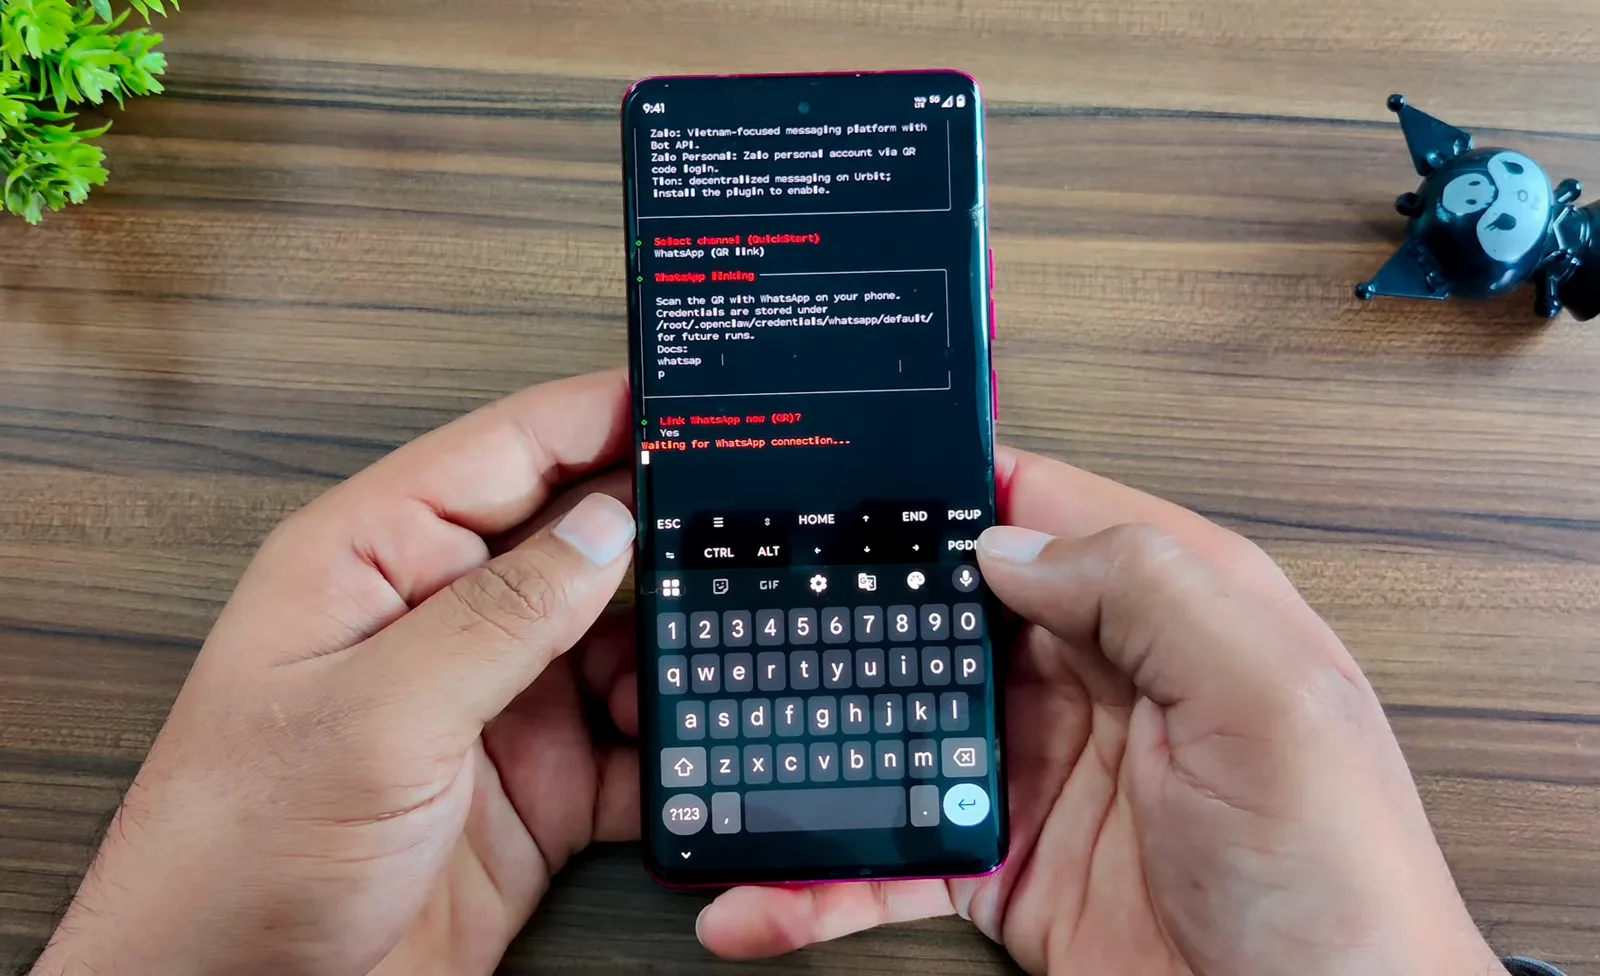
Same agent, different front door - WhatsApp links by QR.Watch at 6:12
Start the gateway and pair your chat
- 12
Start the gateway and watch it listen
Onboarding done, the gateway is what actually serves the agent. Open a new Termux session from the three-dot menu, log back into Ubuntu with proot-distro login ubuntu, and run openclaw gateway --verbose. The line to watch for is "gateway listening on ws://127.0.0.1:18789" - from that moment the agent is live on the phone, and every pairing step after this hangs off the process you just started.
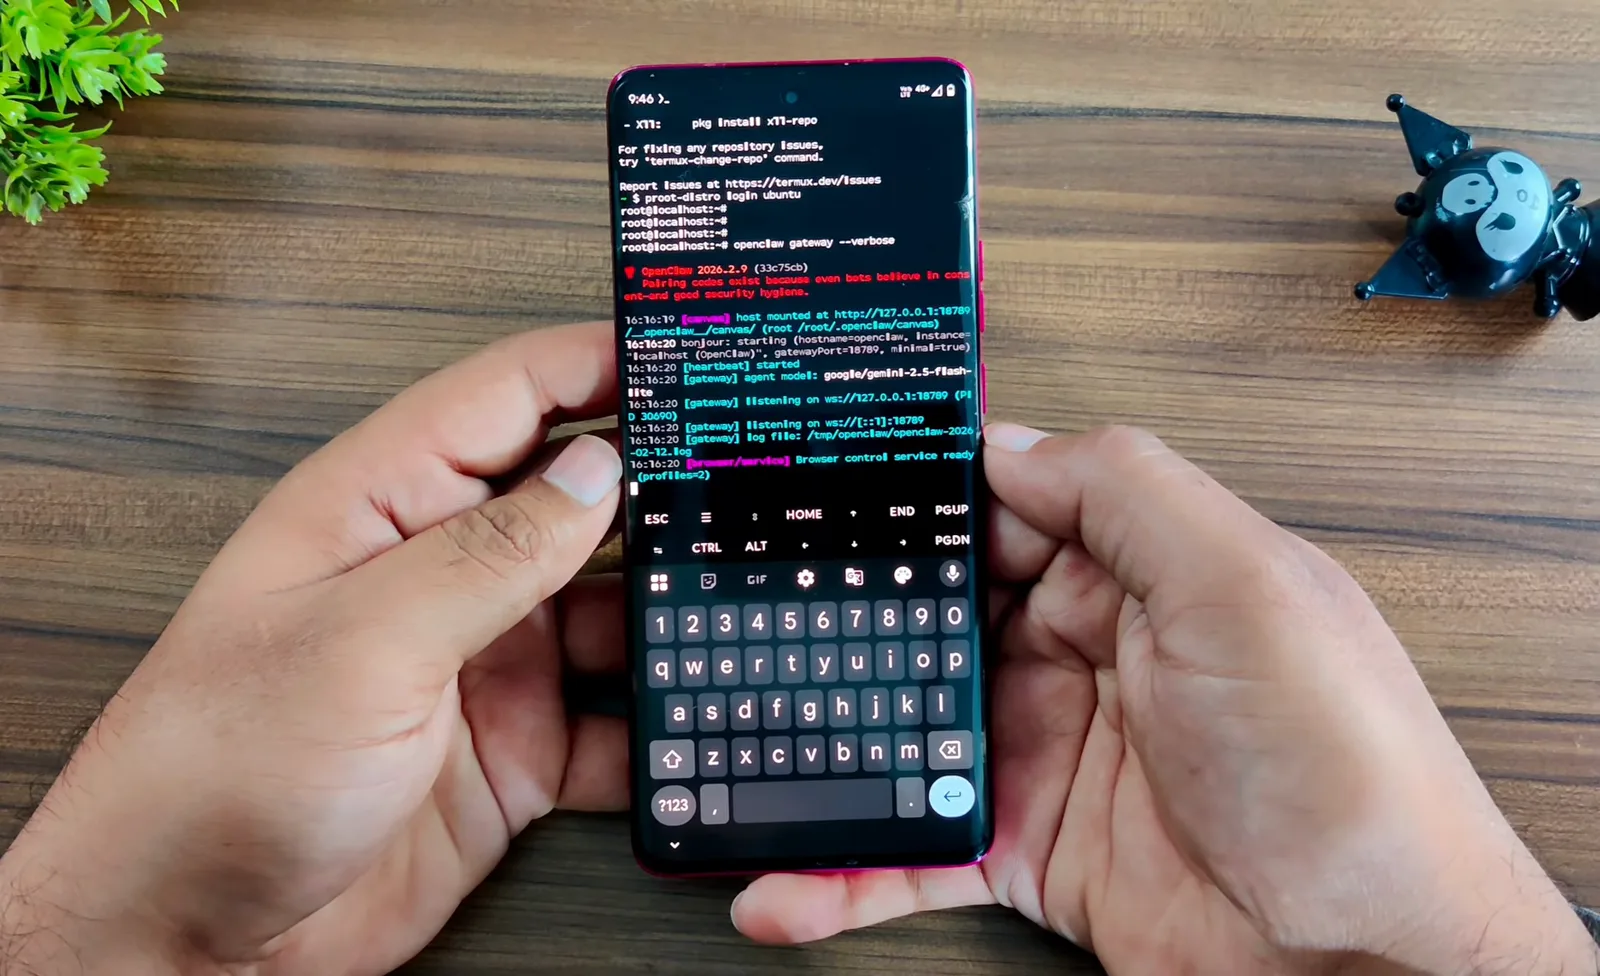
Watching for that listening line is your green light.Watch at 7:45 - 13
Approve the Telegram pairing
Bot and agent still need to trust each other. In Telegram, open your bot and tap Start: it answers "Access not configured", prints your Telegram user id and a pairing code, plus an approval command of the form openclaw pairing approve telegram, code included. Copy it, start a second Termux session from the sidebar, paste and run - the approval links the bot to the gateway. The walkthrough then returns to the main session where the gateway keeps running; the next message you send arrives as a paired user.
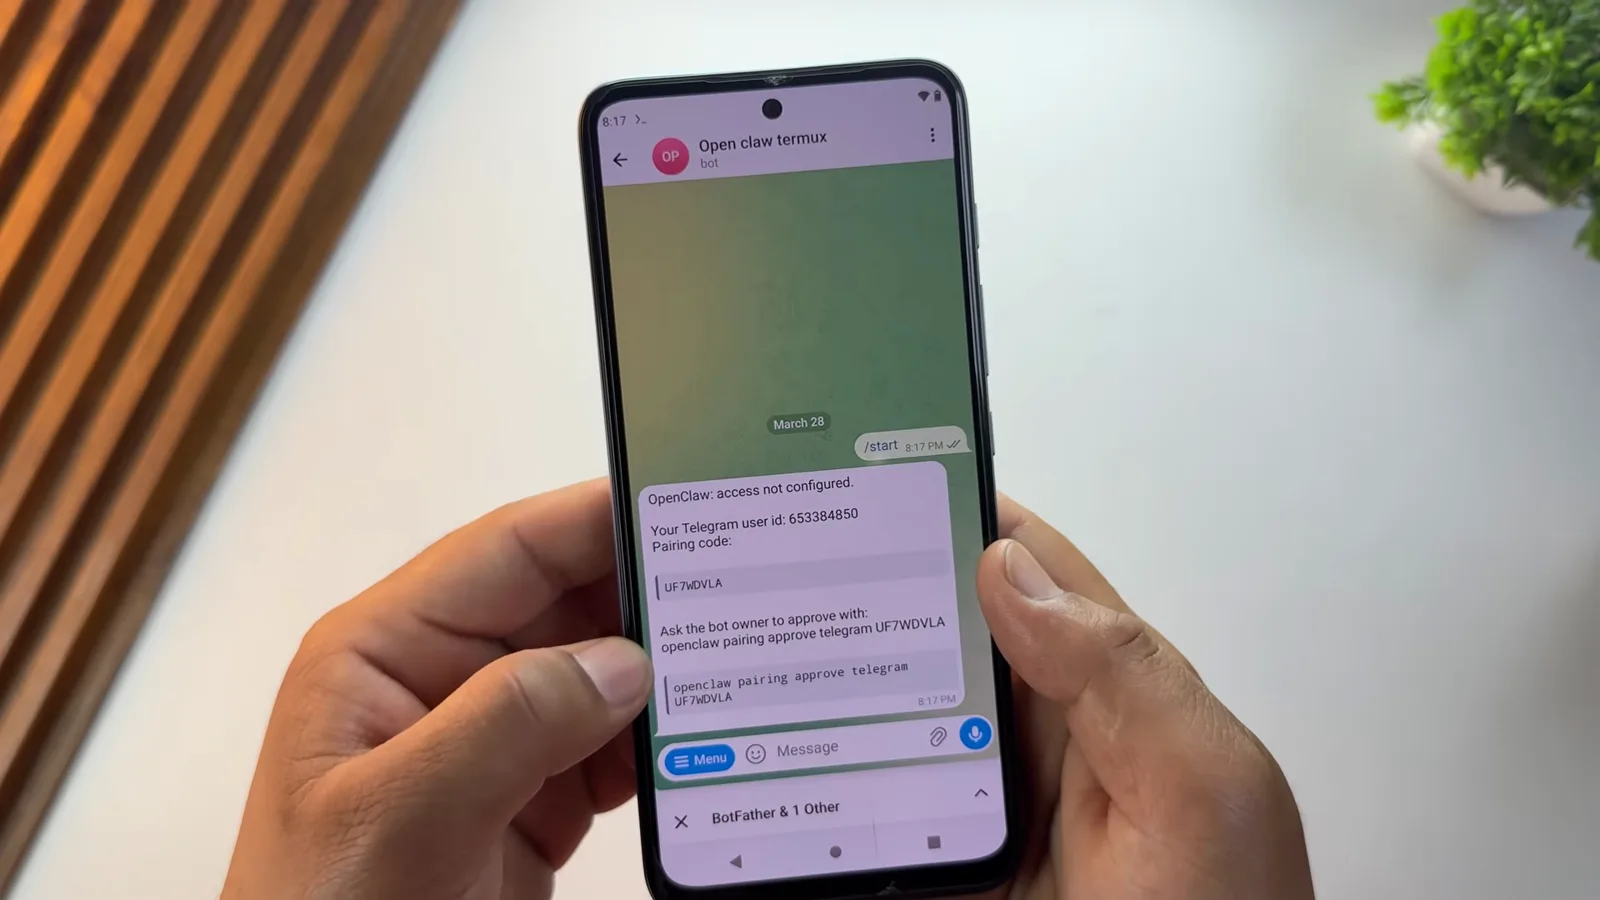
Approve once in a second Termux session and the bot is yours.Watch at 7:52 - 14
Connect the Control UI with your gateway token
There is a second door: the web Control UI. In Chrome - on the same phone, the walkthrough stresses, not another device - open the gateway address 127.0.0.1:18789. The Overview page shows an empty Gateway token field. To fill it, start another Termux session, log into Ubuntu and run the gateway-token command from the repo; it prints a JSON blob with the token inside. Copy the token, strip the double quotes at both ends, paste it into the field and hit Connect - the dashboard flips to connected and the agent answers in its chat tab.
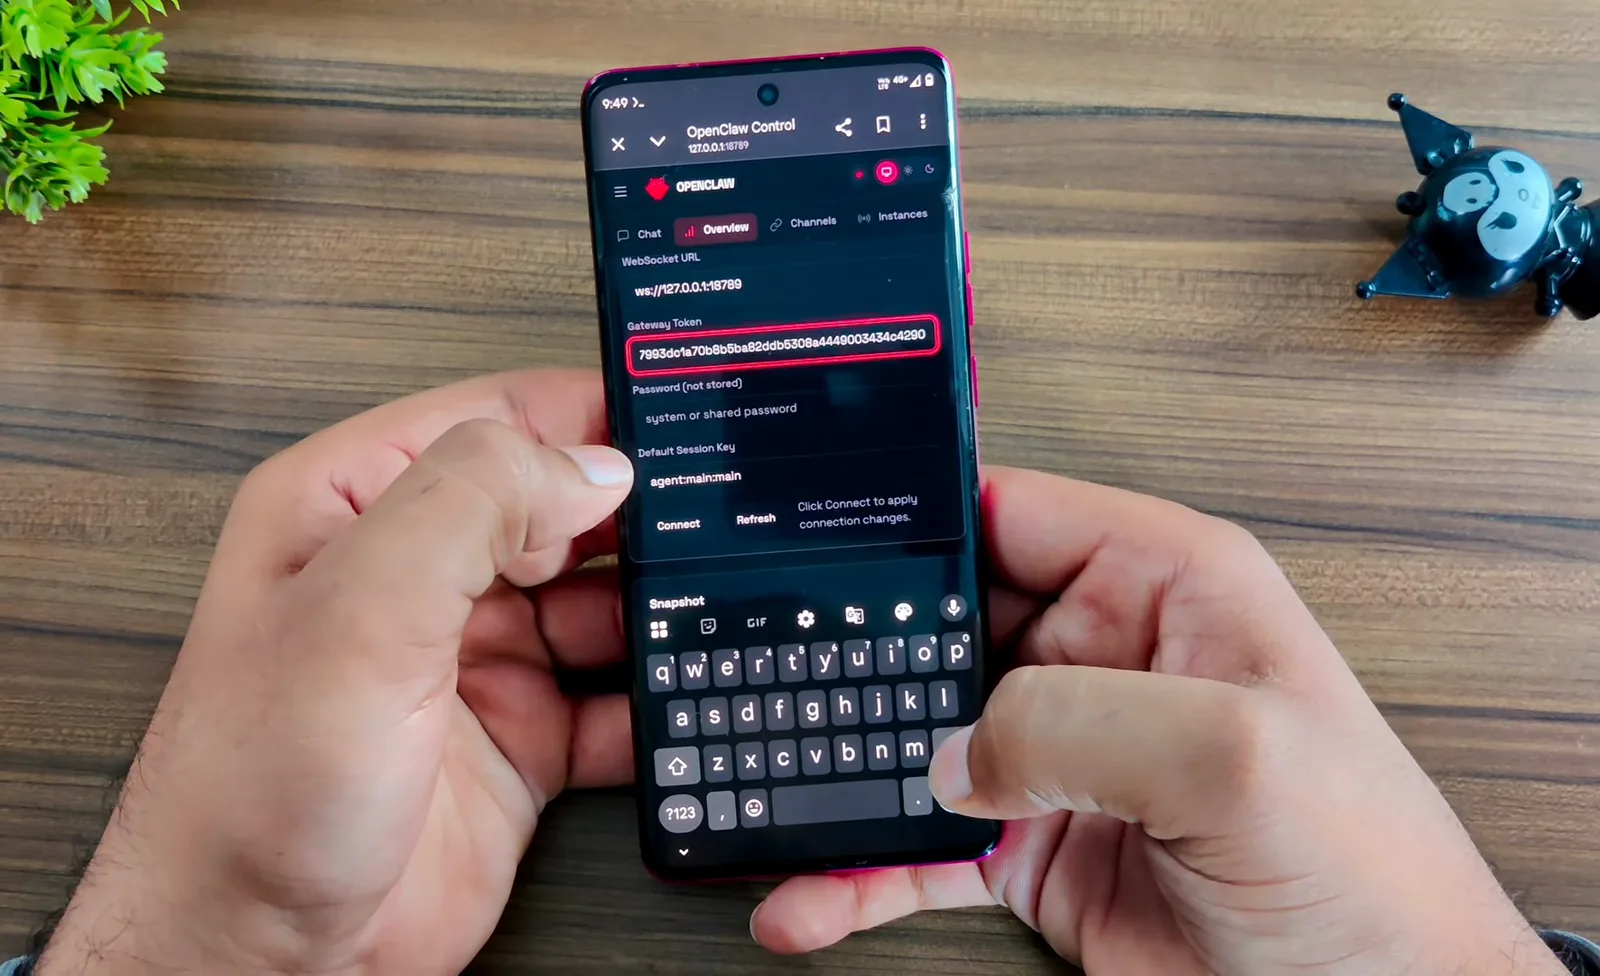
Same-phone Chrome only: paste the token, hit Connect.Watch at 9:05
Prove it works, then give it a home
- 15
Test it on something real, like the battery
Prove the agent reads the actual phone. Ask what it can do and it lists Android control through AT commands and Termux utilities - screenshots, OCR, web search. Then ask for the battery percentage: the walkthrough's bot answers "The battery percentage is 81%", and the phone's status bar really shows 81. That closes the loop - the reply is not generated filler, it is the phone reporting itself through the agent, which is exactly the access you just granted.
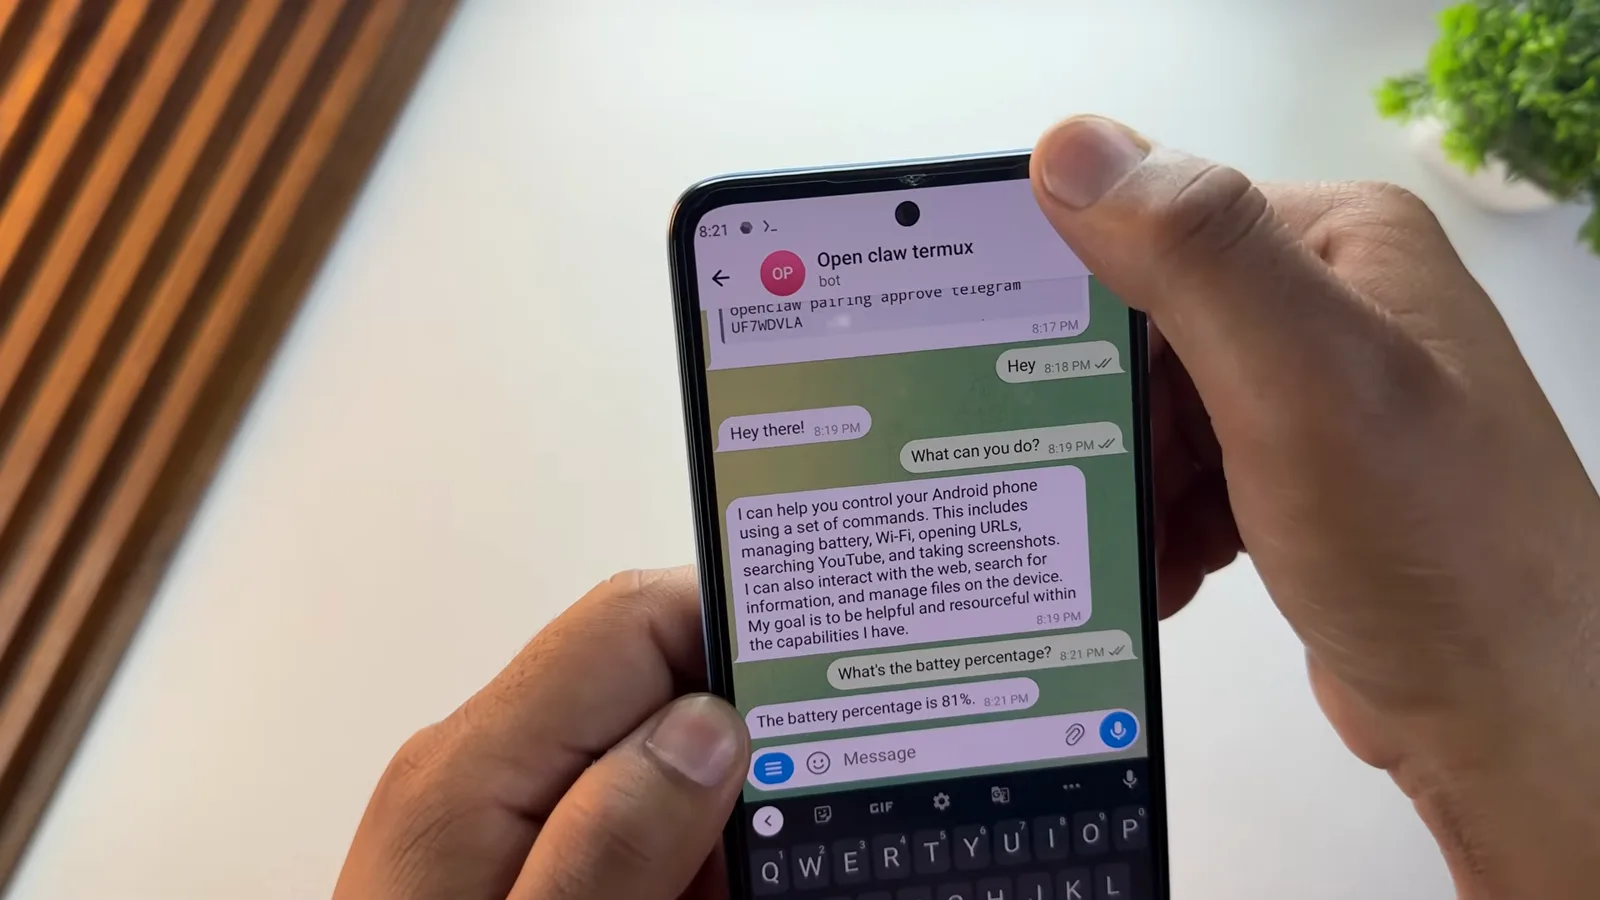
81 percent, read off the real battery - it is driving the phone.Watch at 8:49 - 16
Retire the drawer phone into 24/7 service
The point of the Termux route is where it can live. Ali Solanki's setup runs on an old Android gathering dust - Android 10 or above is enough - so an agent with deep system access never sits on a daily phone. His reasoning is the security takeaway of the whole page: he did not want that much access on devices holding sensitive data, so the drawer phone becomes the always-on machine instead. Leave the gateway session running on Wi-Fi and the old handset clocks in as a 24/7 AI employee.
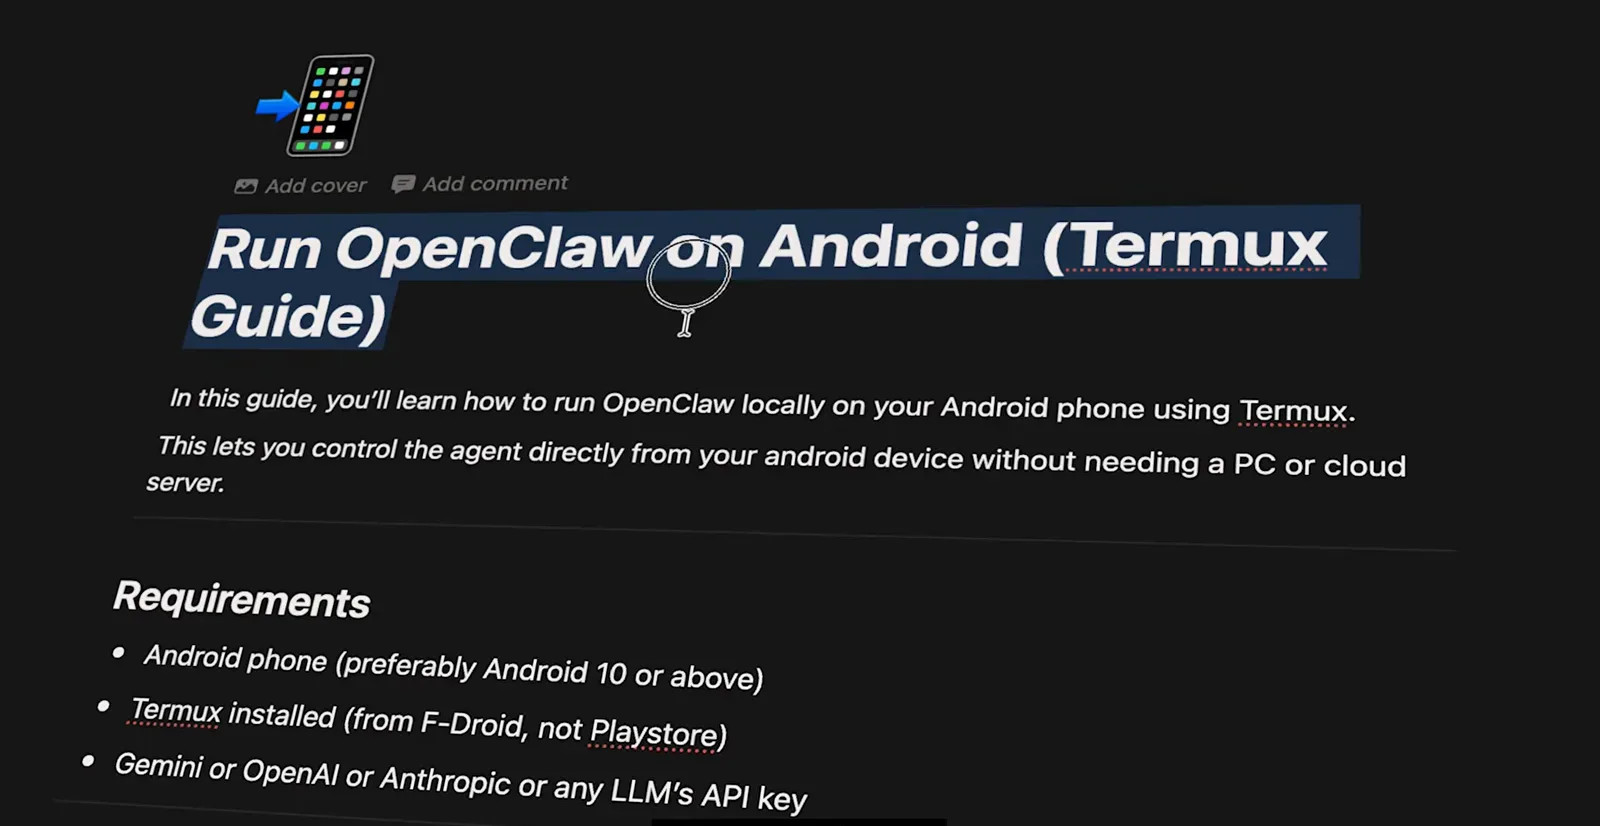
The drawer phone finally gets a job: requirements are modest.Watch at 1:36