

Kling 4 Prompts: How to Prompt Kling 4.0, Step by Step
Kling 4.0 prompts read like shot lists, not keyword piles — and that changes how you write them. This guide walks through 15 steps drawn from two hands-on recordings: Khalil's early-access test on AI for Real Life: Redefining Filmmaking and T.J. Lovelady's walkthrough of the redesigned Kling AI studio. Every prompt shown below is one the presenters actually typed, captured from the app — the multi-shot dialogue brief, the shot-timed surf sequence, the CONTINUITY and AUDIO AND PERFORMANCE blocks — alongside the spec sheet, model picker and settings that shape the output. Frames were verified against the source videos, and each step deep-links to the exact moment it shows.
Source & credits
Screenshots in this guide are captured from AI for Real Life: Redefining Filmmaking's public walkthrough video. Every step links back to the exact moment it shows, so you can follow along.
AI for Real Life: Redefining Filmmaking ↗Know what Kling 4.0 can take
- 1
Read the capability sheet before you write a word
Kling's own 4.0 announcement page, captured in the walkthrough, lists what a prompt can ask for: text-to-video, image-to-video, First & Last Frames, and a new multi-keyframe mode that accepts up to 10 keyframe images as input. Video duration spans 3–30 seconds, resolution runs 720p to 4K, and 10-bit HDR applies to 1080p and 4K. Write inside these lanes and the model has a chance of answering; write outside them and you are guessing.
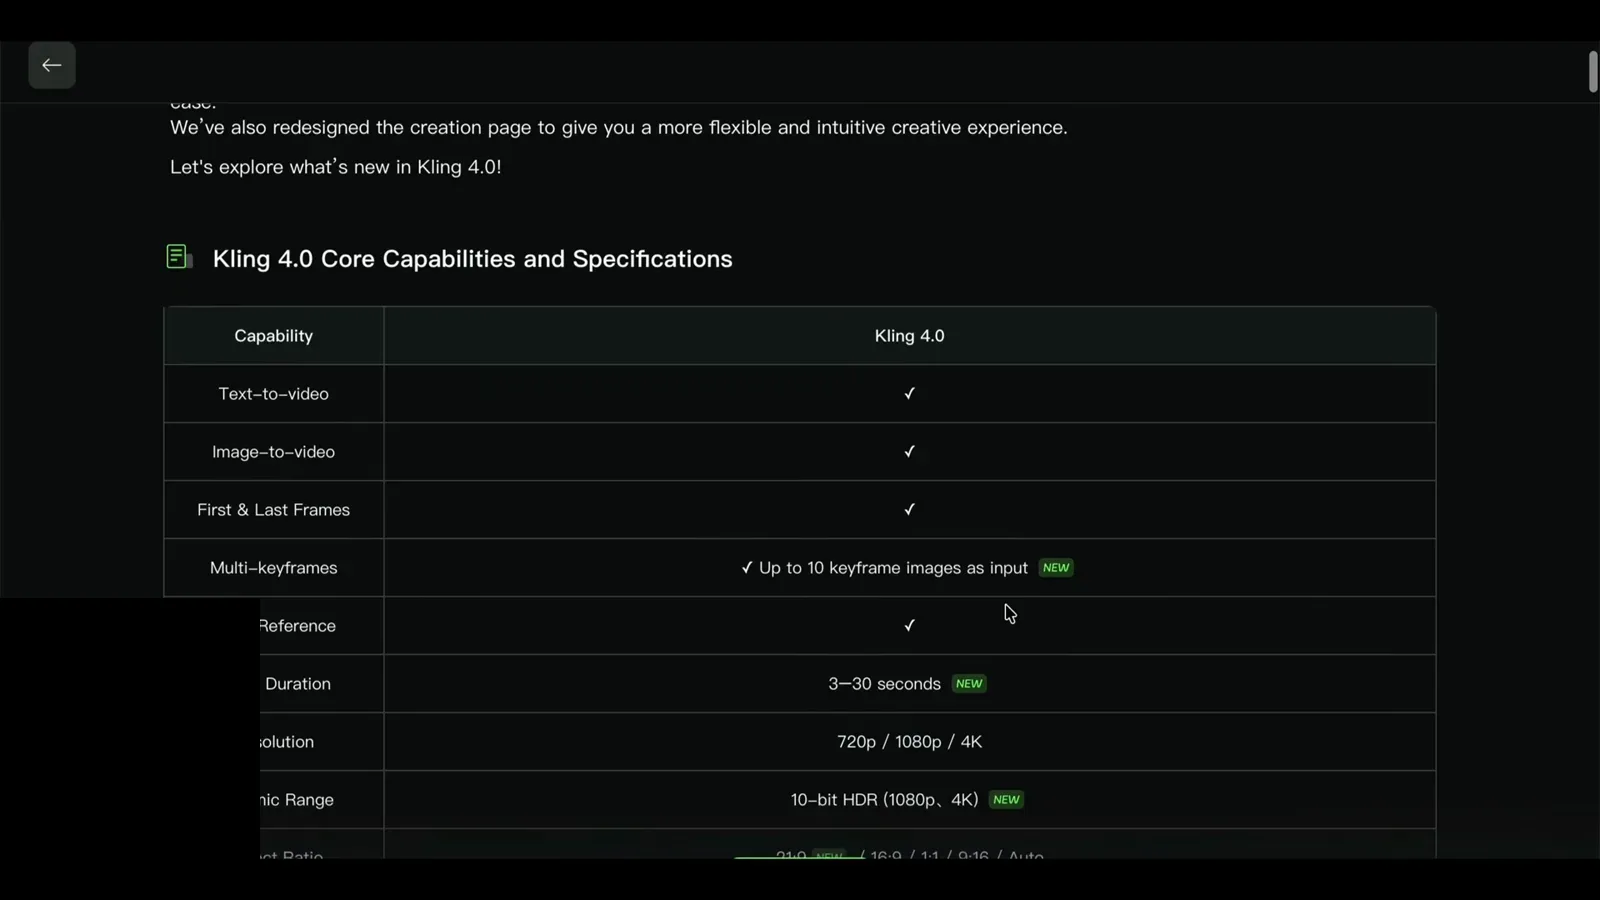
The official 4.0 sheet: multi-keyframes up to 10 images and 3–30-second durations are the new lanes.Watch at 1:02 - 2
Note the input limits: 8,000 tokens, 10 references, 21:9
The lower half of the same sheet sets your prompt budget: up to 8,000 tokens of text, up to 10 reference images, and Omni Reference support. Audio output is two-channel stereo, with German, French and Indonesian newly added to the language list, and the aspect-ratio row now includes a 21:9 cinema option beside 16:9, 1:1 and 9:16. Long prompts are a real Kling 4 change — the walkthrough's examples routinely run a full paragraph.
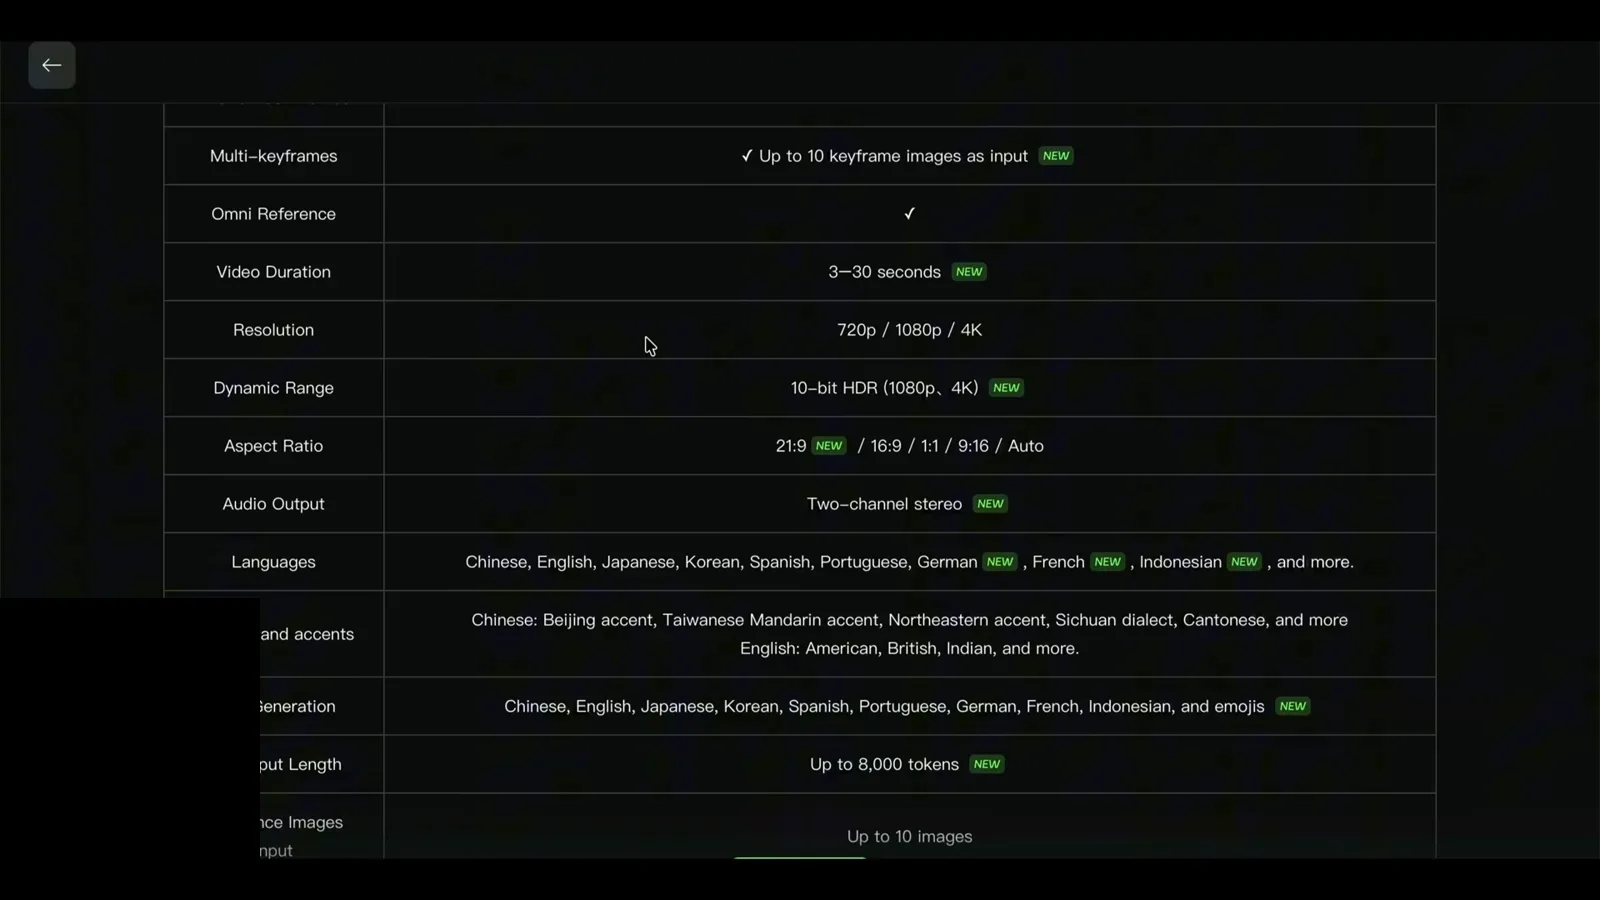
8,000-token prompts, ten reference images and 21:9 — the numbers that shape a Kling 4 prompt.Watch at 1:20
Find your way around the new studio
- 3
Meet the composer: one box for prompt, references and settings
T.J. Lovelady's walkthrough opens the redesigned creation page, where generations fill the screen and a single composer sits at the bottom: "Describe your shot, or upload images, videos, or elements as references. Use @ to quickly add reference assets." The settings row reads Video Generation, VIDEO 4.0 Flash and Omni reference, then 720p · 20s · 16:9 · 1. Every Kling 4 prompt starts from this bar.
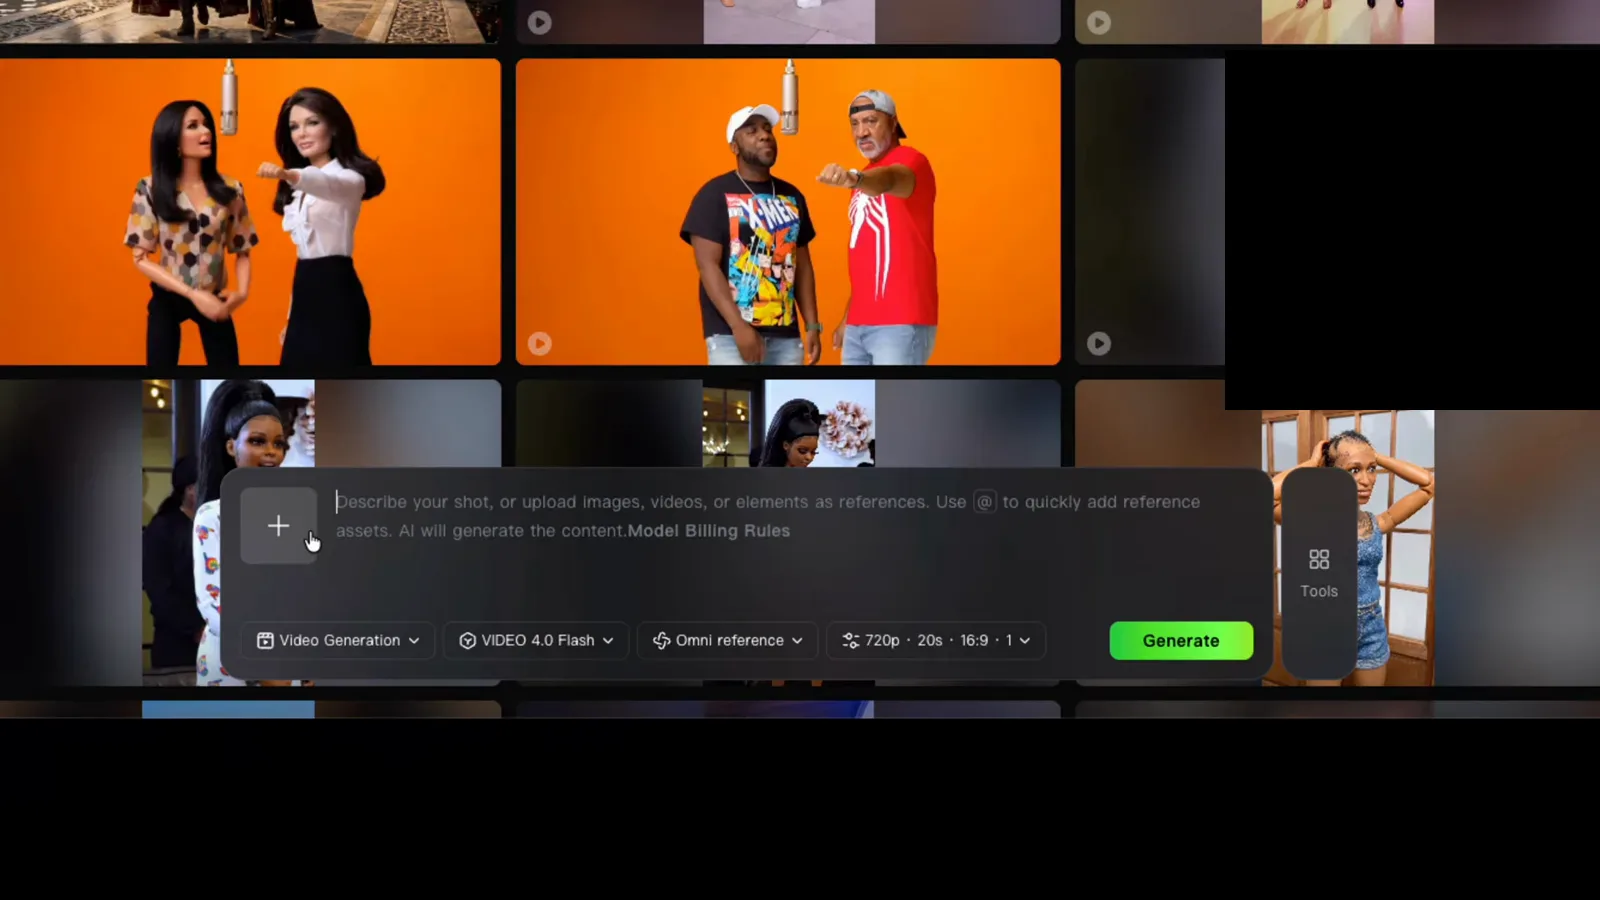
Prompt, references and the Flash model's settings all live in one bottom bar.Watch at 2:32 - 4
Pick the model knowingly: Flash now, full 4.0 later
The model dropdown lists VIDEO 4.0 Flash beside VIDEO 3.0 Omni, VIDEO 3.0 and VIDEO 01. During the early-access period captured here, Flash is the only 4.0 tier available and it is capped at 720p, while the full 4.0 model was promised for October with 30-second 4K HDR output and stronger lip sync. Both presenters stress the same caveat: everything true of 4.0 Flash today is a floor, not the ceiling.
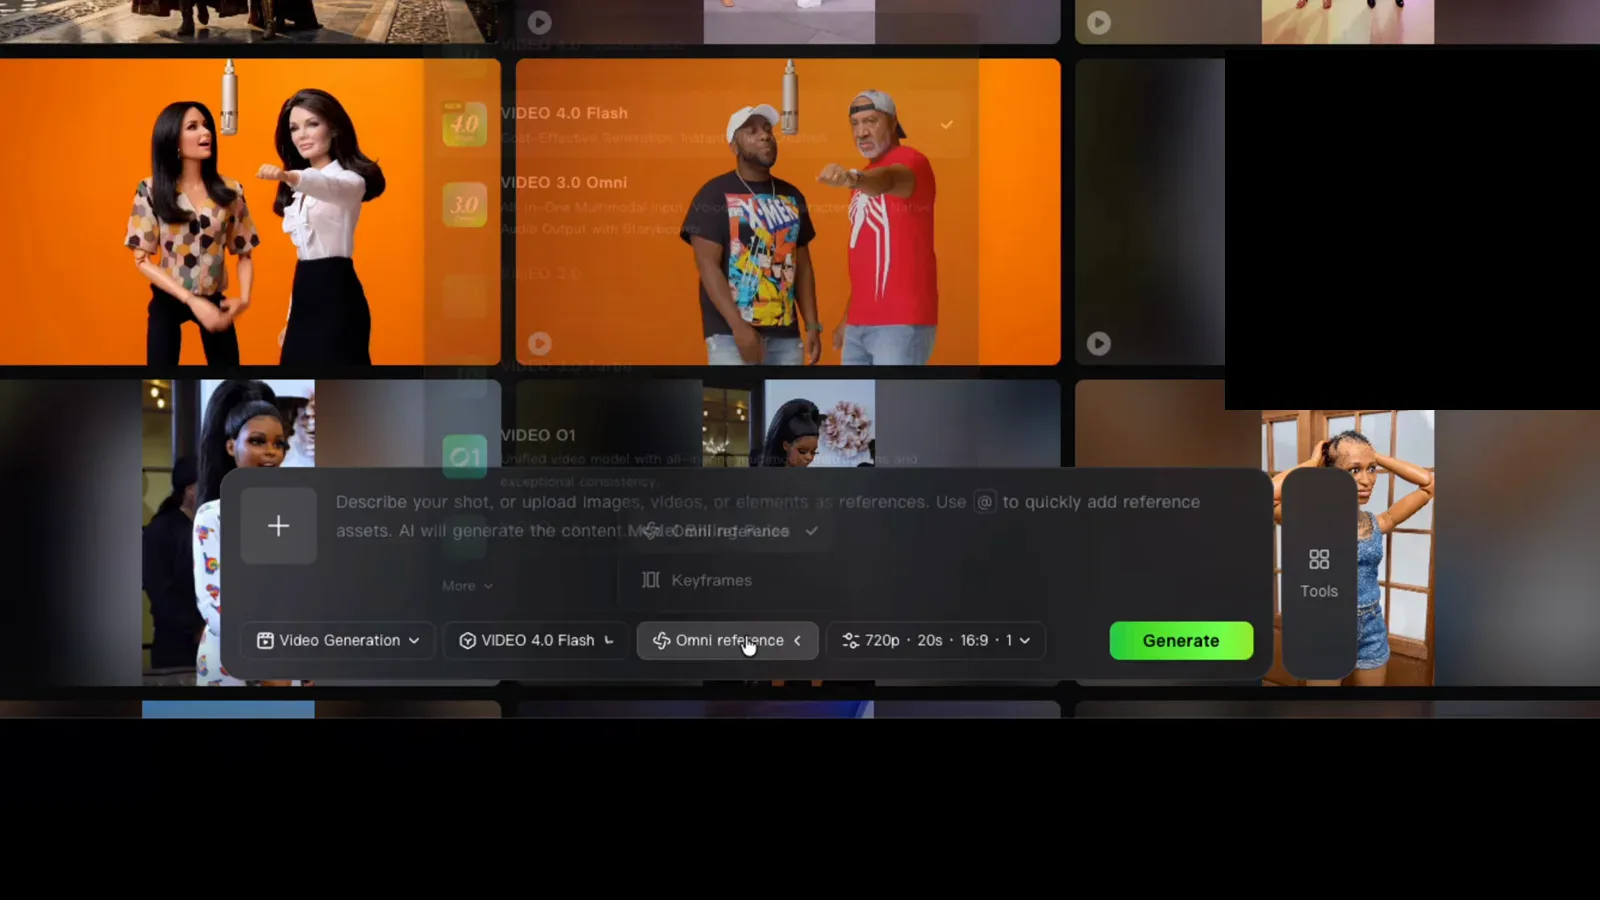
Early access means Flash: the full 4.0 tier was still behind this dropdown.Watch at 2:54 - 5
Set mode, duration, ratio and outputs before you prompt
The settings popover groups the four choices behind every generation: Mode locks 720p during the Flash period; Duration drags from 3 up to 20 seconds; Ratio offers 16:9, 1:1, 9:16 and 21:9; Output runs one video, with the 2–4 outputs marked VIP. A 20-second ceiling is why a prompt like the walkthrough's surf sequence describes a whole run as one shot list instead of five disconnected clips.
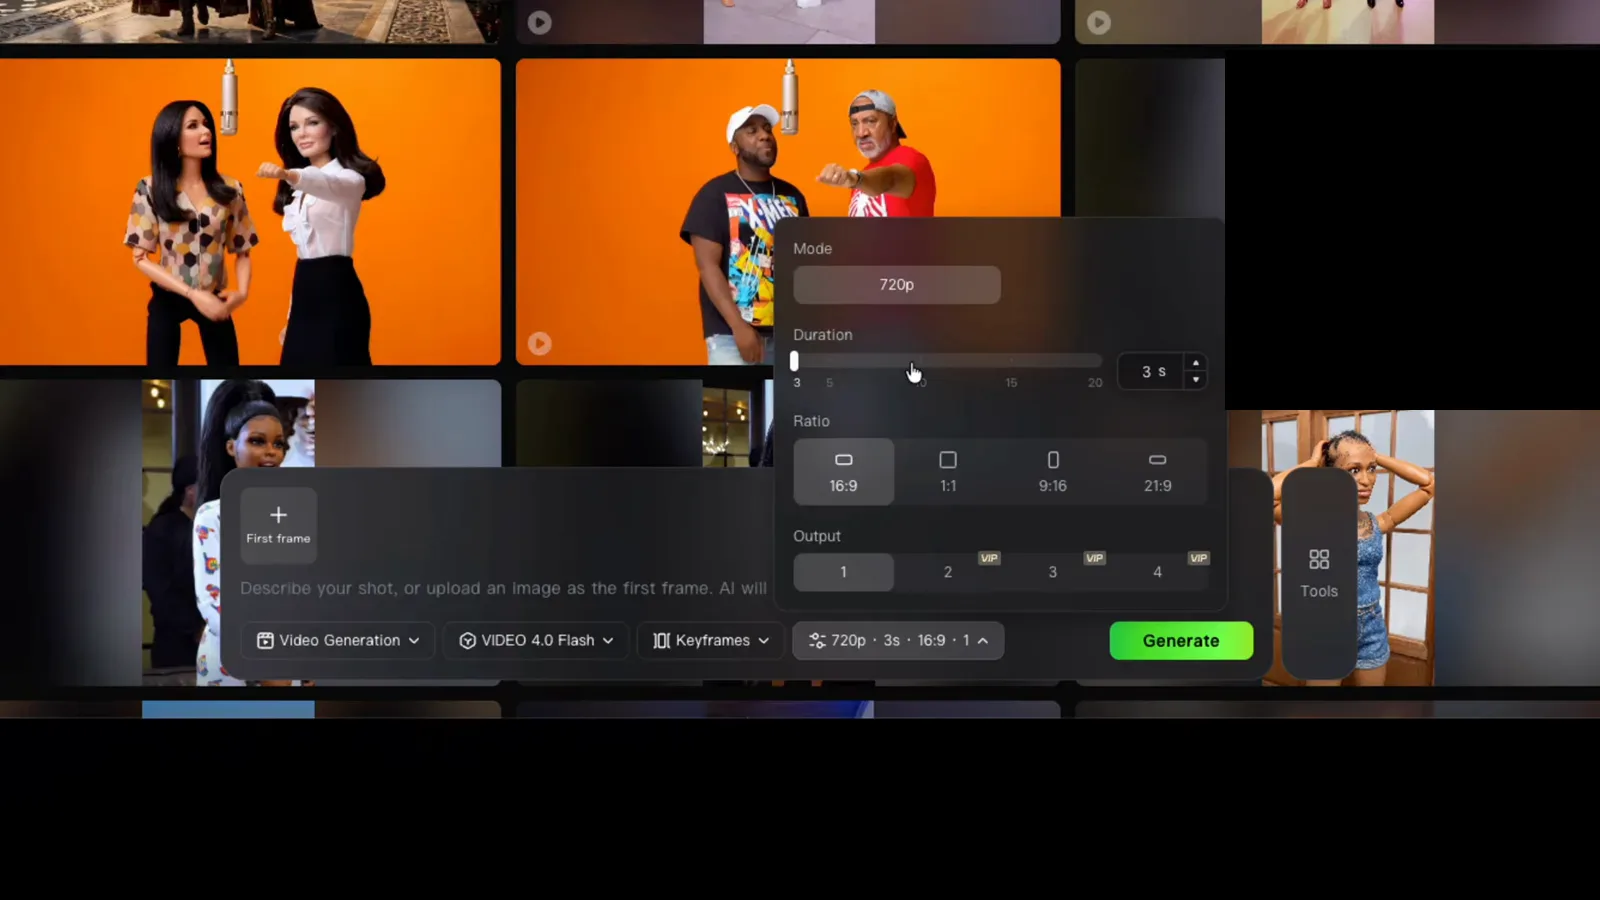
Four settings, one popover: mode, duration, ratio, output count.Watch at 3:27
Text-to-video prompt formulas that worked
- 6
Start pure text-to-video to learn what the model does alone
With no reference images attached, T.J. asked for an anime scene where two characters engage in an epic battle, and the result is the frame above: a neon-lit rooftop, two fighters, clean silhouettes. His read: the battle is fluid and fast — hard territory for earlier Kling versions — though wide shots soften at 720p. Running one no-reference prompt first shows you what the model contributes before your images steer it.
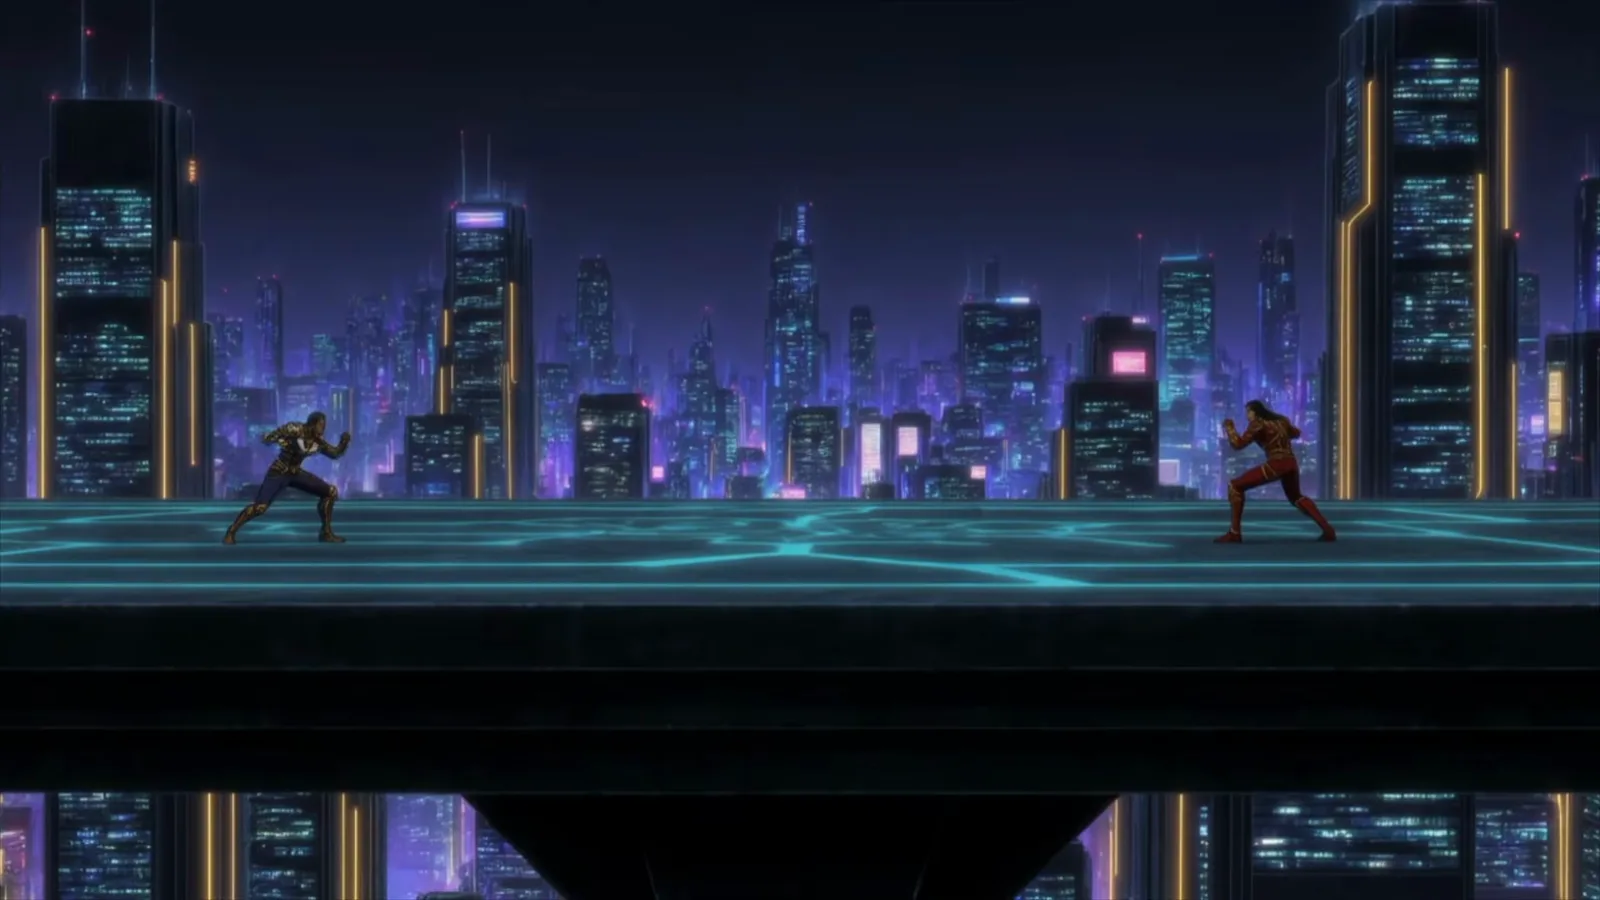
A no-reference anime duel: what Kling 4 Flash produces from text alone.Watch at 8:10 - 7
Anchor a dialogue scene with a locked-character block
Khalil's dialogue prompt, captured in the app, opens like a shot log: "Multi-shot cinematic dialogue scene — 15 seconds — 16:9. Use the supplied Caleb-and-Natalie beach image as the locked character, wardrobe, and location reference. Keep both faces, hairstyles, skin tones, swimsuits, and seated beach positions consistent." Only then does it set the story turn. Lock sheet first, story second is the pattern to copy.
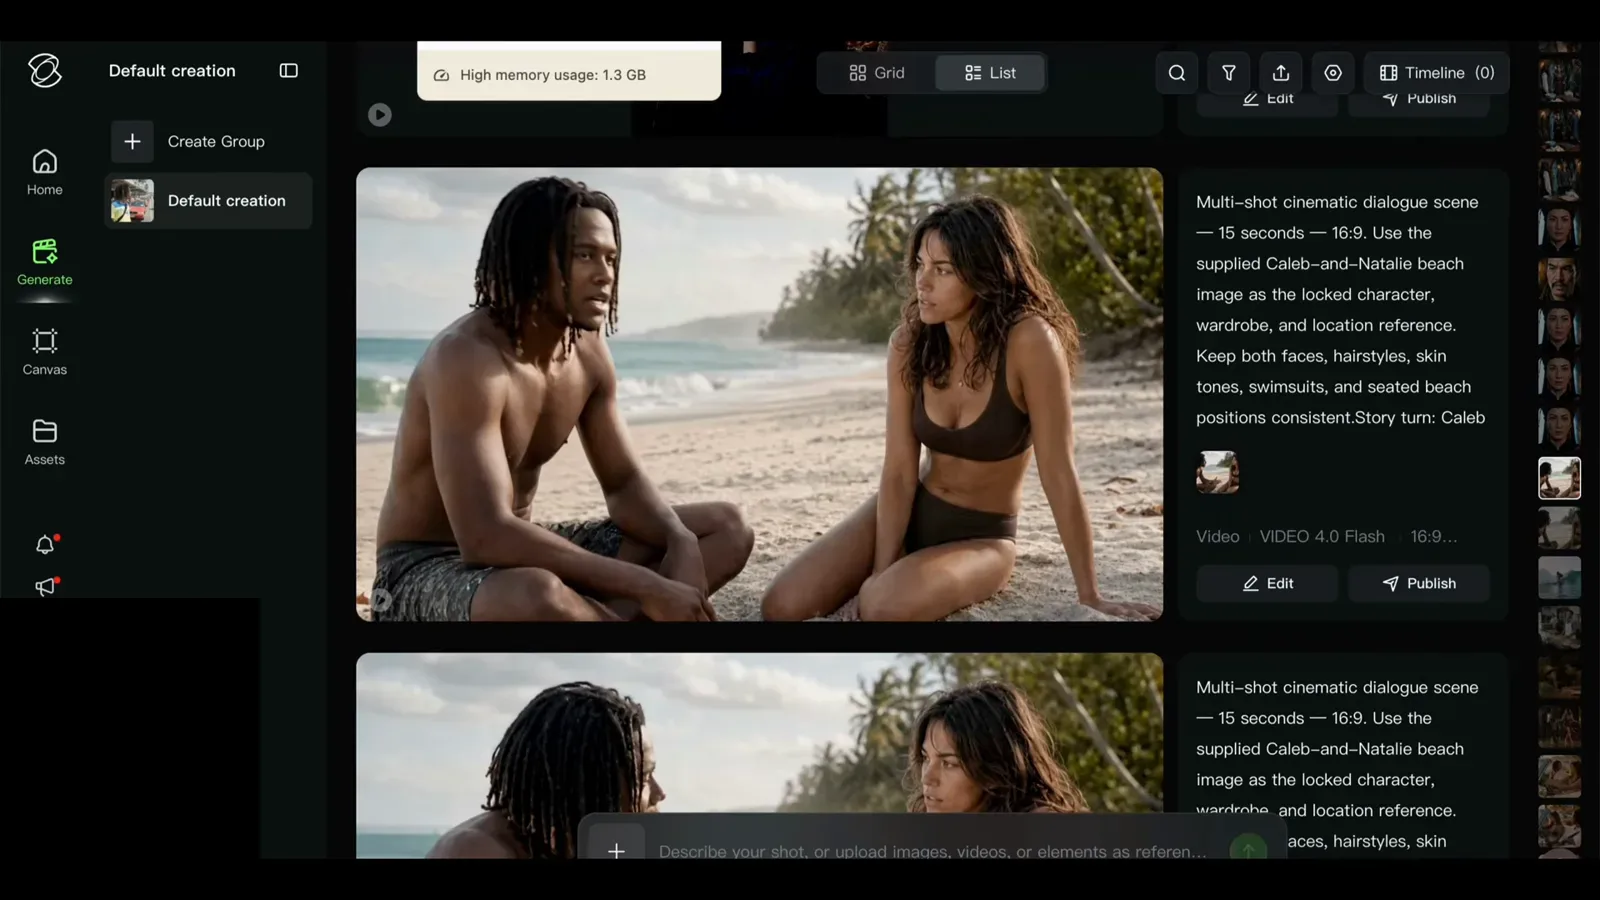
The multi-shot formula: locked reference first, story beat second.Watch at 2:05 - 8
Time-block action and call the camera in the prompt
The surf prompt is the walkthrough's masterclass in direction: "20-second, 16:9 ultra-realistic cinematic surfing sequence... High-end live-action surf-film realism: natural wave physics, believable board control, detailed water spray, warm Caribbean sunlight, cinematic color." Then shot timing — "0–4 seconds — The Drop" — and the camera order: "Ultra-low tracking camera skims above the water alongside him." Kling 4 answers film language with film language.
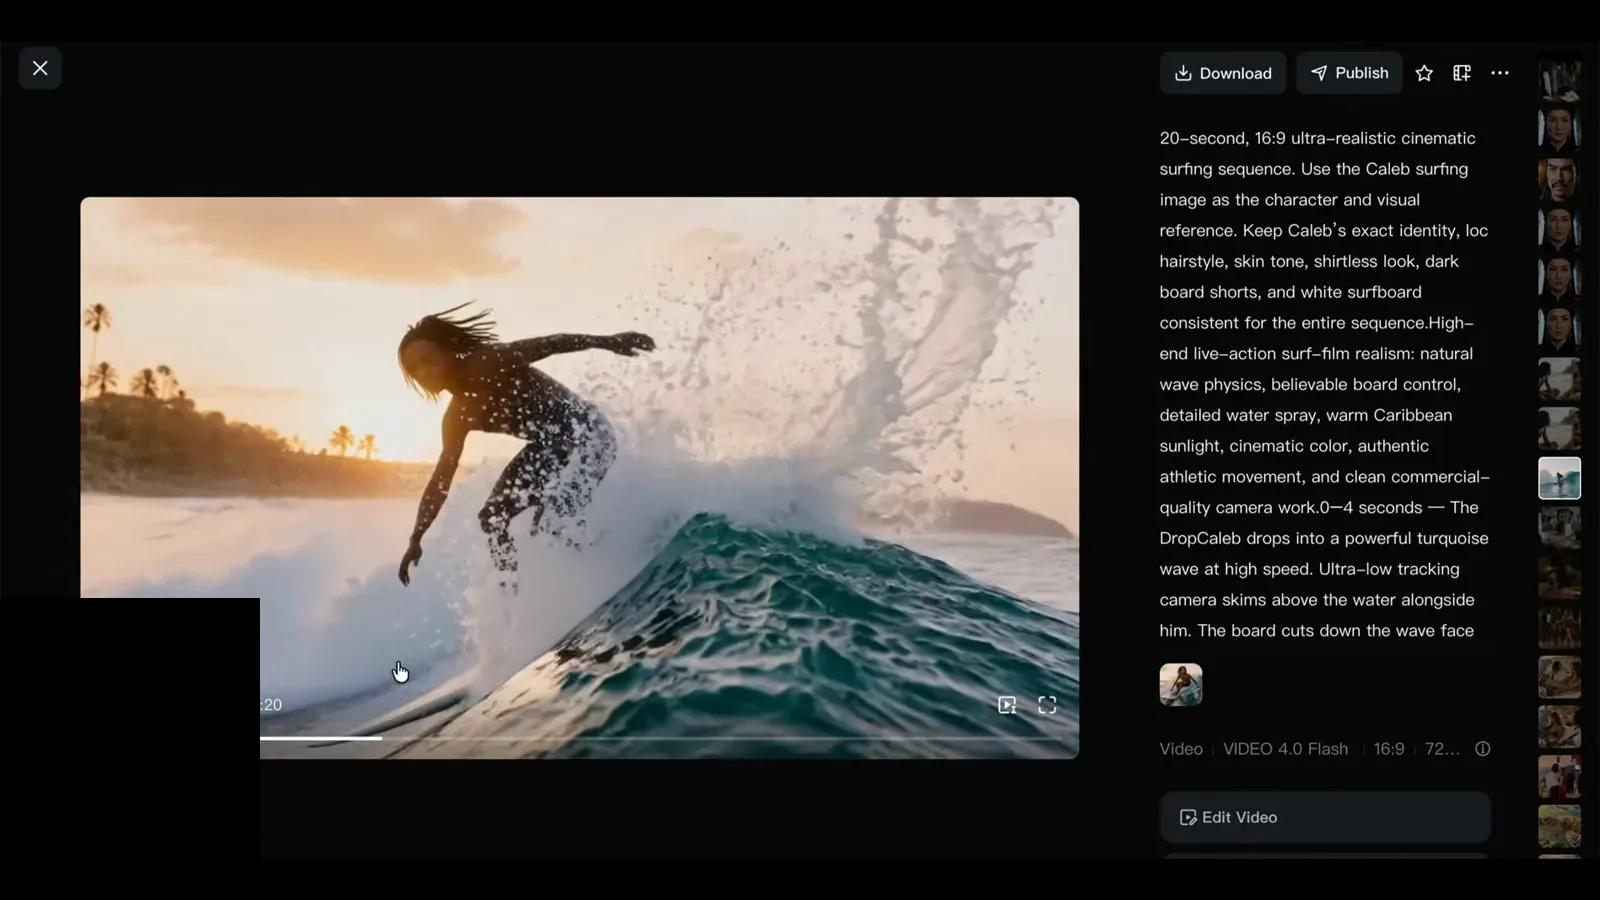
Shot timings plus a named camera move — the prompt works like a call sheet.Watch at 5:25 - 9
Freeze the set with a SCENE block for multi-shot consistency
For a period drama scene, Khalil prefixes the prompt with "SCENE: Multi-shot cinematic, 15 seconds, 16:9. Start from [image]; maintain its exact muted vintage Philadelphia poultry-shop setting, counter geography, character positions, natural documentary" lighting and period wardrobe. Naming the geography and the positions is what stops a second shot from redecorating the room. His verdict on the take: the set held; the acting wobbled.
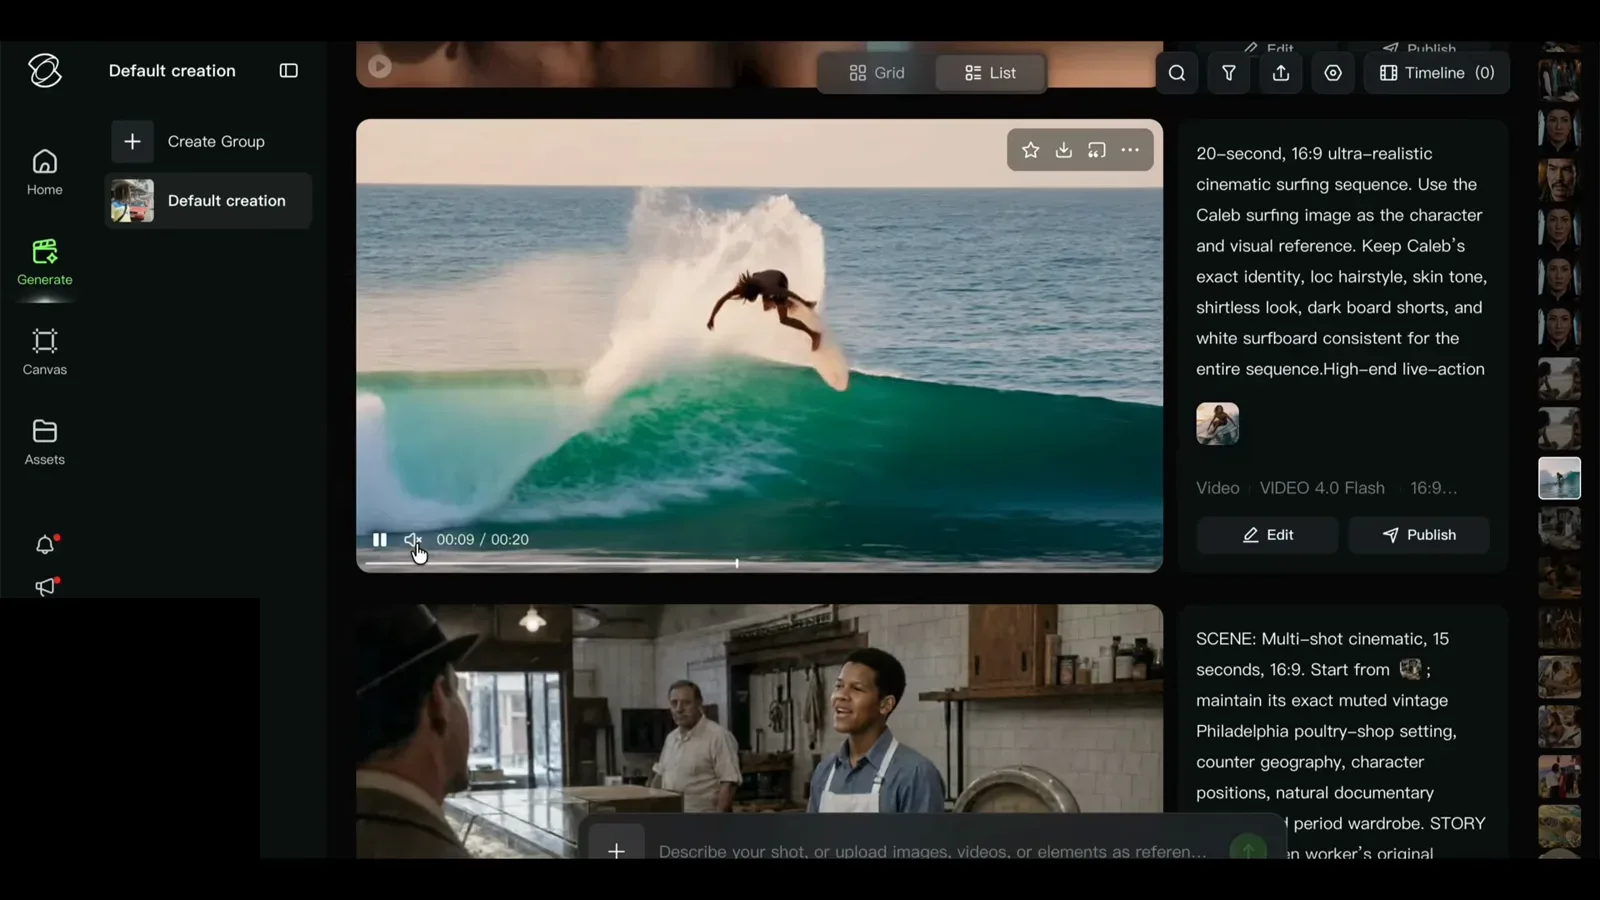
A SCENE block pins the set, the geography and the blocking across shots.Watch at 6:50
Style, continuity and audio blocks
- 10
Spell out realism as texture, light and physics
The underwater prompt shows how literally Kling 4 takes style notes: "Live-action realism: Translate the references into high-fidelity live-action footage with tangible physical texture: detailed turtle scales and shell, natural human skin pores, individual hair strands, and realistic swimwear fabric." Khalil's turtle test came back with sun rays, caustics and drifting particles — the model visibly rewards prompts that name materials.
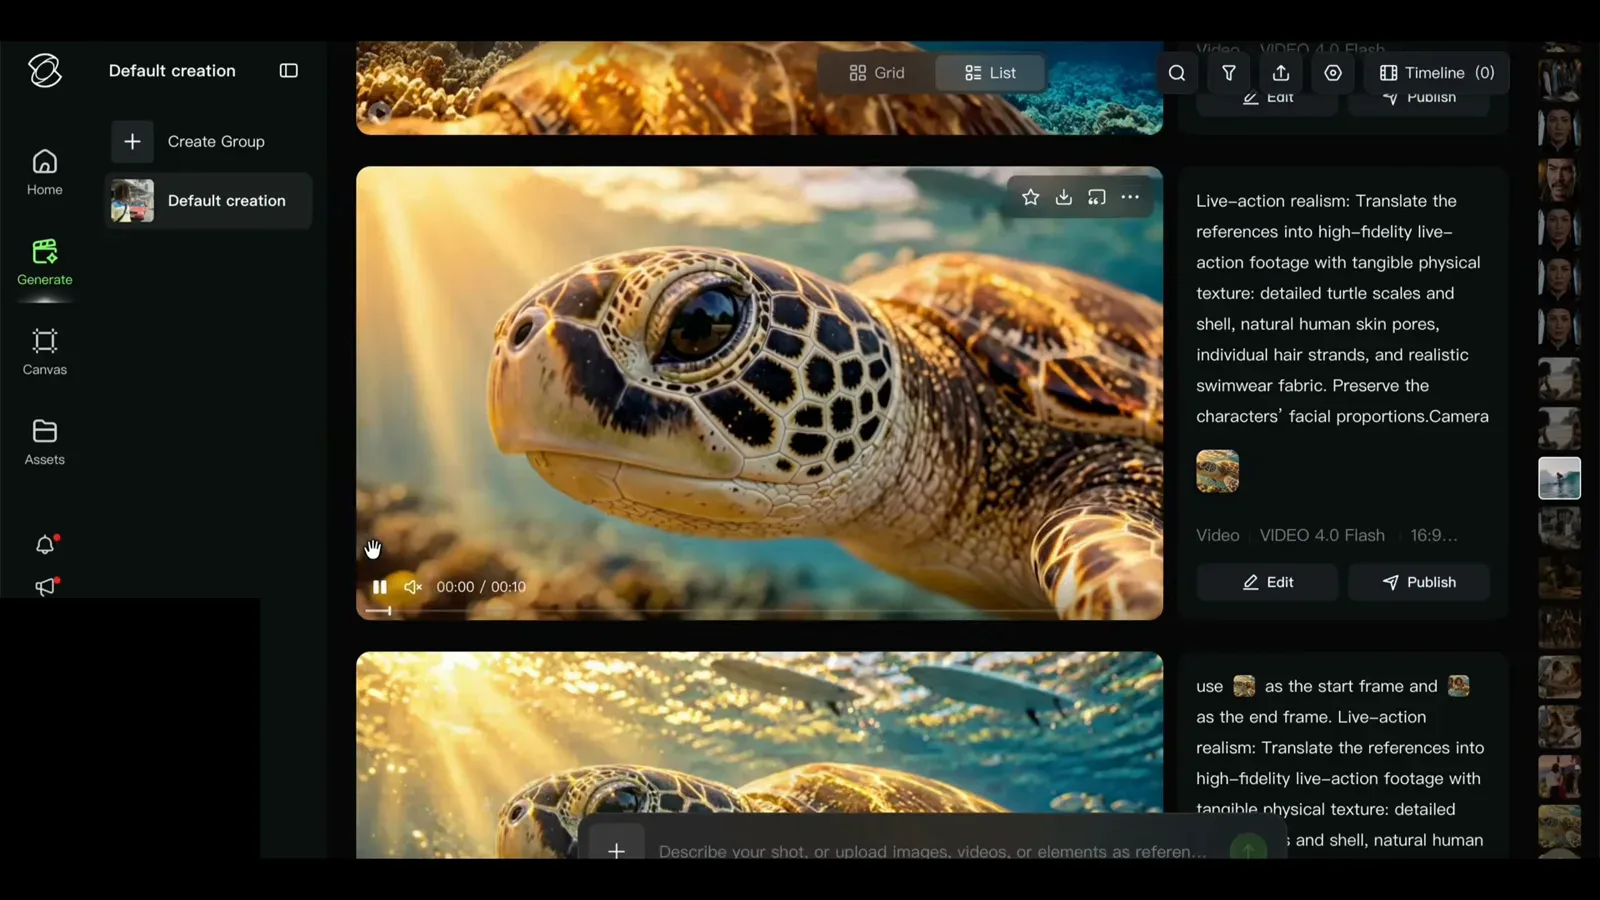
Name the material and the light; the model fills in the physics.Watch at 14:05 - 11
Write CONTINUITY and PERFORMANCE blocks in capitals
For the salsa test, the prompt moves in labeled sections: "Begin from the image's exact pose and composition, then move immediately into fluid partner dancing. CONTINUITY Preserve their identities, facial features, skin tones and hairstyles throughout... Keep the same elegant, dimly lit ballroom, polished wooden floor, warm diagonal spotlight and deep shadows. ENERGY AND PERFORMANCE They are confident..." Capitalized section headers keep a long prompt legible to you — and the takes came back with outfits and lighting intact.
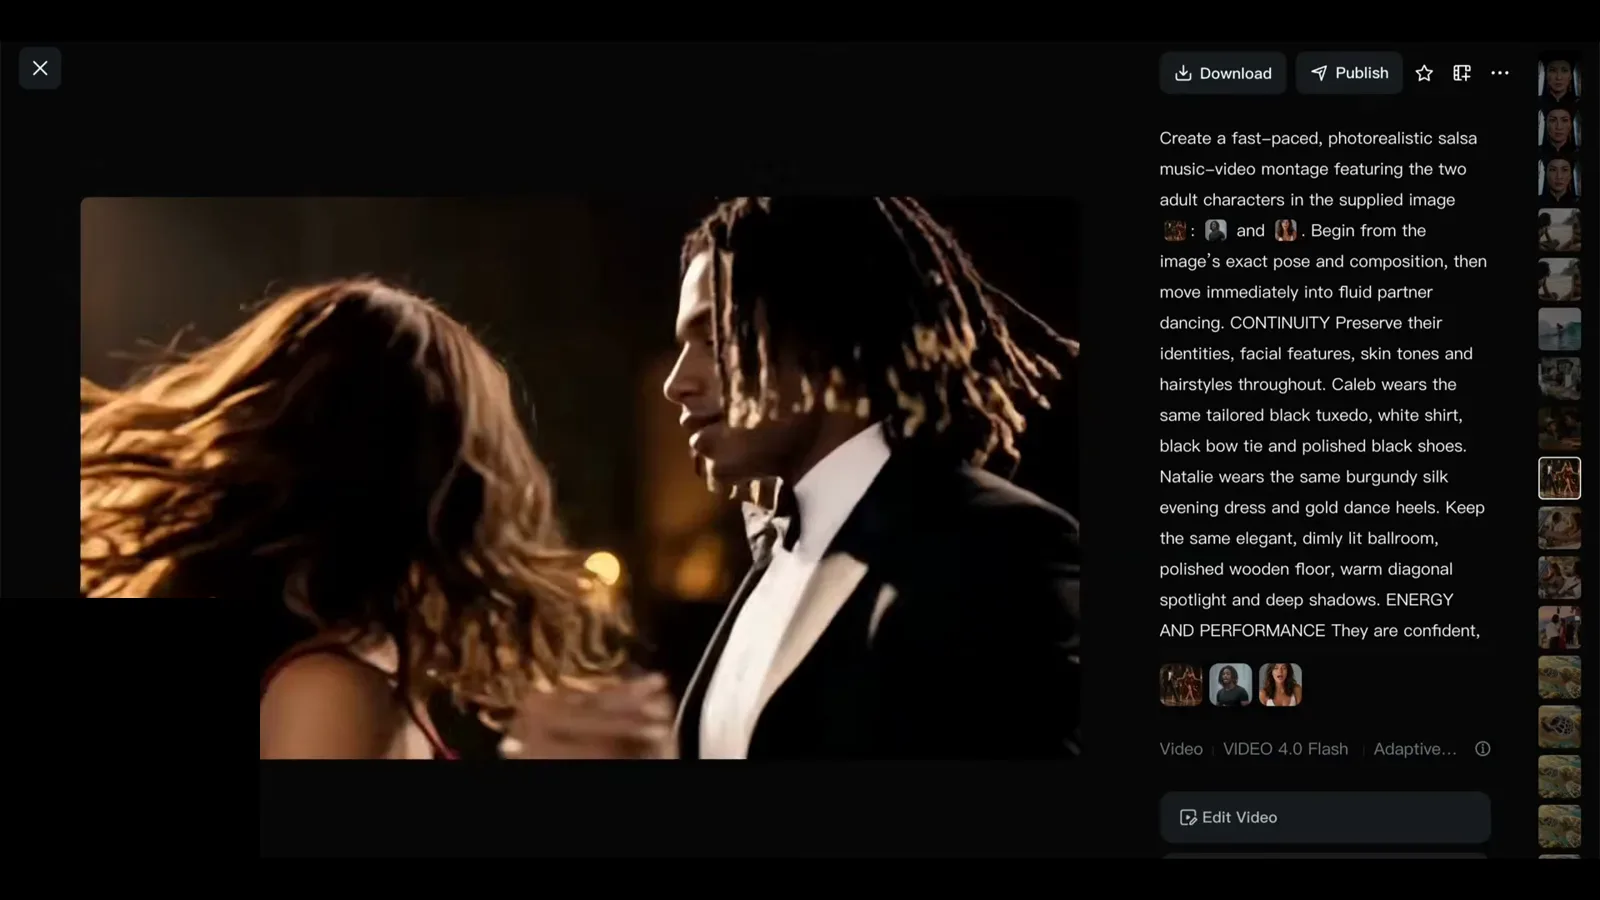
Labeled blocks — CONTINUITY, ENERGY AND PERFORMANCE — structure a long prompt.Watch at 10:00 - 12
Prompt the soundtrack: tempo, instruments, vocals
Kling 4 Flash outputs two-channel stereo, and the car musical number shows how to steer it: "Create a photorealistic cinematic music-video sequence based on the supplied image and song excerpt. AUDIO AND PERFORMANCE Music and vocals: An upbeat, confident breakup-pop chorus at approximately 112 BPM, with punchy drums, warm bass, bright guitar accents..." The character sings on the beat in the result. One limit from the other walkthrough: attaching an audio reference link failed during the Flash period.
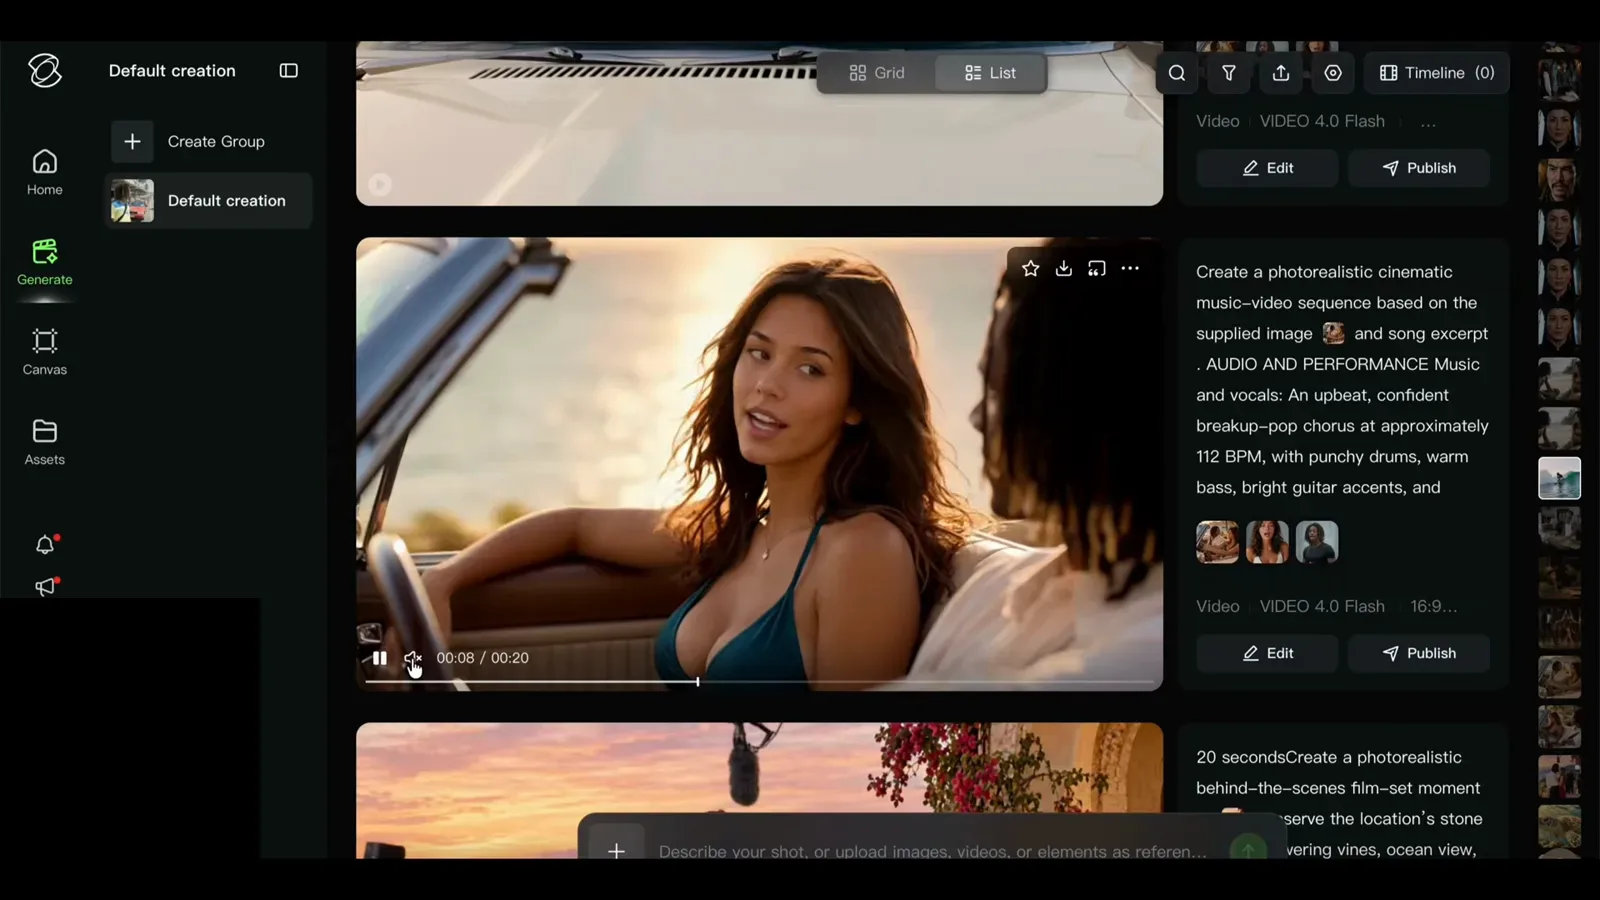
Describe the song — BPM, drums, bass — and the model sings to it.Watch at 12:20
Keyframes and camera control
- 13
Image-to-video today means one keyframe: the first frame
Switch the composer to Keyframes and Flash exposes a single "+ First frame" slot — the placeholder reads "upload an image as the first frame." T.J. looked for a last-frame slot and found none in Flash, though the 4.0 sheet lists First & Last Frames for the full model. Until it ships, his workaround matches Khalil's practice: describe the destination in the prompt and let the shot end where the text ends.
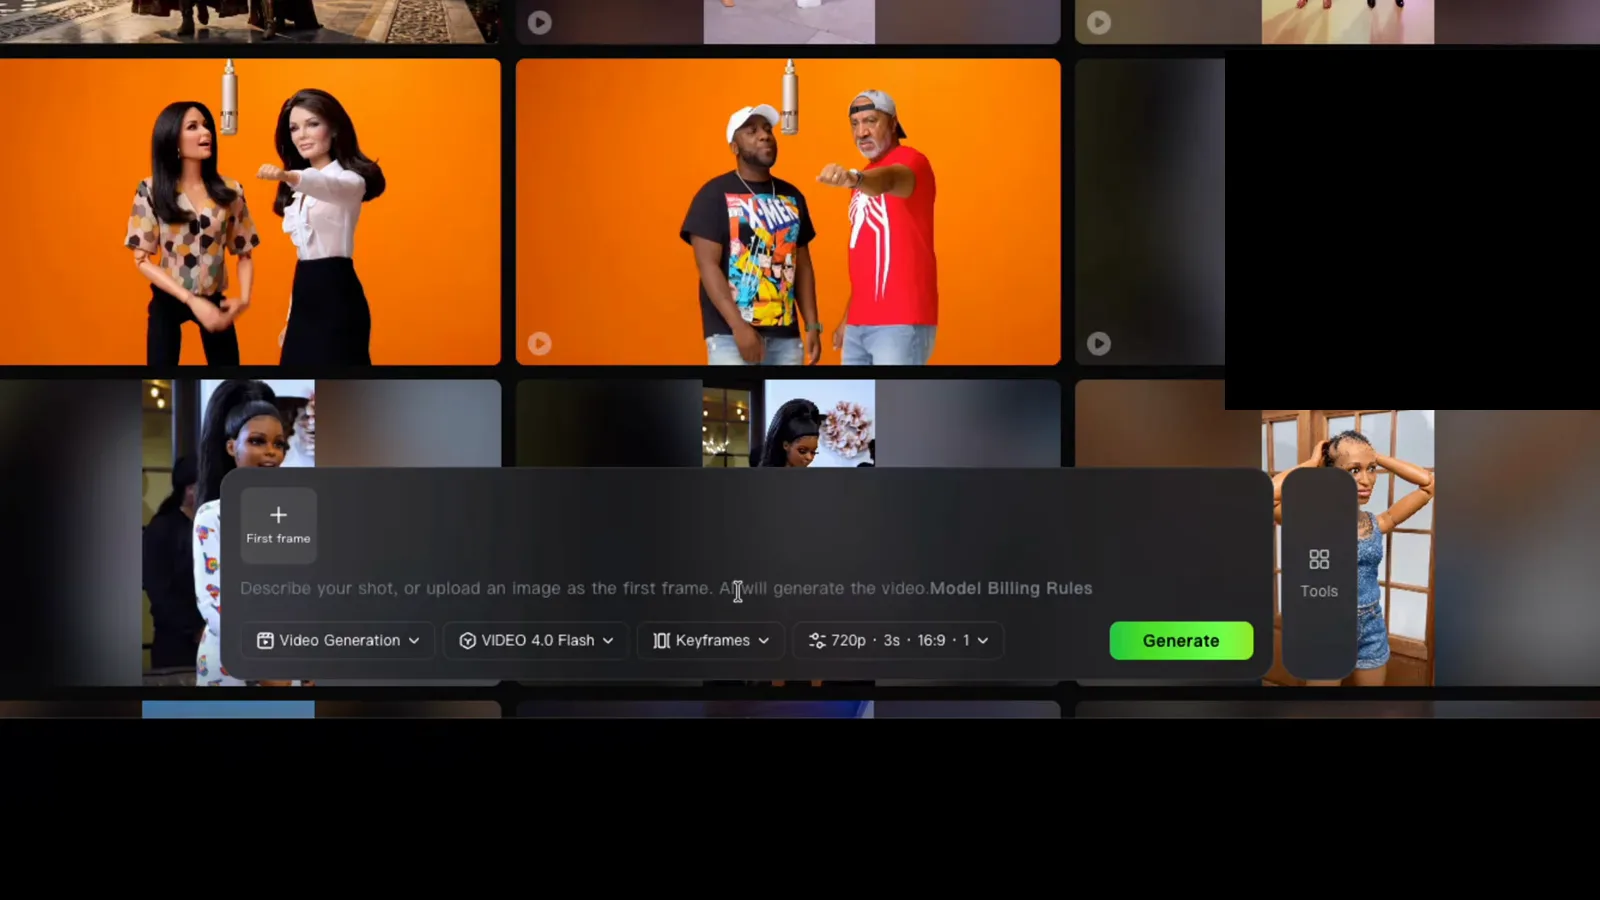
Flash gives image-to-video a first frame only — the end frame waits for the full model.Watch at 3:00 - 14
Bridge two stills with a start frame and an end frame
Khalil's underwater sequence demonstrates the technique the spec sheet calls First & Last Frames: "use [image] as the start frame and [image] as the end frame. Live-action realism. One continuous shot..." He hover-previews the second still — the swimmers arriving at the turtle — and warns that "a lot depends on how you set up the first and last images." His first attempt cut between scenes; re-anchoring both ends bought the continuous move he wanted.
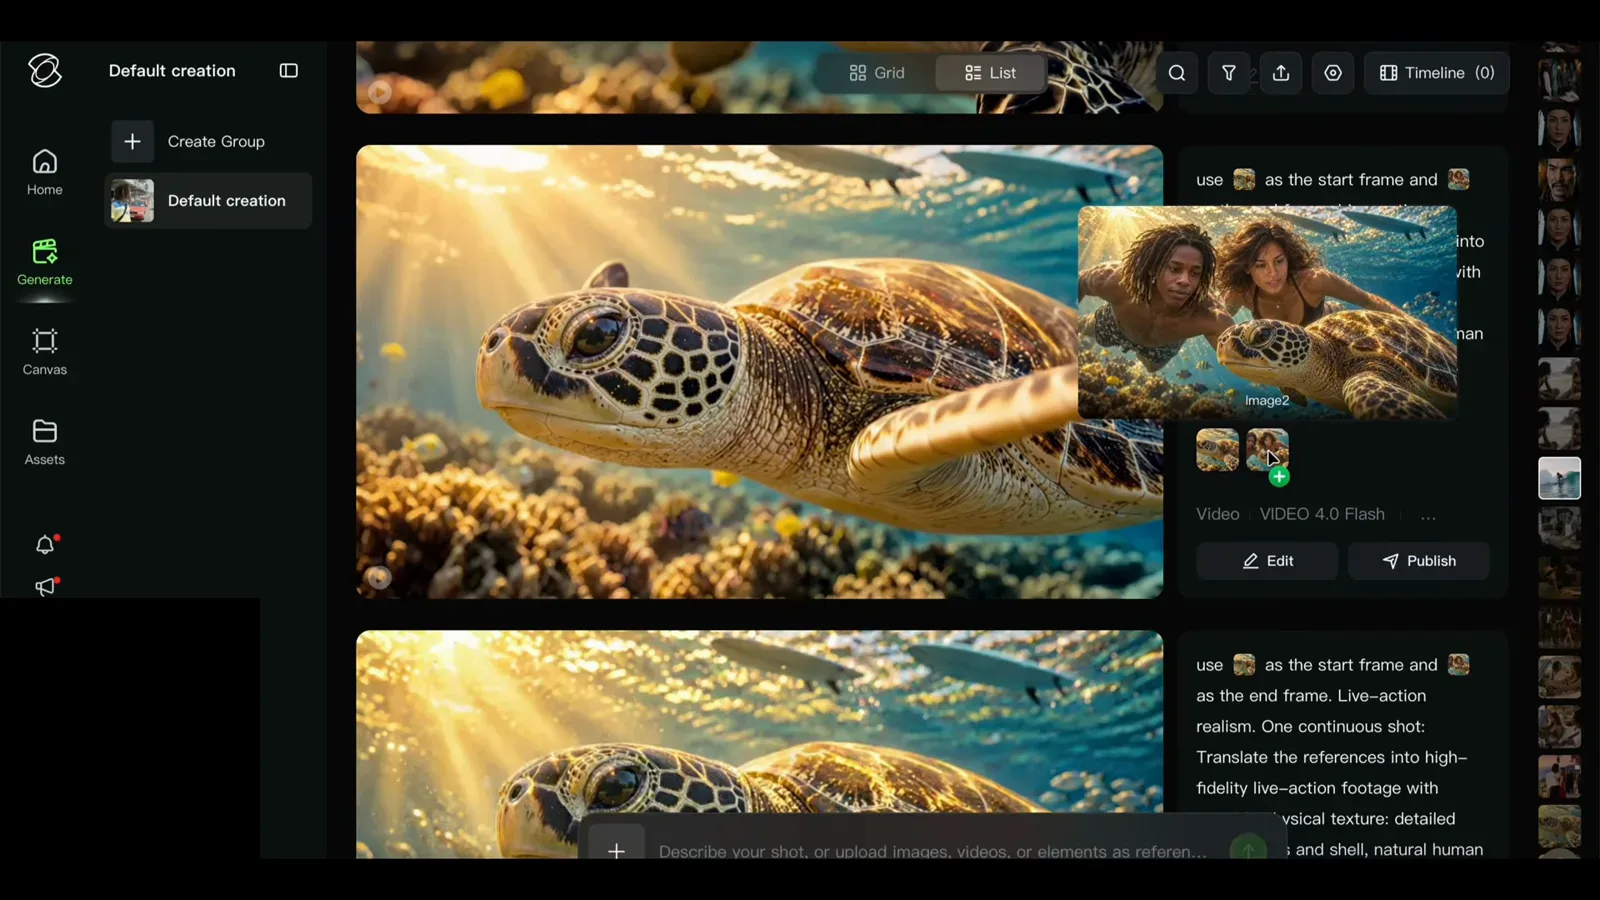
Two anchors, one move: the start frame and end frame bracket the shot.Watch at 14:50 - 15
Trust the camera notes: tracking and orbit shots are first-class
Kling's 4.0 highlights page, captured in the walkthrough, makes camera motion a headline promise: "Dynamic Motions and complex camera movements remain smooth and stable. Whether it's high-speed movement, continuous action, tracking shots, or orbit shots, footage stays stable and seamless." The same page confirms video editing inputs: up to 5 clips, one primary, each 3–30 seconds, 30 seconds combined. Pair that with camera words in your prompt — ultra-low tracking, whip pan, push-in — and direct deliberately.
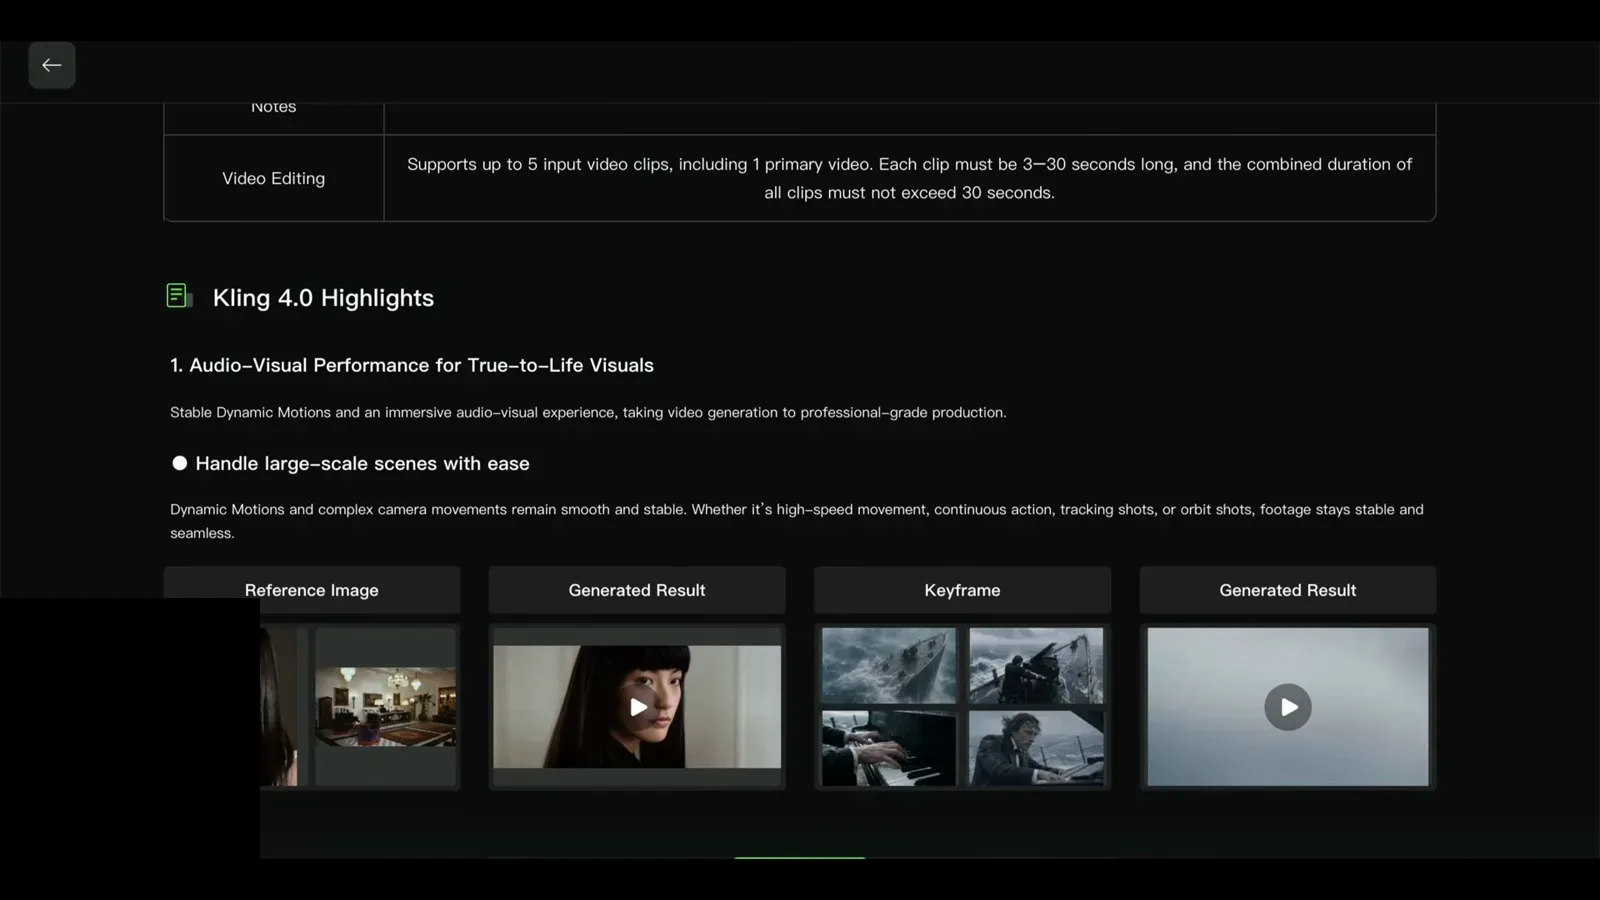
The official word: tracking and orbit shots stay stable in 4.0.Watch at 1:42