

How to Write Kling 3.0 Prompts (2026 Guide)
Kling 3.0 prompts work best when they read like a director's shot list: name the camera framing, the subject, the action, the environment, and the sound, and the model follows each line. This guide walks the native Kling AI web app step by step — following the same screens Jason Gandy demos in his Kling 3.0 tutorial — through text-to-video, Multi-Shot sequences, image-to-video, and character elements, with every prompt example copied word for word. The prompt-structure rules and limitation notes also draw on Dan Kieft's 25-minute Kling 3.0 master guide.
Source & credits
Screenshots in this guide are captured from Jason Gandy's public walkthrough video. Every step links back to the exact moment it shows, so you can follow along.
Jason Gandy ↗Start a Generation in the Kling AI App
- 1
Open the Video Generation composer
From the Kling AI homepage, open the Generate menu on the left and choose Video Generation — the composer opens with the model picker at the top and the prompt box in the center. Everything in this guide happens on this single screen.
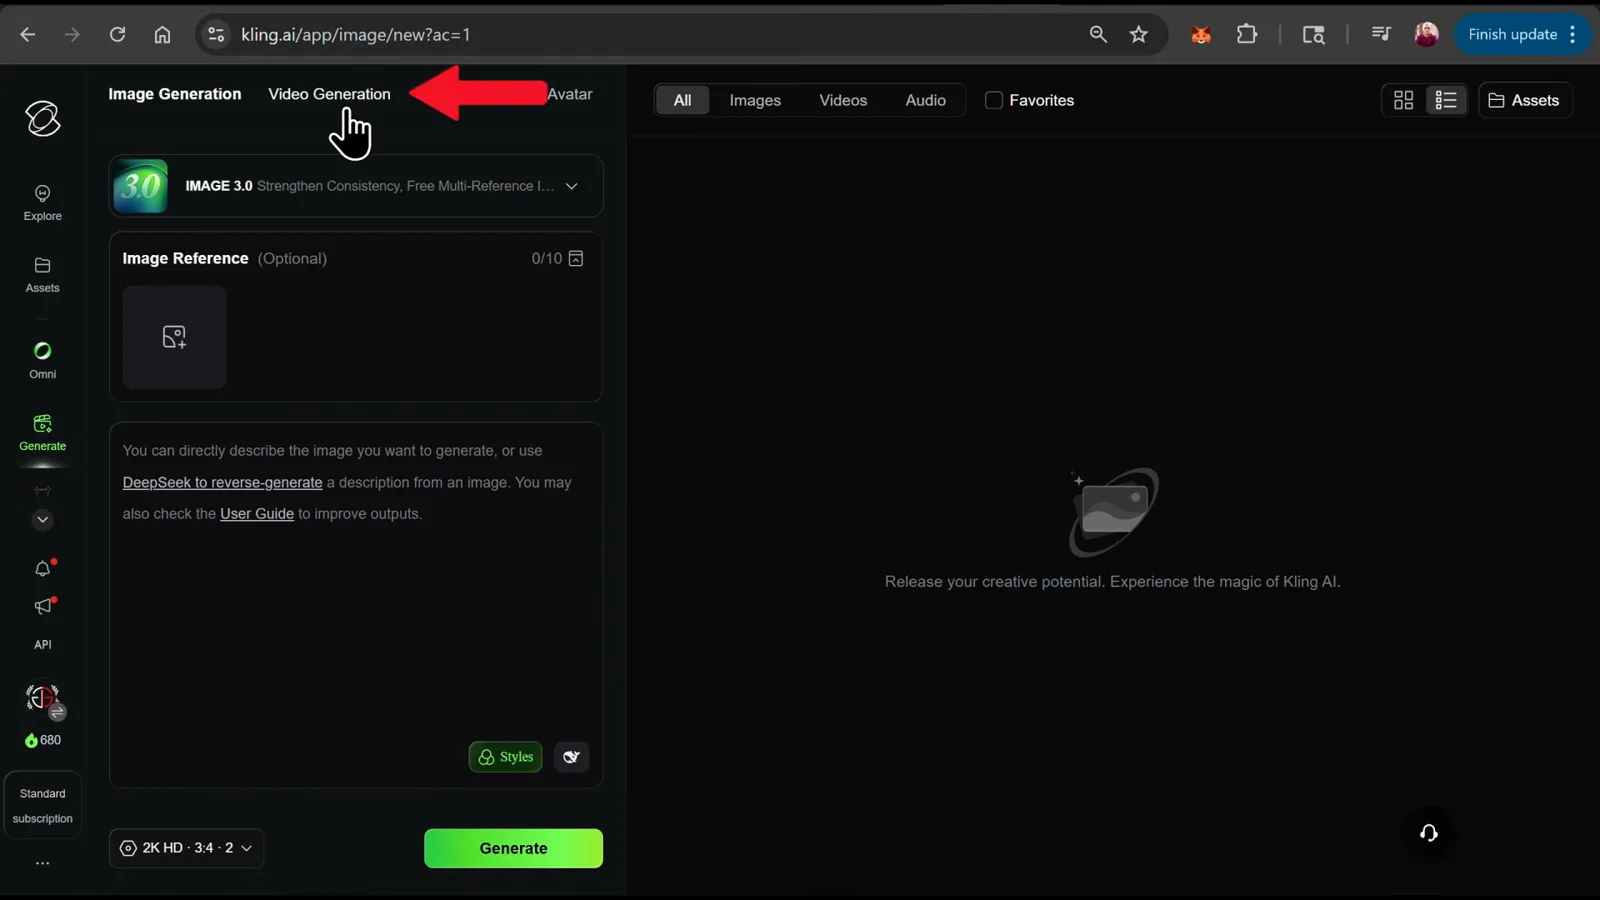
One screen handles text-to-video, image-to-video, and multi-shot — you never leave it.Watch at 0:42 - 2
Select the Video 3.0 model
Click the model dropdown at the top of the composer and pick Video 3.0 — the listing spells out why: "Enhanced Native Audio, Improved Element Consistency, and support for Multi-Shot Storytelling." Video 2.6 and Video 2.5 Turbo stay available in the same menu, so always check which engine is selected before you spend credits.
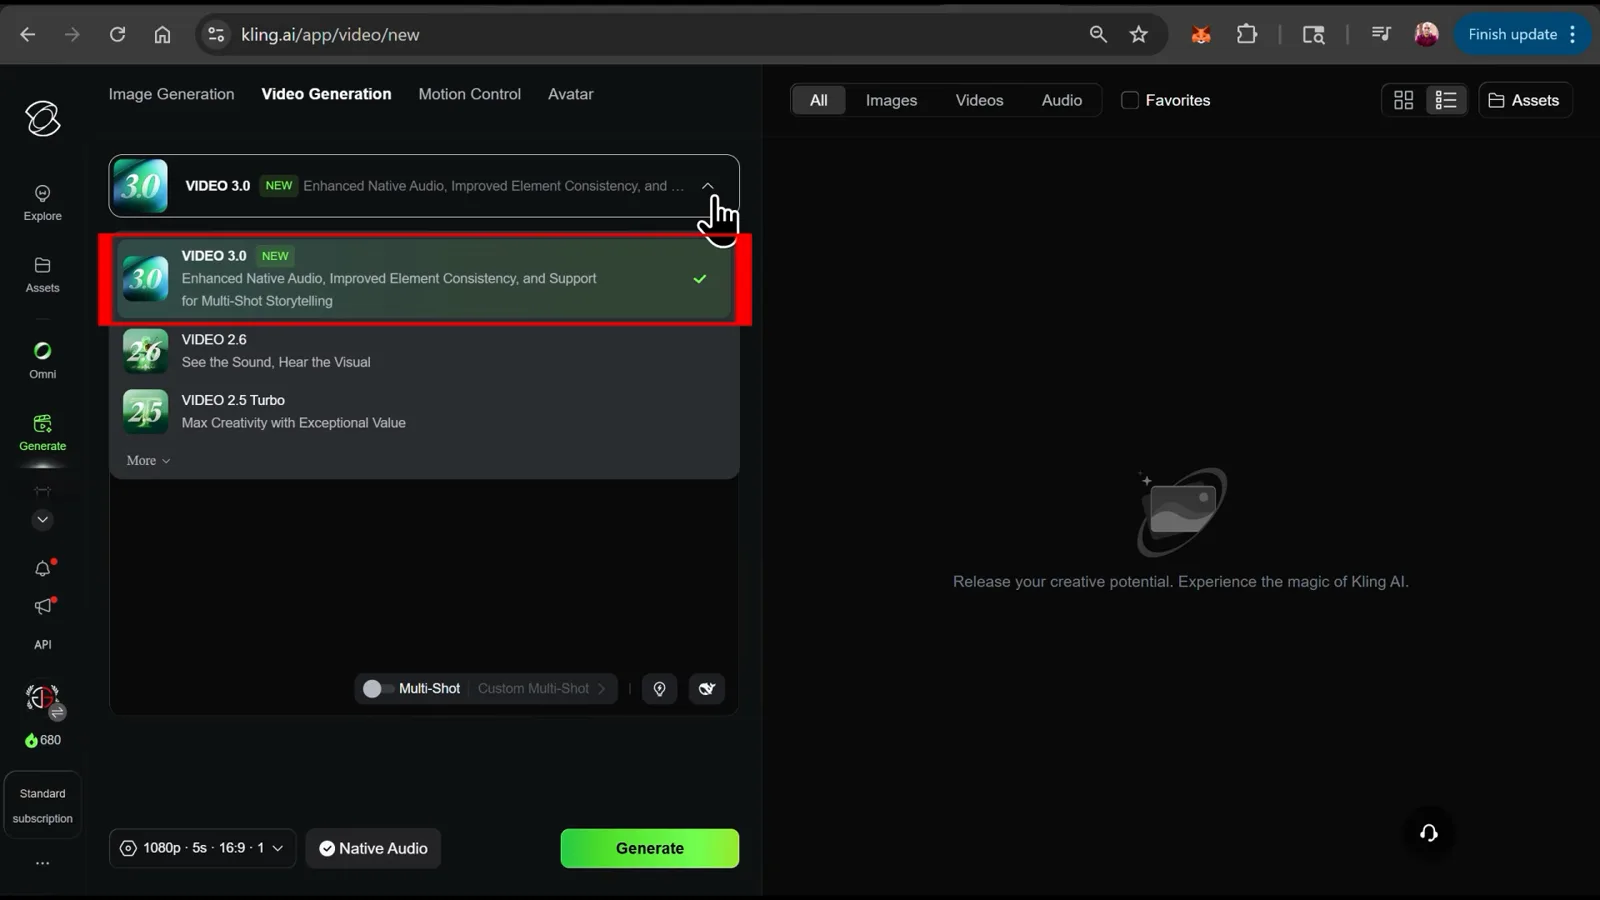
The dropdown label is literally the 3.0 feature list — read it before generating.Watch at 1:02 - 3
Set mode, length, ratio, and outputs
Expand the settings row under the prompt box to reach four controls: Mode (720p, 1080p, or 4K), a Length slider that runs from 3s to 15s, Video Ratio (16:9, 1:1, or 9:16), and Number of Outputs from 1 to 4. Resolution and length both raise the credit cost, so start low on first attempts.
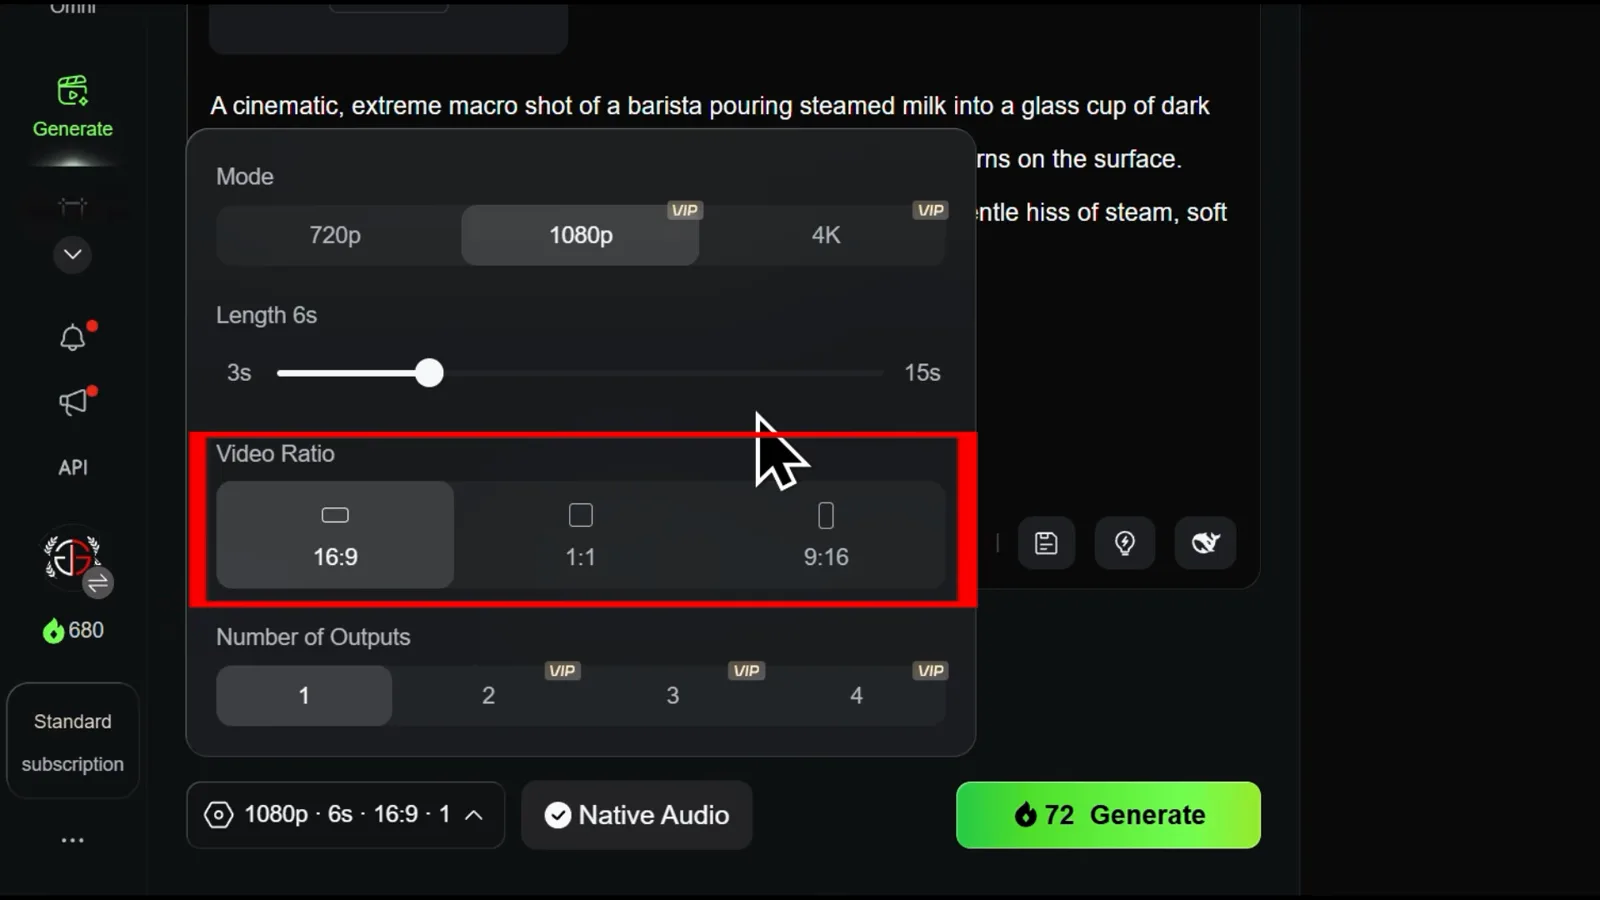
Kling 3.0 stretches to 15 seconds per generation — plan your shots around it.Watch at 2:28
Write a Text-to-Video Prompt
- 4
Write the prompt like a shot description
Type one continuous description covering what the camera sees and what you hear. The demo prompt reads: "A cinematic, extreme macro shot of a barista pouring steamed milk into a glass cup of dark espresso. The milk flows smoothly, creating complex microfoam patterns on the surface. Warm sunrise backlight highlights drifting steam in the air. Sound: Gentle hiss of steam, soft swirling of liquid mixing, distant quiet cafe ambiance." Note the "Sound:" block — that is what feeds the native audio.
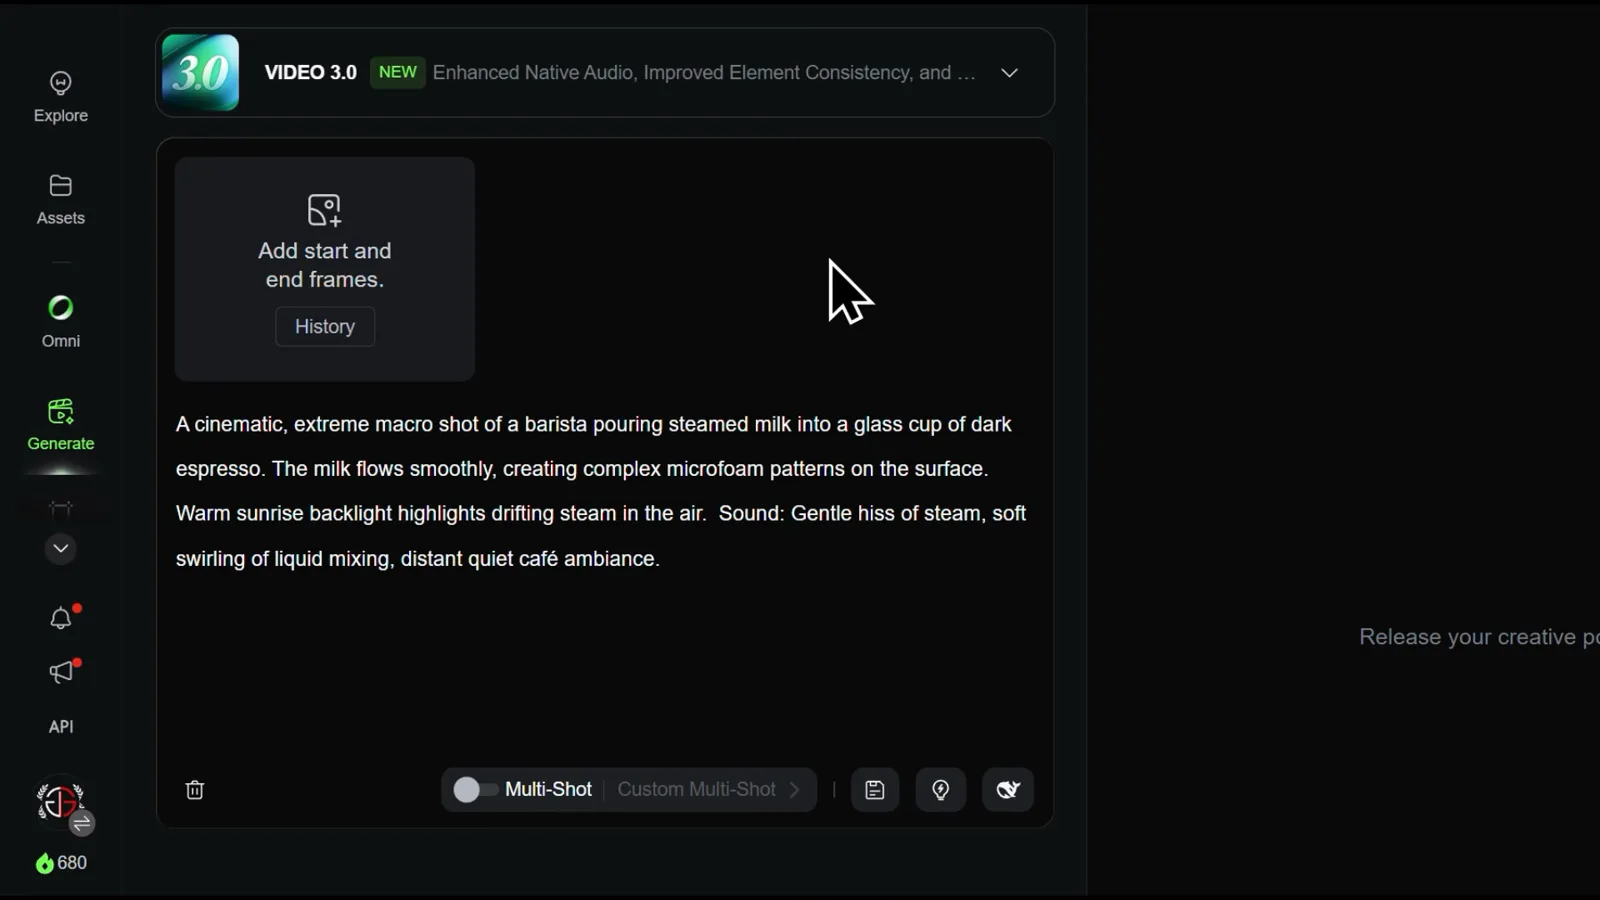
Framing, subject action, lighting, then audio — one paragraph, in that order.Watch at 1:45 - 5
Toggle Native Audio on
In the settings bar under the prompt, click the Native Audio chip so it stays checked. The video's quoted price: a 6-second 1080p clip with native audio costs 72 credits, and adding native audio always costs more — so switch it off when you plan to add your own soundtrack. The hiss of steam and cafe ambience you described in the prompt become the soundtrack.
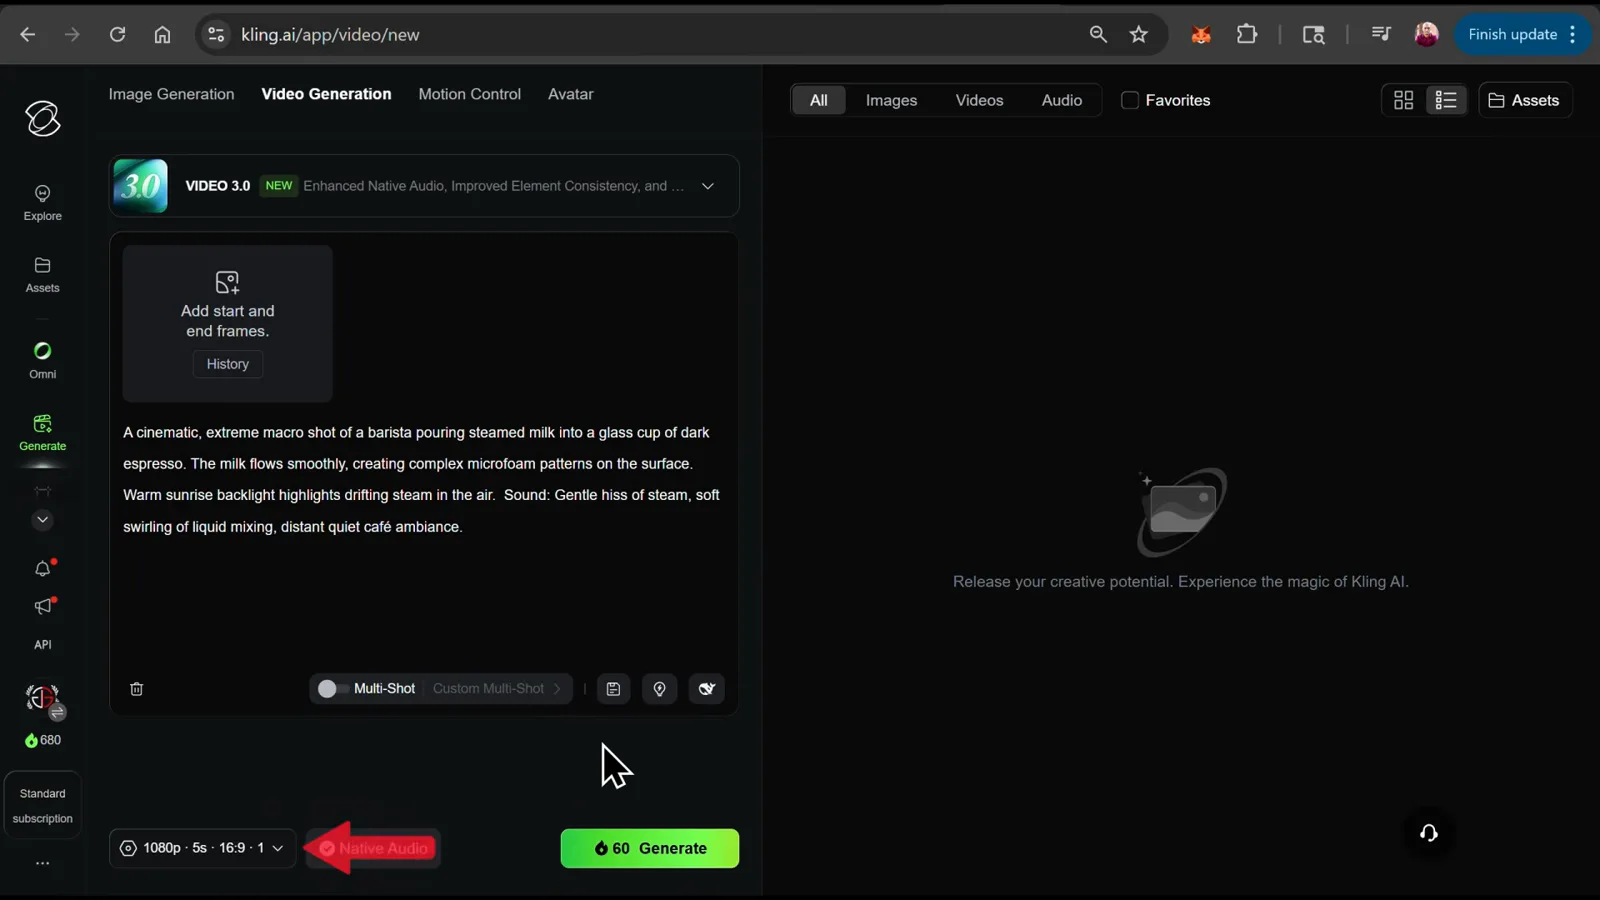
Native Audio renders the sounds you wrote — for a few extra credits per run.Watch at 2:03 - 6
Generate and review the clip
Hit Generate and the right-hand column shows the task status and estimated wait time until the finished clip appears with a player. The espresso demo comes back with rising steam and quiet cafe ambience exactly as prompted — download it from the result card, or refine the prompt and run it again.
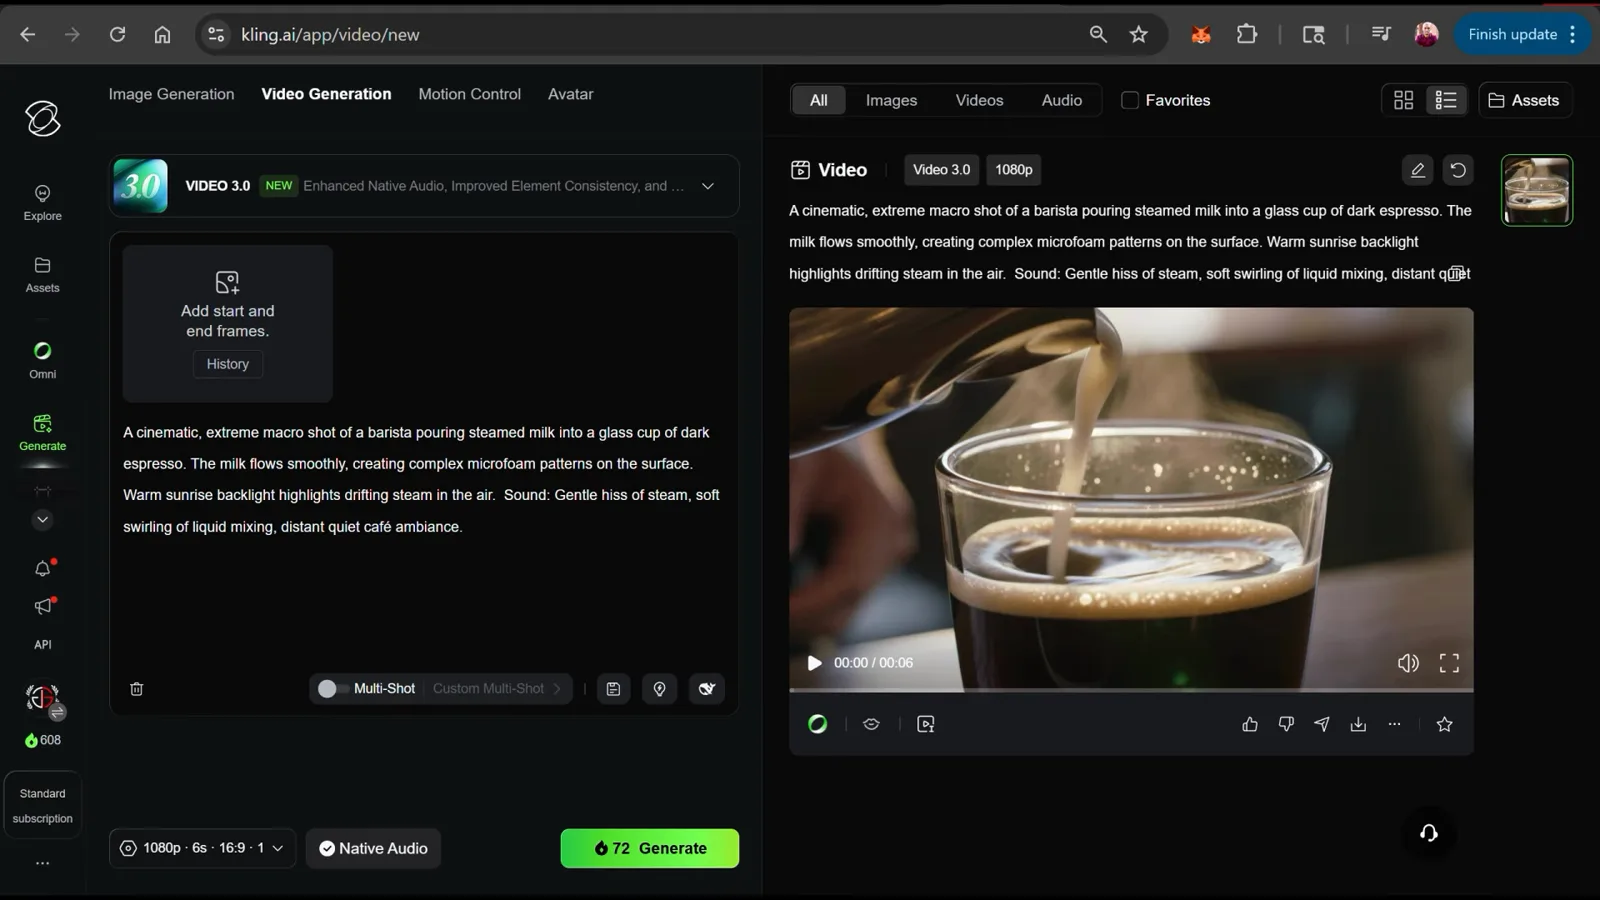
Judge the result against each line of your prompt, then re-run what missed.Watch at 3:12
Prompt Multi-Shot Sequences
- 7
Turn on the Multi-Shot toggle
Below the prompt box, flip the Multi-Shot switch — a Custom Multi-Shot button appears next to it. This is the feature Kling 3.0 was built around: one generation that cuts between several shots while keeping the same environment and characters consistent.
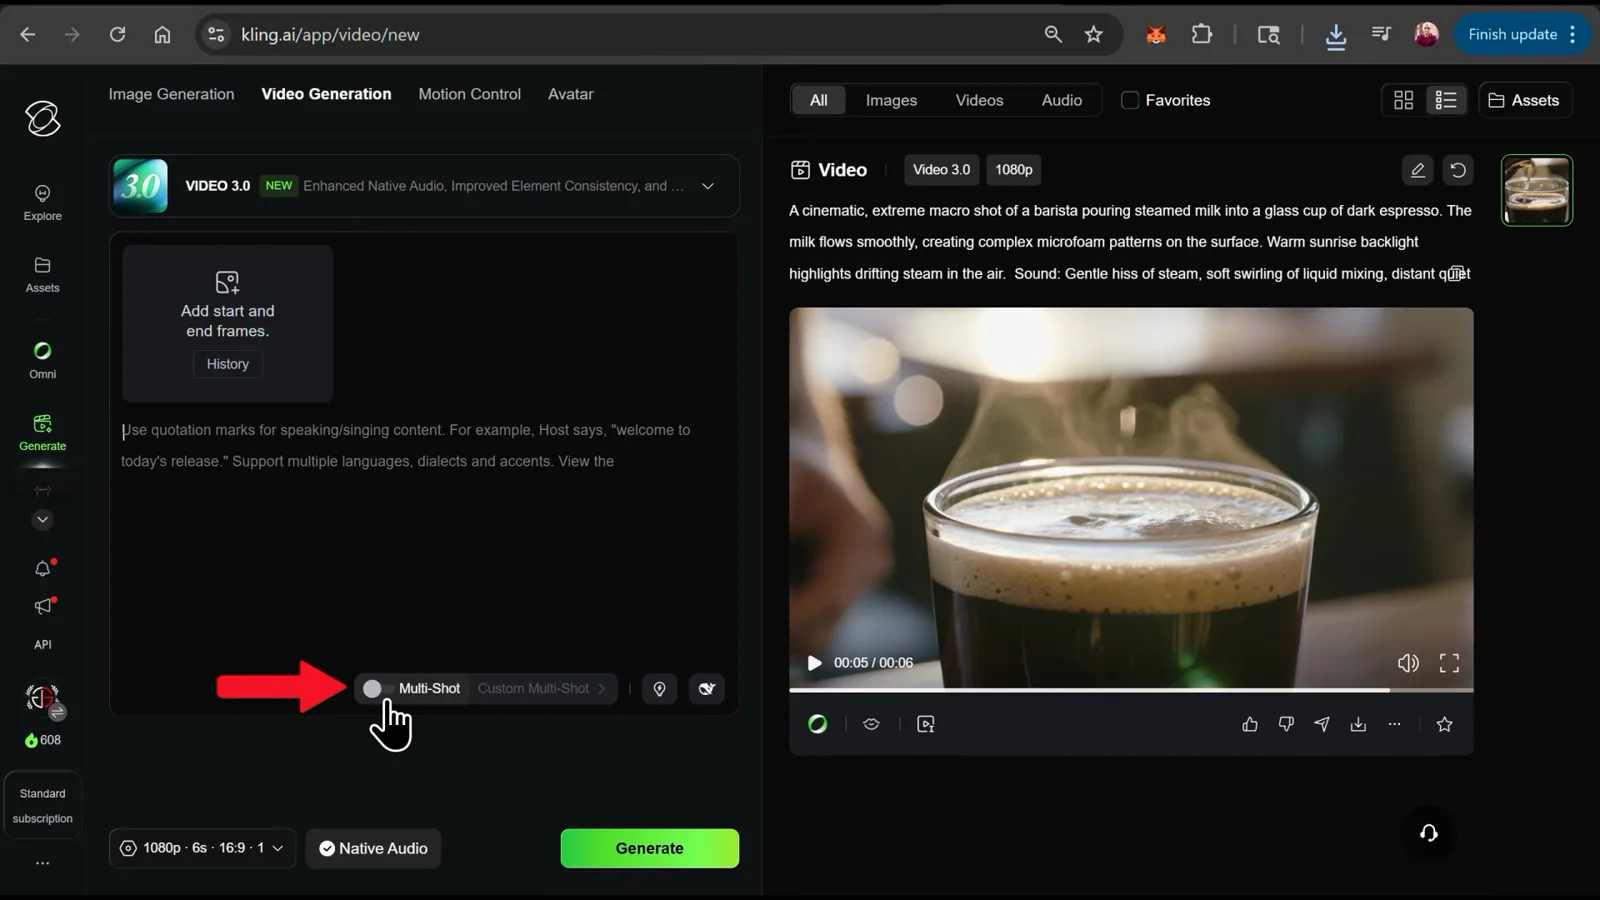
Multi-Shot is what turns one prompt into an edited sequence.Watch at 3:52 - 8
Give every shot its own prompt
Open Custom Multi-Shot and you get numbered fields — Shot1, Shot2, and a + Shot button for up to six. The astronaut demo opens with: "An atmospheric wide shot of an astronaut in a white, detailed spacesuit walking carefully through a dense, glowing bioluminescent alien forest. The lighting is moody with floating blue spores in the air." Shot2 continues: "A medium shot of the astronaut stopping suddenly. They raise their gloved hand to wipe dust off their helmet visor. They look down at something off-camera, their body language showing surprise." Each field names its own framing first.
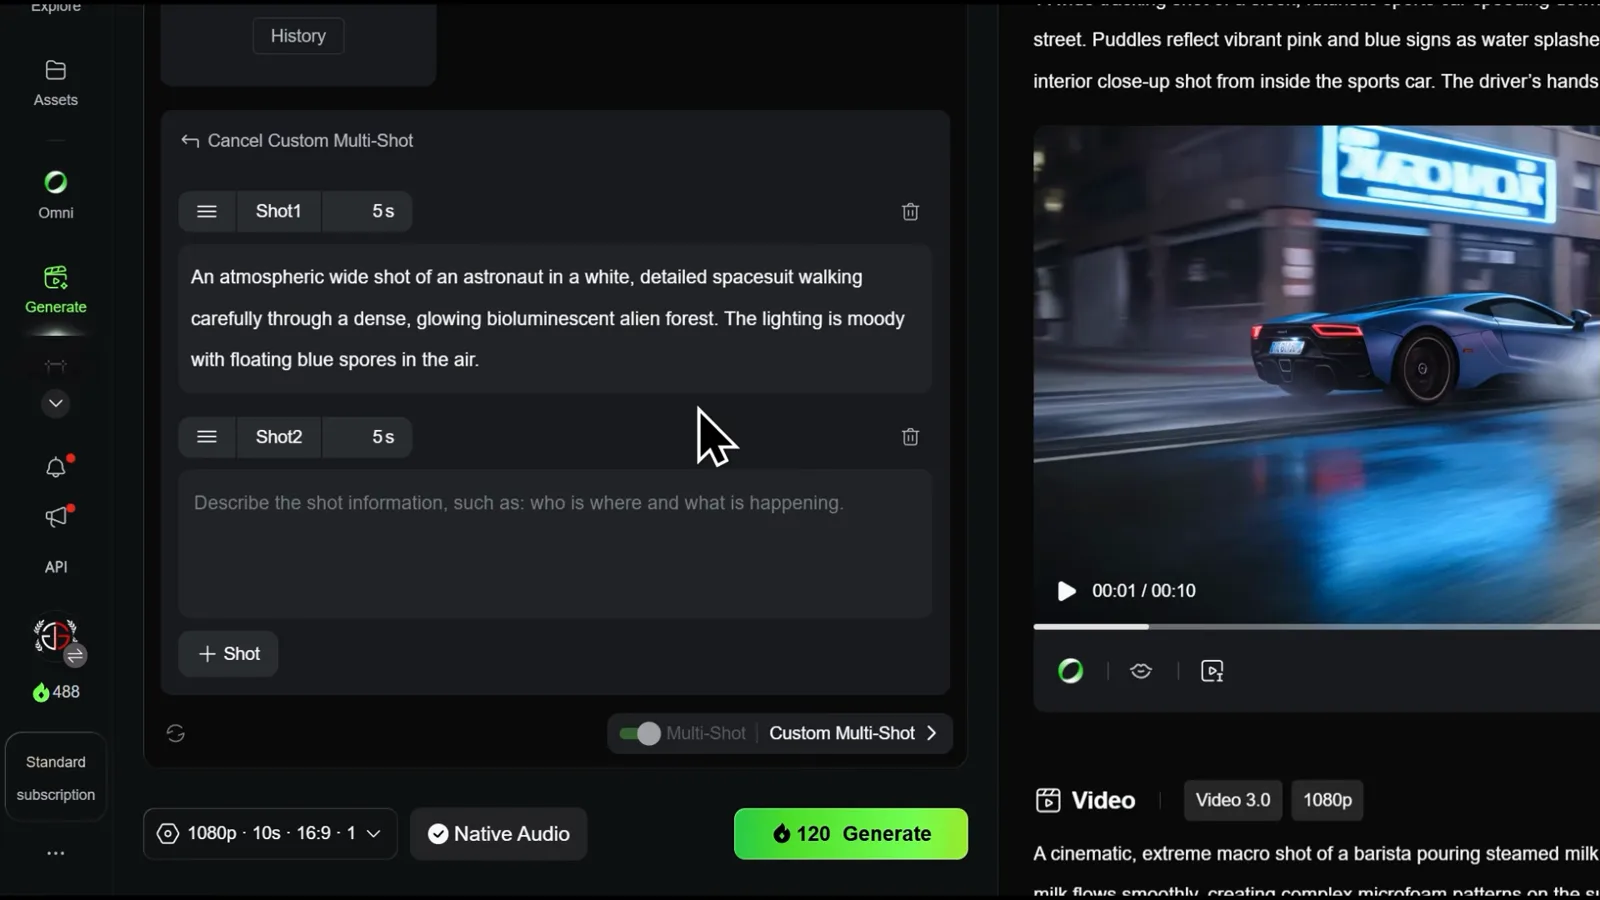
Write each field like a briefing for a camera operator, cut by cut.Watch at 5:45 - 9
Budget seconds across the shots
Every shot carries its own duration and the totals must fit the length you set — the demo splits three shots as 5s / 2s / 3s while adjusting, then settles on 5s each for the final 15-second cut. You can also skip custom fields entirely: write one scene description with Multi-Shot enabled and Kling 3.0 decides where to cut.
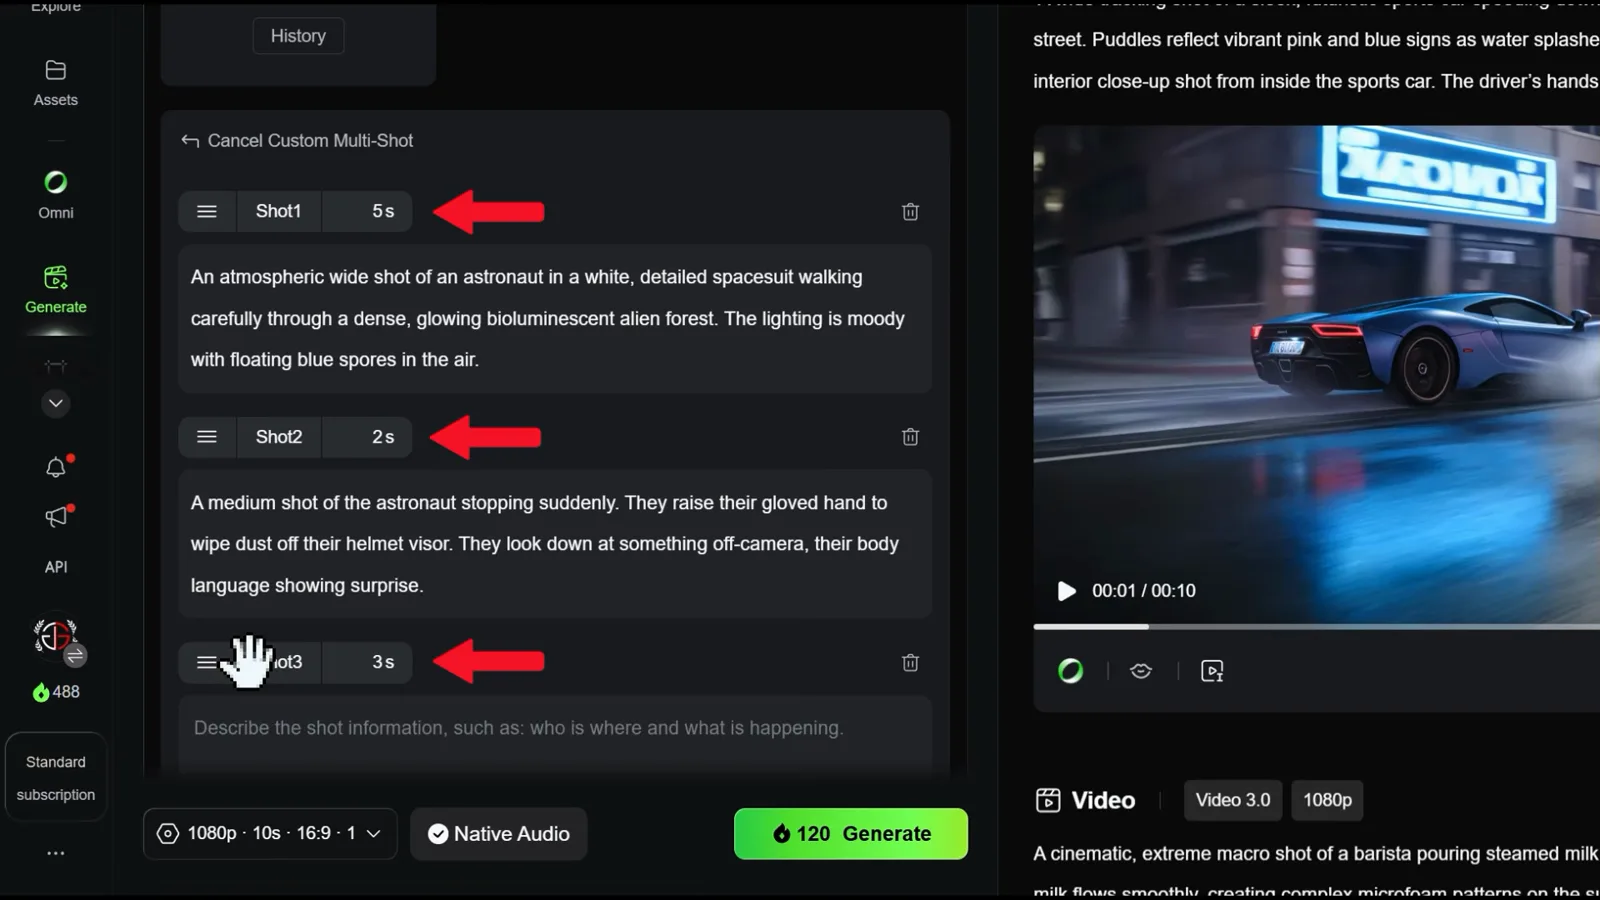
Short chips for cuts, longer ones for dialogue — the clock is yours to split.Watch at 6:12 - 10
Generate the full sequence
Press Generate — the 15-second, three-shot astronaut run costs 180 credits with native audio — and Kling returns a single clip with the cuts already in place: the wide walk-in, the visor wipe, then the close-up of a crystalline flower pushing the spores away. The result card lists each Shot chip with its prompt so you can audit what produced what.
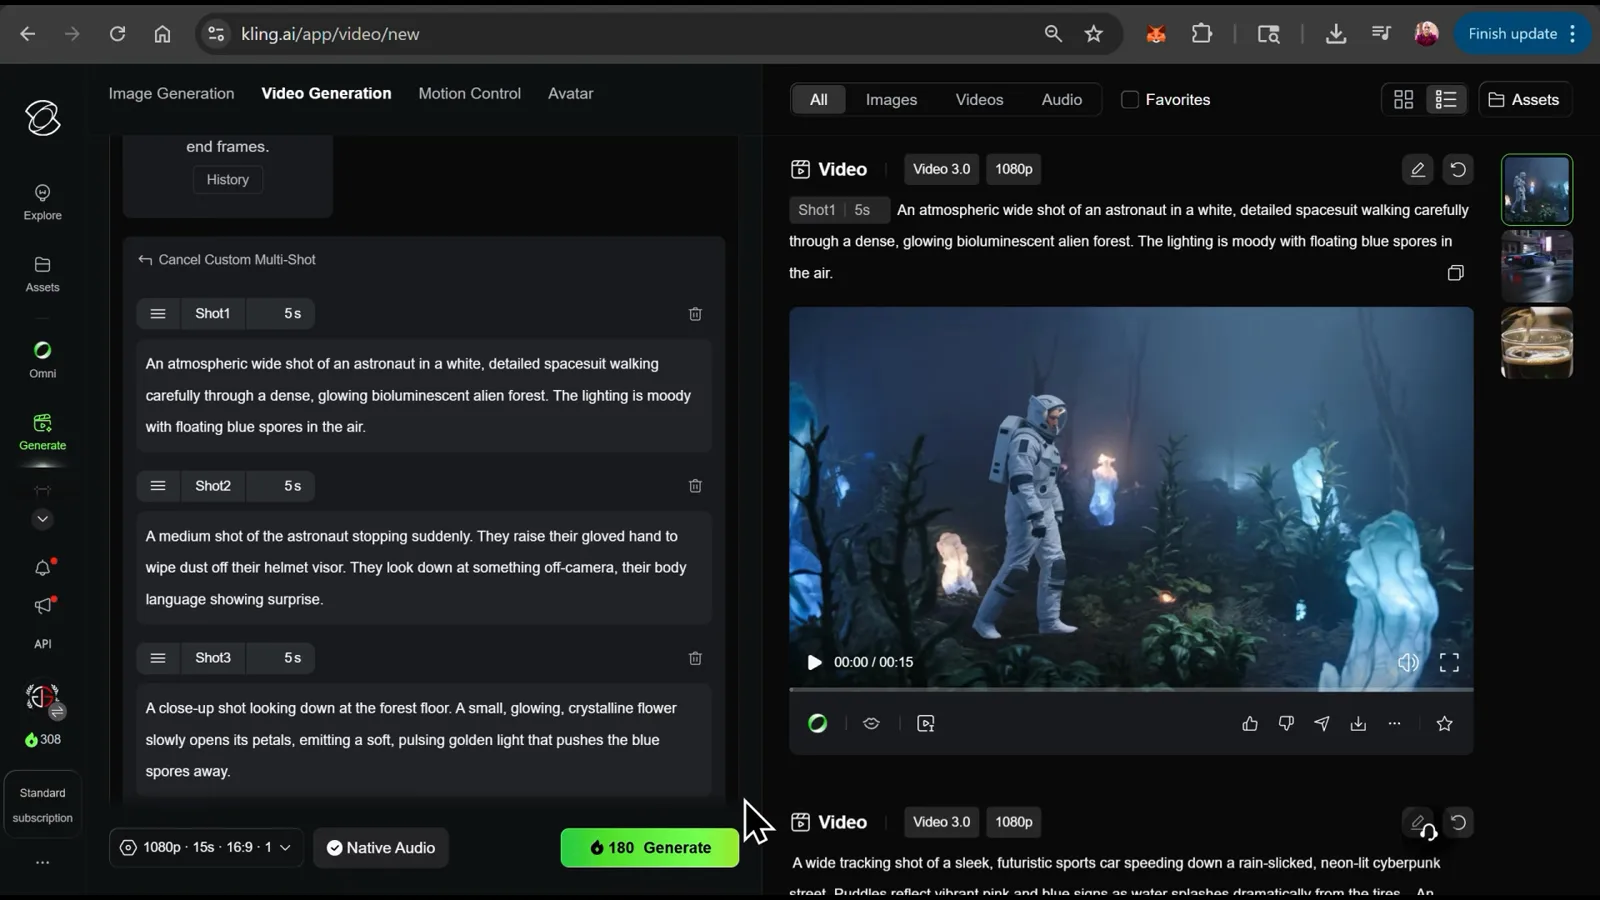
One click, three consistent angles — this is the 3.0 headline trick.Watch at 7:14
Image-to-Video Prompts and Character Elements
- 11
Upload an image as the start frame
Click the frames area at the top of the composer to upload a still as your first frame — the owl photo in the demo locks exactly how shot one begins. An end frame is optional (Add end frame), and the History button lets you reuse earlier frames, including ones pulled from previous videos.
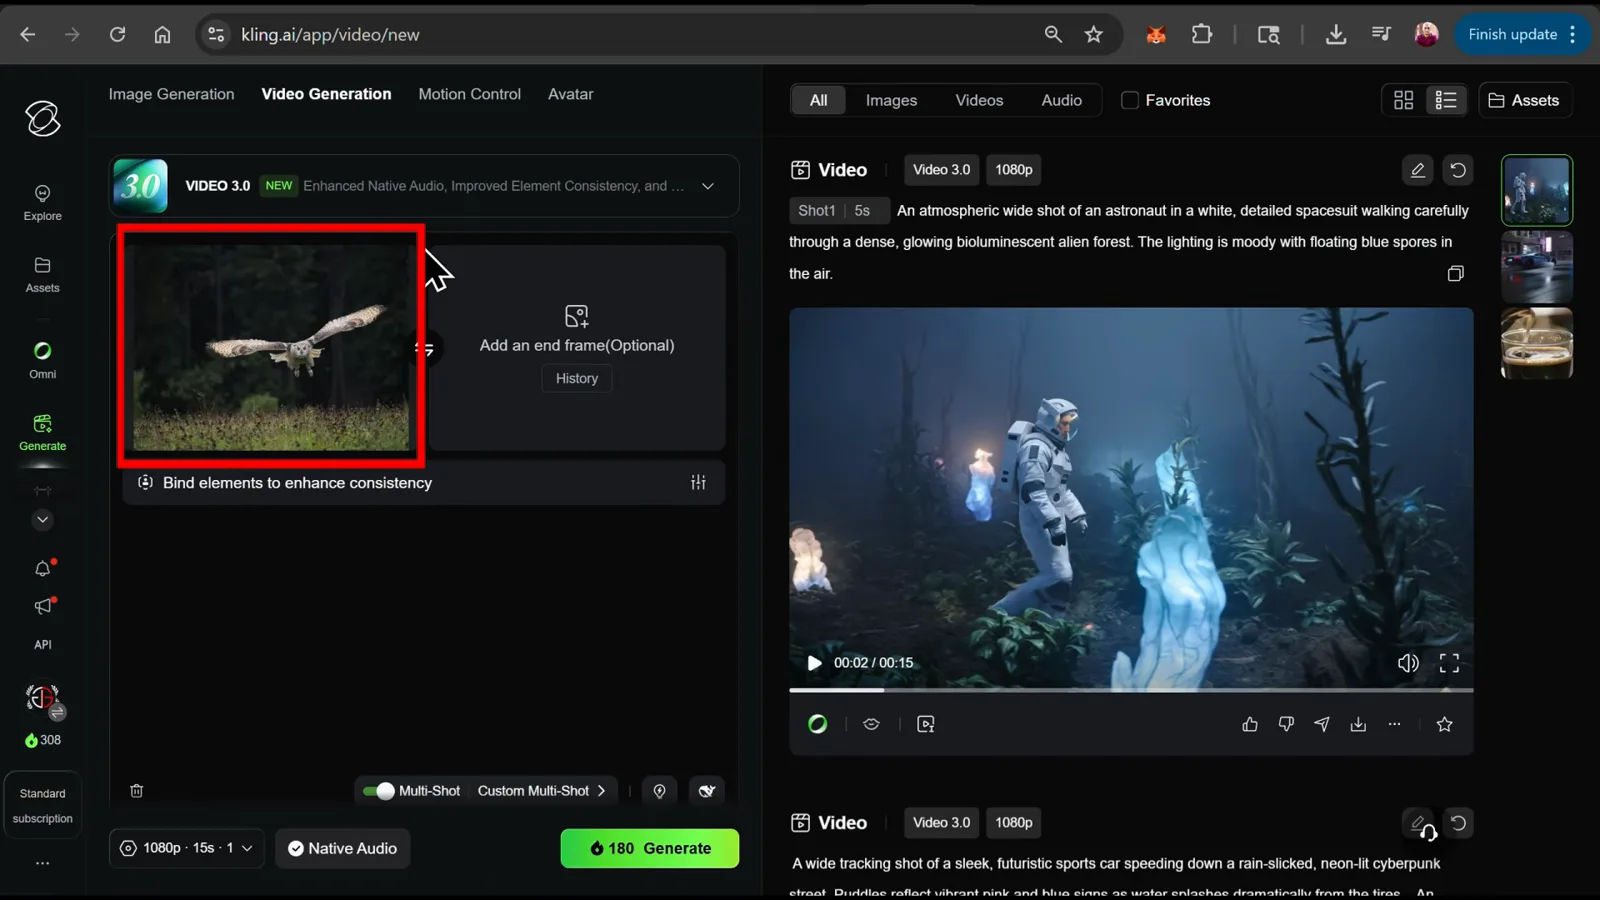
Image-to-video starts from your pixels — the first frame is never a surprise.Watch at 8:17 - 12
Prompt the motion, not the scene
The image already fixes subject and environment, so spend your words on movement and camera. The owl demo reads: "Extreme slow motion, 4k resolution. The majestic owl glides silently forward, hovering low over the grassy meadow. Its massive wings beat in a slow, fluid motion, displacing the air around it. The camera tracks smoothly backward, keeping the owl's piercing orange eyes perfectly locked in focus..." Wings, wind, and a pulling-back camera — nothing re-describes the forest.
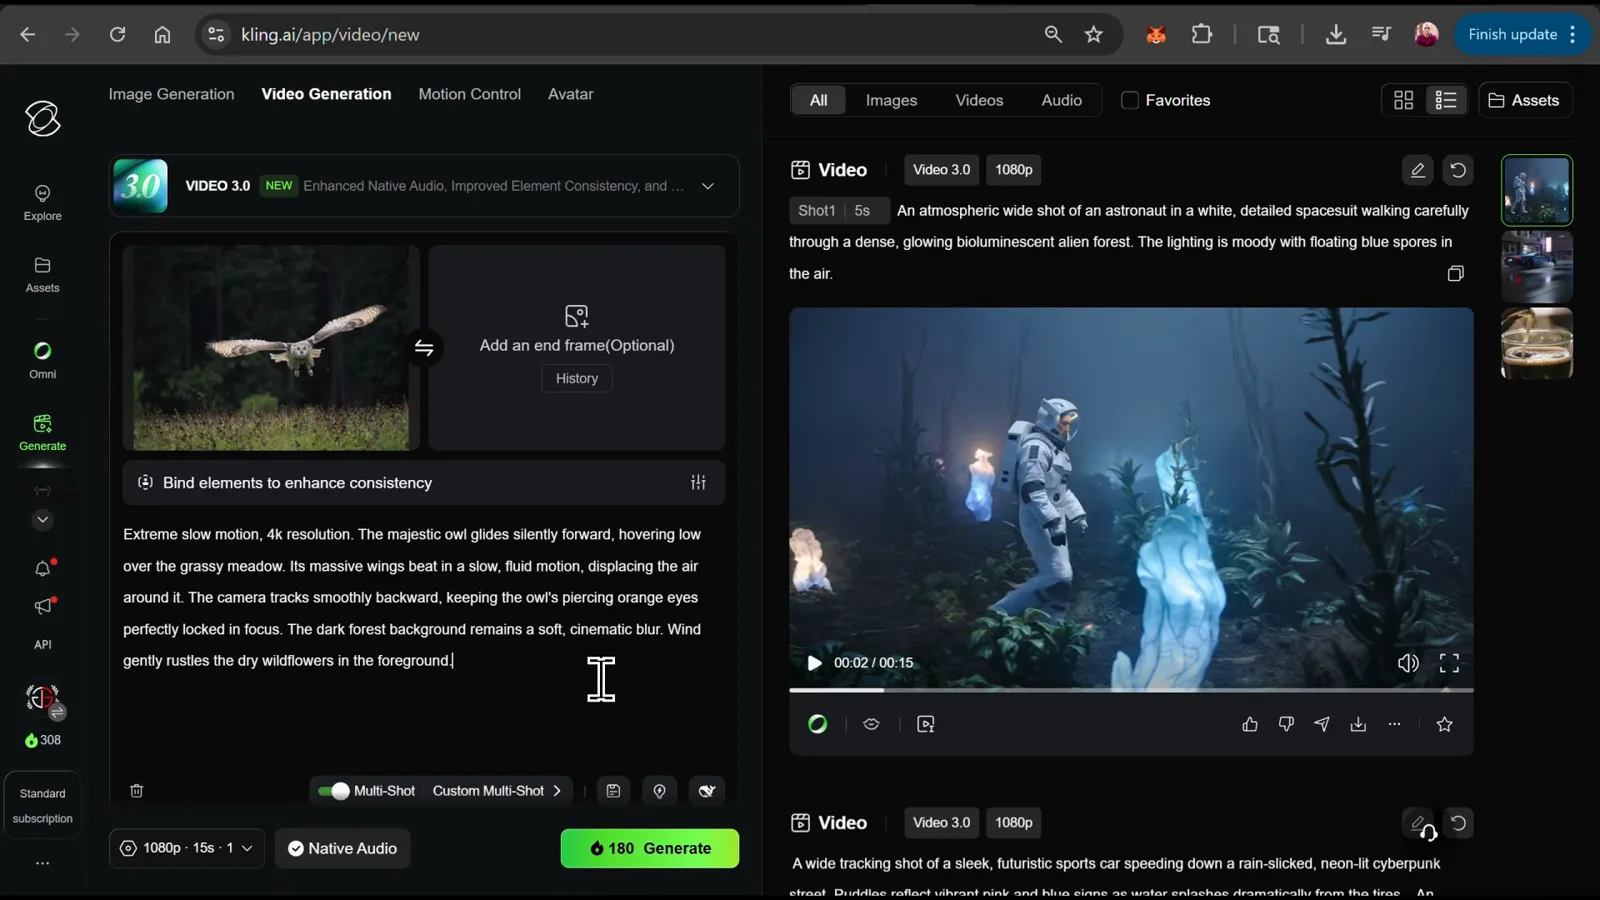
With a start frame in place, every sentence should describe change, not looks.Watch at 8:36 - 13
Bind elements for a consistent cast
After adding a start frame, a "Bind elements to enhance consistency" row appears beneath it. Binding attaches a saved character or product to the generation, so your robot, avatar, or mascot looks identical across every clip in a series.
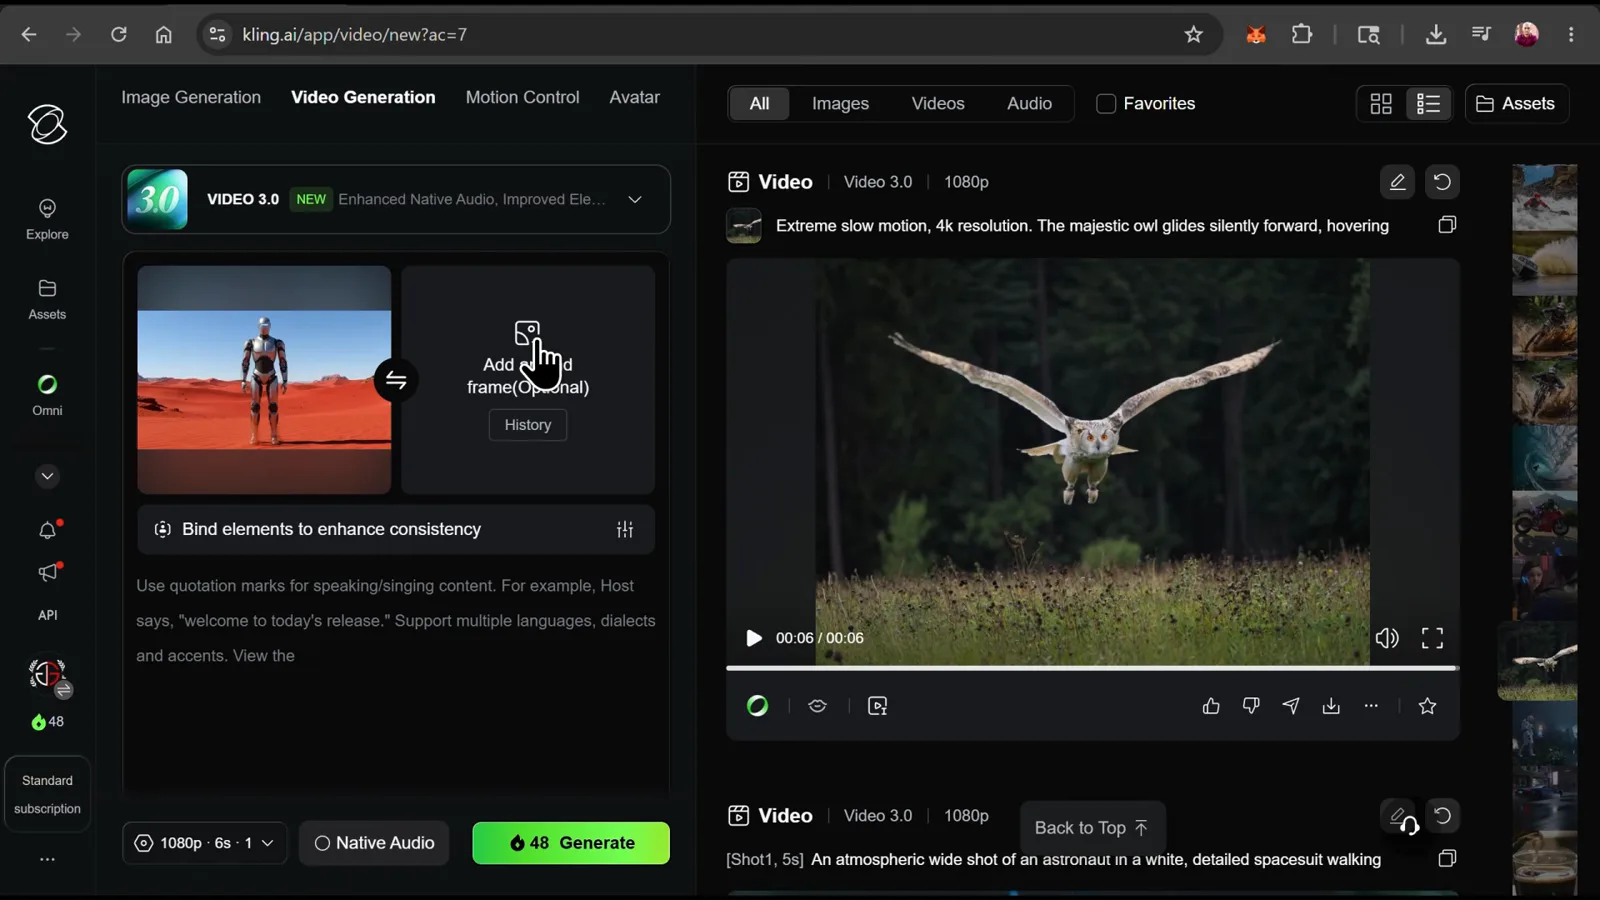
Elements are how episodic content keeps the same face on episode five.Watch at 9:42 - 14
Create the element from several angles
The Create Element dialog accepts multiple images — the demo builds a robot from front, side, and back views — or a video between 3 and 8 seconds. Name it, set the type to Characters, add a short description, optionally pick a preset voice, then hit Generate; the element shows up selectable in the bind row.
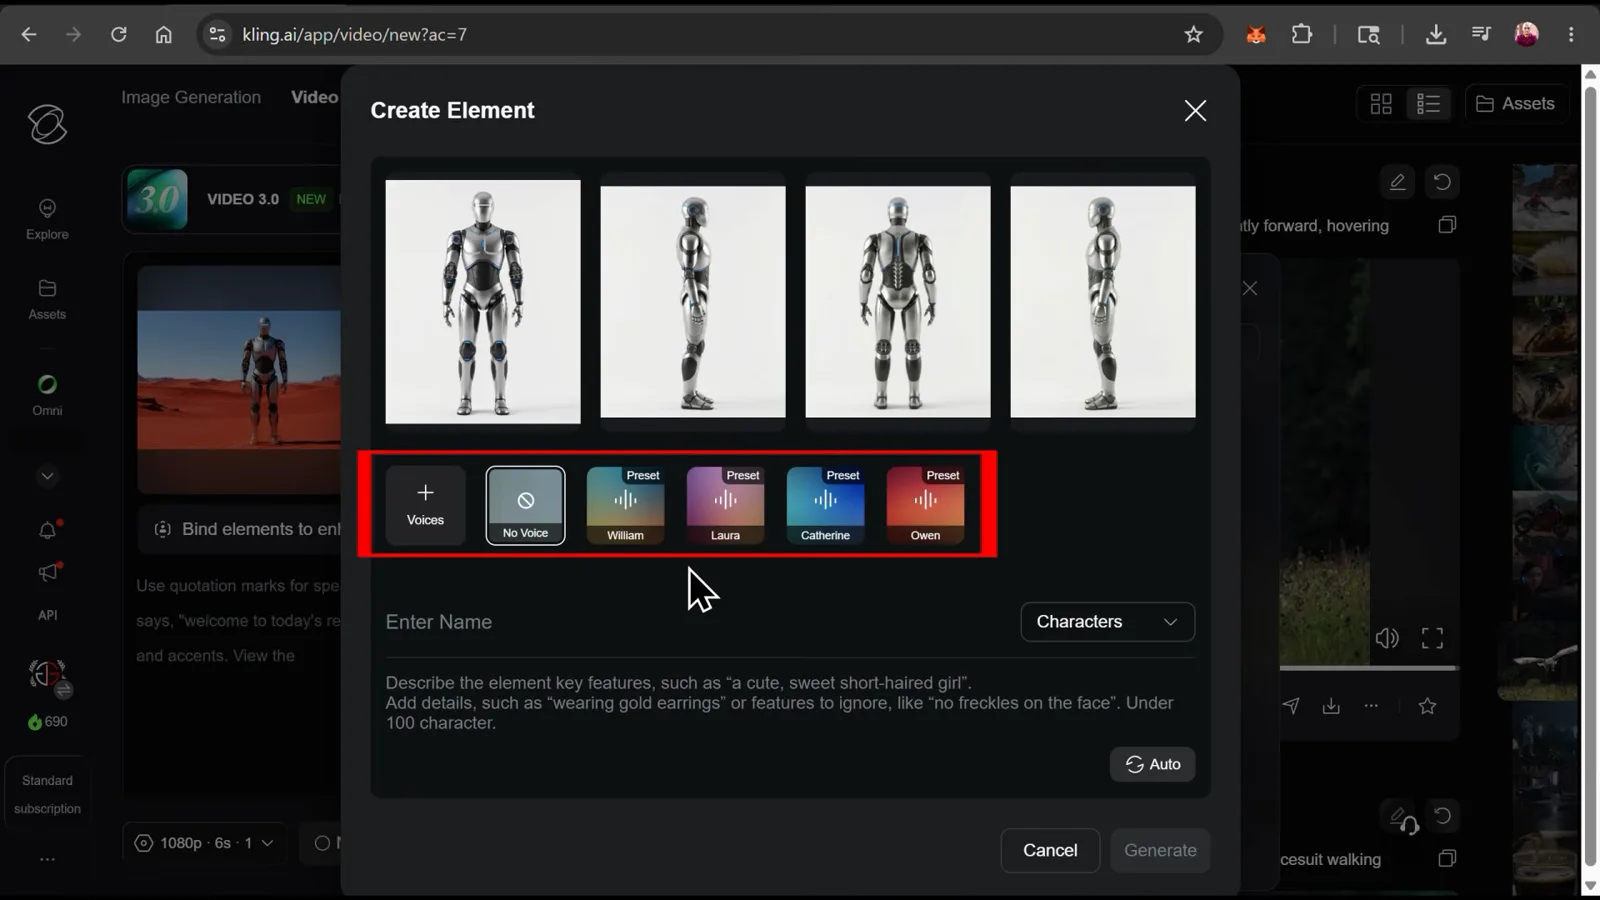
More angles in, fewer morphs out — build the element once, reuse it forever.Watch at 10:45 - 15
Direct the element with camera and dialogue
With the element bound, the robot demo runs: "A photorealistic drone shot circling a sleek, futuristic silver and black robot walking in the middle of a vast, sweeping desert of vibrant red sand... Camera switches to back view as the wind blows fine grains of sand across the robot's matte black leg joints and glowing blue LED knees... While walking, he asks 'where am I?' in a confused tone." The 8-second 1080p run costs 96 credits, the robot stays on-model through the full orbit, and native audio speaks the line.
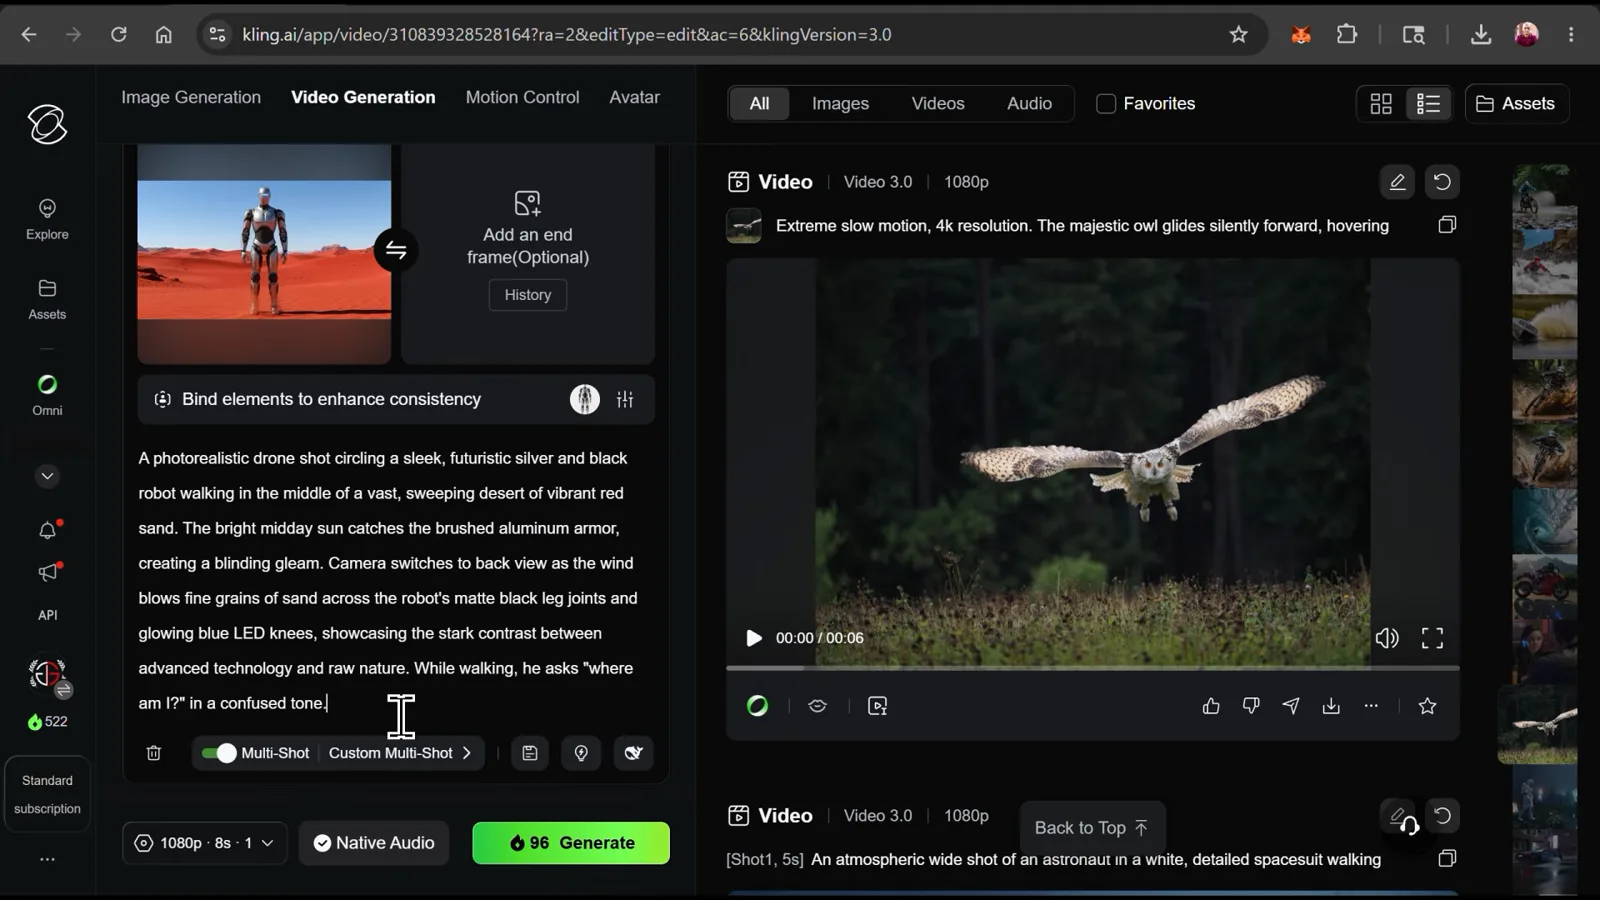
Camera grammar plus a quoted line — that is a complete Kling 3.0 prompt.Watch at 11:52