

How to Use Meta Muse on Mac: The 2026 Desktop Guide
Muse is Meta's personal AI agent — it already plans trips, buys tickets and watches your flight on iPhone and Android, which our Muse Spark mobile guide covers step by step. On September 18, 2026, Meta brought the agent to the Mac, where it can work across your apps, files, calendar, notes and messages, and manage third-party Connectors from one place. This guide focuses on the desktop side: getting the app, granting permissions, delegating a real task, dictating into any window, and keeping control of what Muse can touch. Every step matches a frame from a hands-on walkthrough by the Julian Goldie SEO channel on YouTube, plus official frames from the Tool Finder explainer, with timestamps linking back to the source videos.
Source & credits
Screenshots in this guide are captured from Julian Goldie SEO's public walkthrough video. Every step links back to the exact moment it shows, so you can follow along.
Julian Goldie SEO ↗Get Muse running on your Mac
- 1
Check your Mac, then download the app
The Mac release is a small native app rather than an Electron wrapper — the walkthrough clocked it at roughly 16 MB — and it shipped in beta. You need a recent machine: the recording runs on Apple Silicon (M1 or later) with macOS 15 or newer, so check your chip and macOS version before installing. The app is free to download, and Meta positions Muse on Mac as the same agent that launched on mobile in September, now able to reach across your desktop.
Free on both stores — the Mac build is the native, beta release.Watch at 6:59 - 2
Sign in with your Meta account
Open muse.meta.com or launch the desktop app and sign in with the same Meta account you use on your phone, so your chats and memory carry over. The official page greets you with one field — mobile number or email — and a single blue Continue button. First-time users create the account here; existing Meta AI users go straight in.
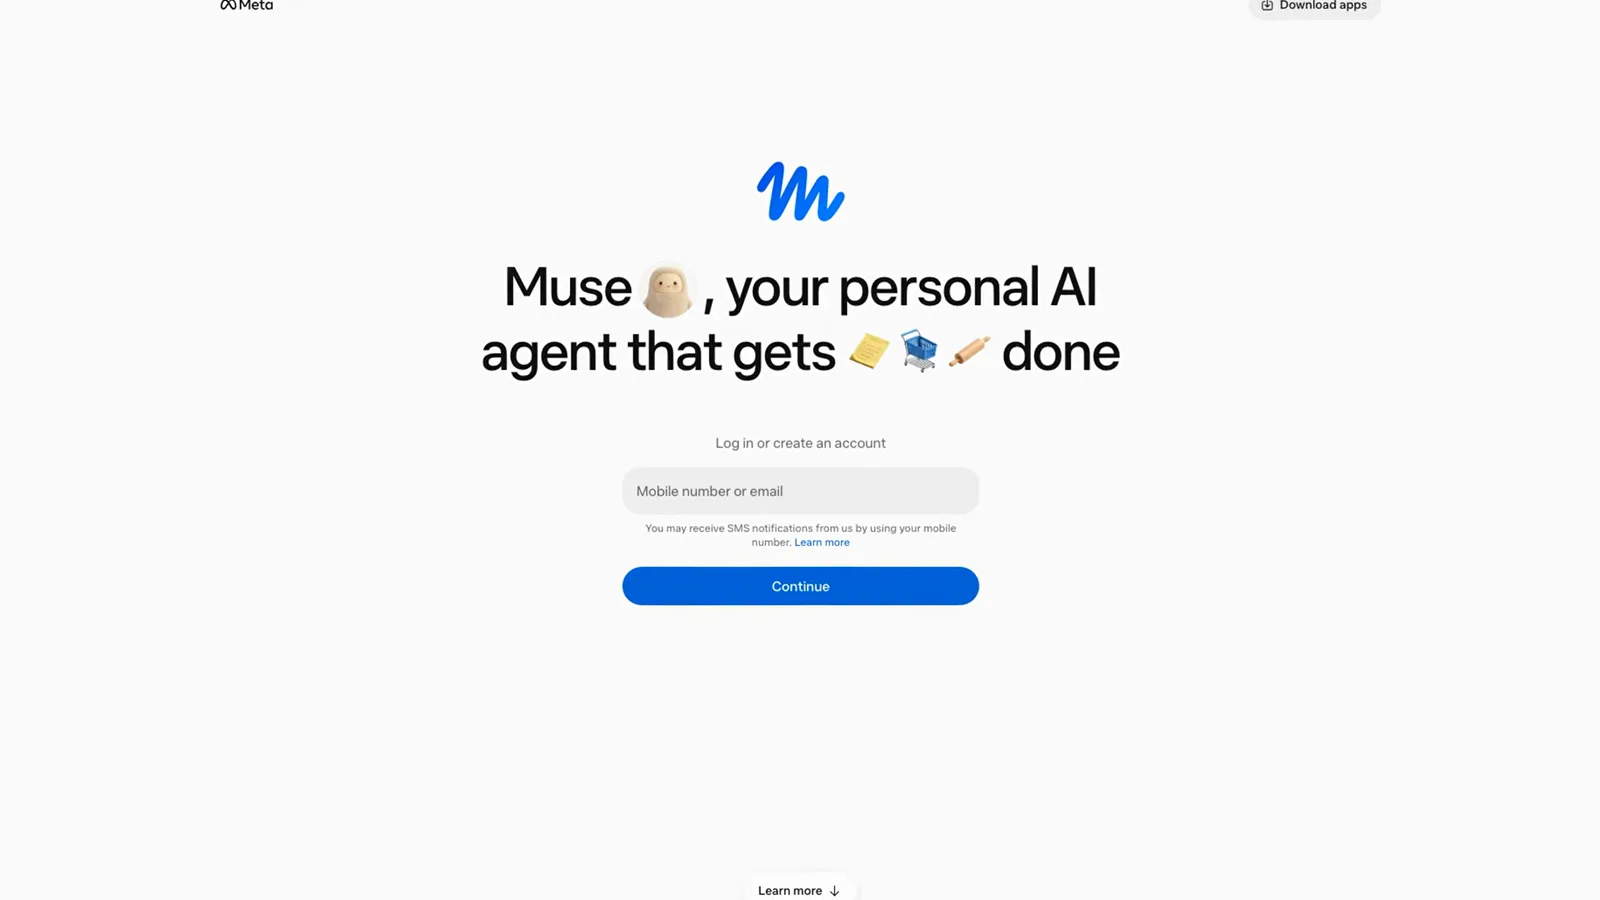
One account for phone and Mac — memory follows you across devices.Watch at 6:50 - 3
Meet the desktop home screen
The home screen opens on a single question — What are you thinking this evening? — above one composer. Tabs for Try Meta AI, Ask anything and Take action switch the assistant's mode, while suggestion chips like Plan a perfect Saturday or Recap my calendar and email show the kind of multi-step work Muse expects. The left rail holds Media, Artifacts, Scheduled, pinned routines and your full History, so every past session stays one click away.
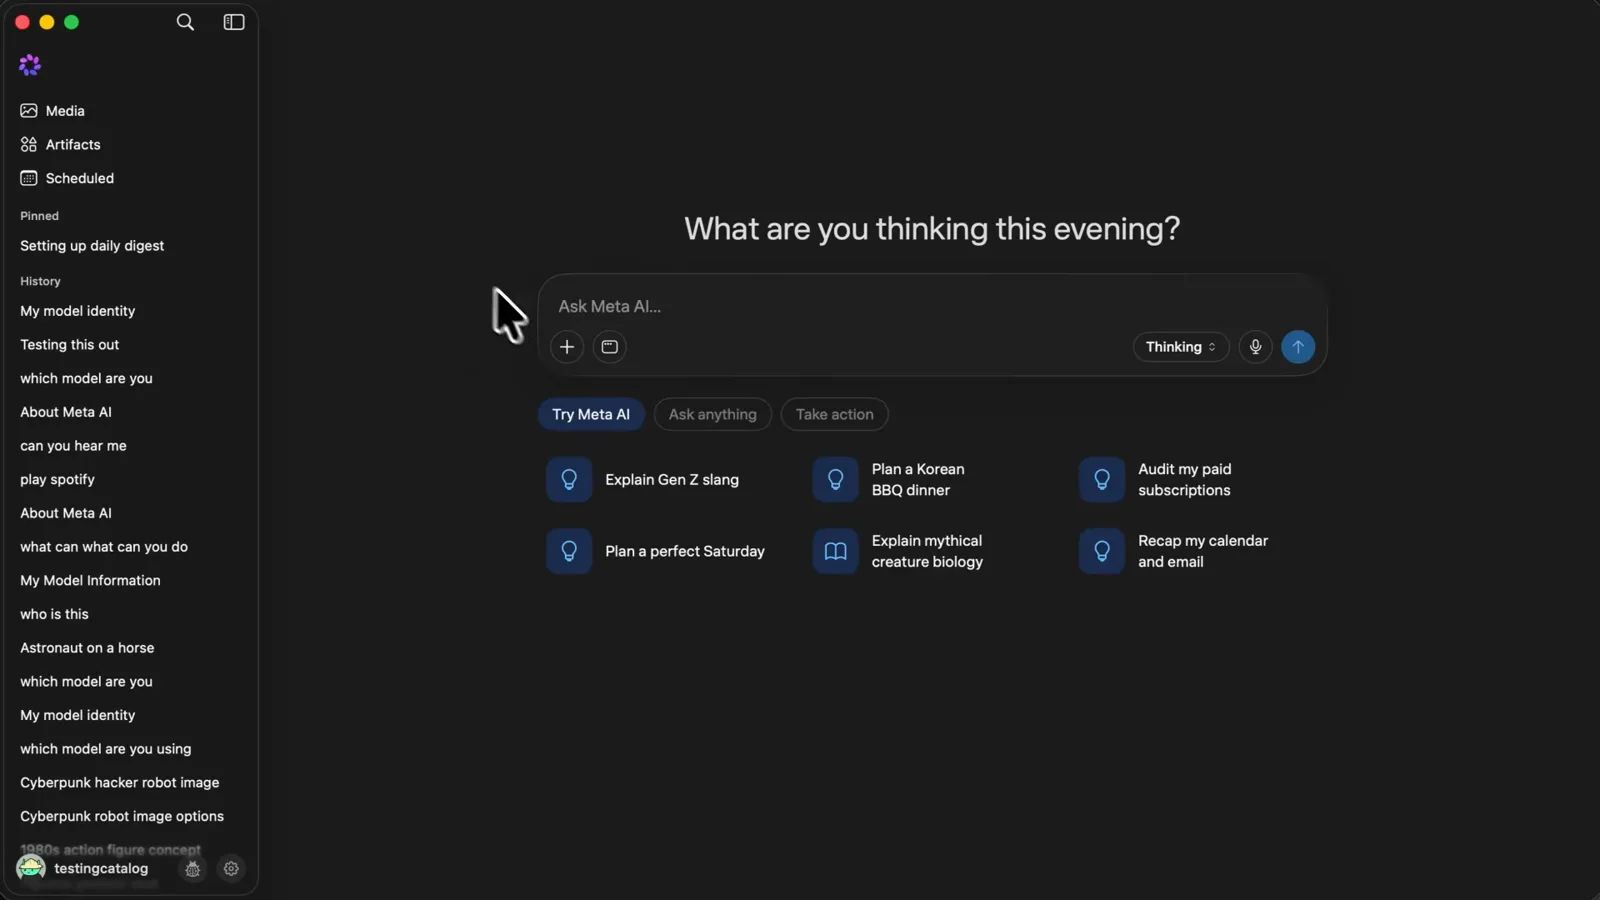
One composer, three modes, and your whole history down the left side.Watch at 6:05 - 4
Grant the required permissions in Settings
Open Settings and walk the left tabs: General, Dictation, Window attachment, Privacy & safety. The Dictation pane lists exactly what macOS will ask for — Microphone, Accessibility and your input source — plus toggles like Save transcription after dictation and the shortcut that triggers dictation. Approving these once is what lets Muse hear you and act inside other apps later, and every one of them can be switched off again from the same pane.
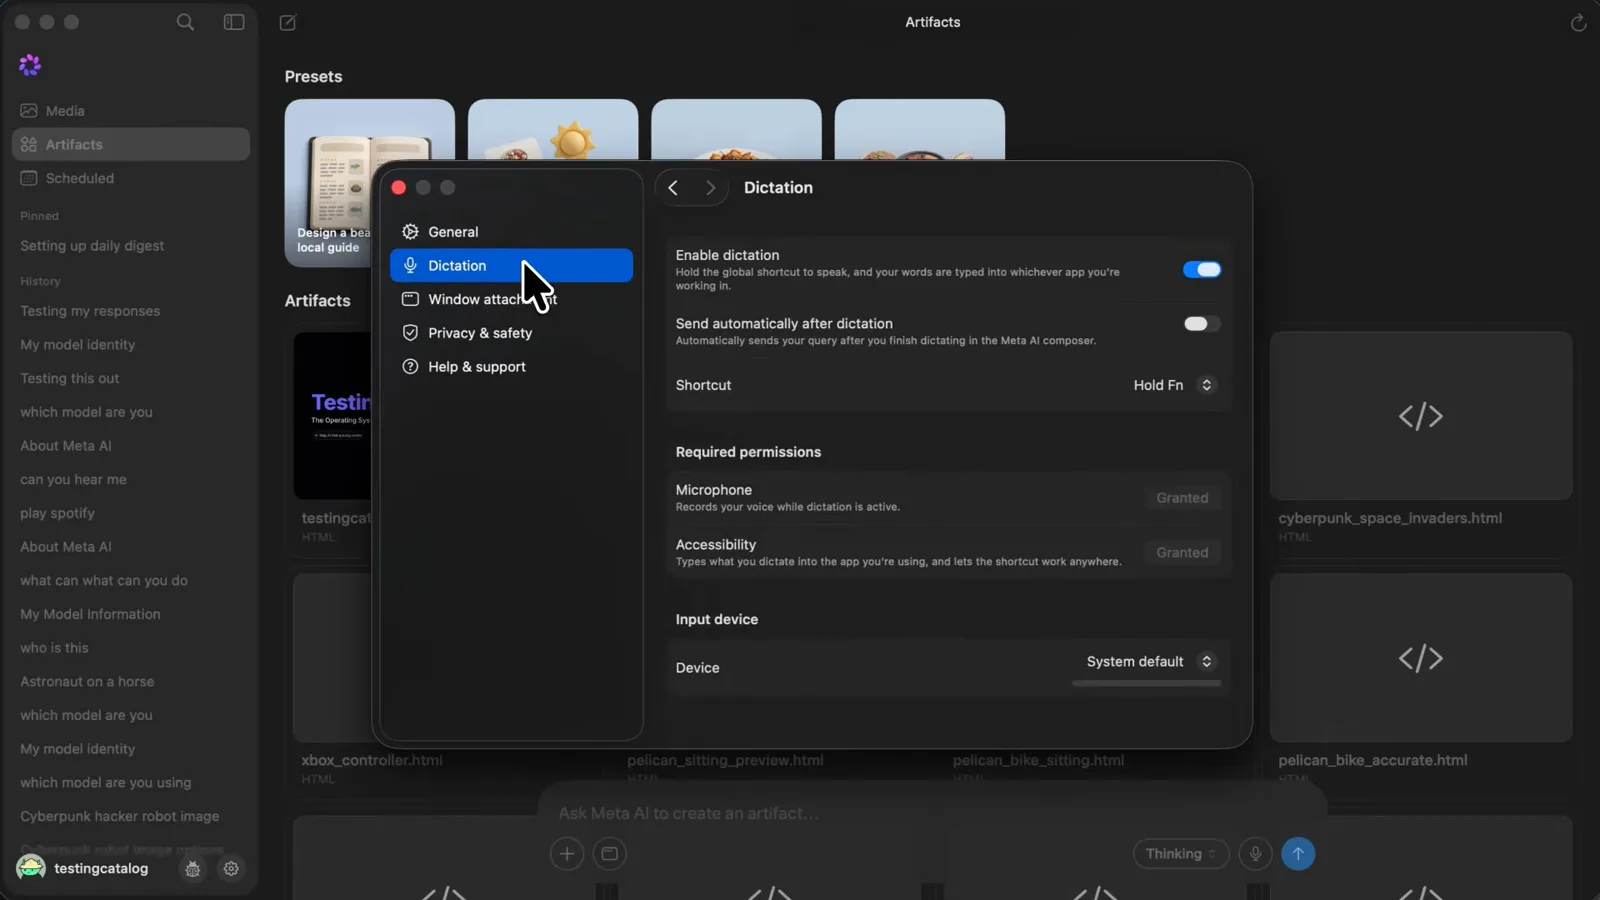
Microphone, Accessibility, input source — approve once, revoke anytime from this pane.Watch at 5:26
Delegate a real task and watch it work
- 5
Send a specific, scoped prompt
The walkthrough delegates a real job: benchmark my organic performance against 5 top and comparable brands in my space — on-brand, on brief, what's driving the gap, and what should I change? Notice the shape of the request: a clear deliverable, an exact number of targets, and the questions the answer must settle. Muse treats it as a to-do, not a chat message, and starts planning before it answers.
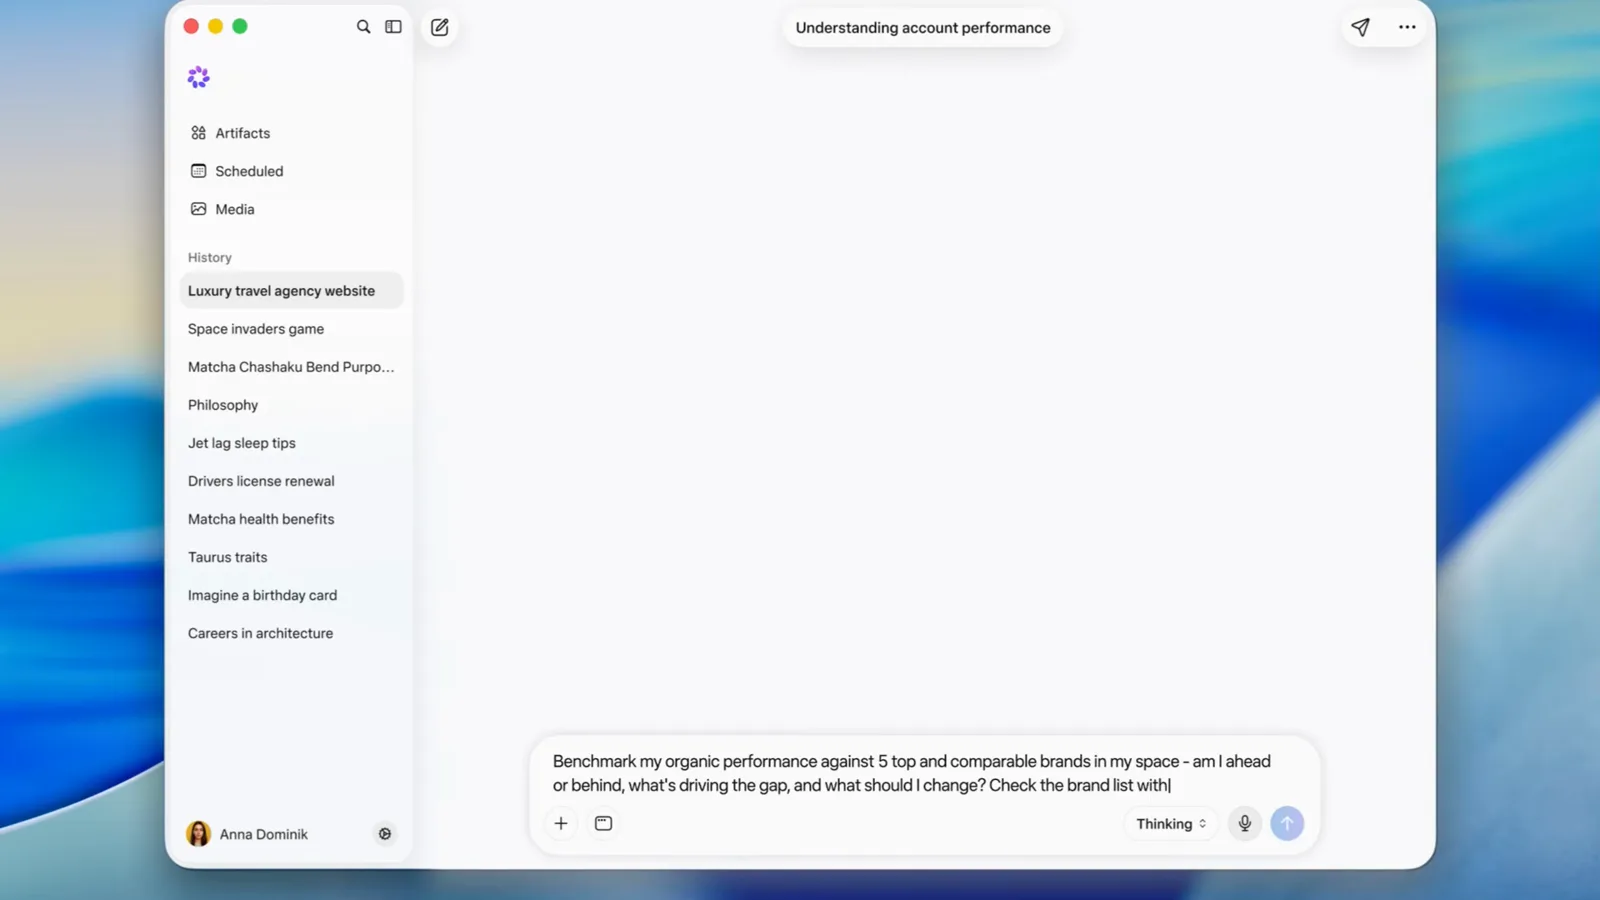
A deliverable, a number, and the questions to answer — that is the prompt shape Muse handles best.Watch at 7:04 - 6
Review the plan Muse proposes first
Instead of guessing, Muse replies with a proposed 5-brand benchmark set: five named accounts, each with a follower count and a one-line reason for inclusion — one bigger than you, one at your scale, two direct competitors, one format peer. This proposal step is where you steer. Swap a brand, argue a pick, or accept the set as is; nothing runs until you say so.
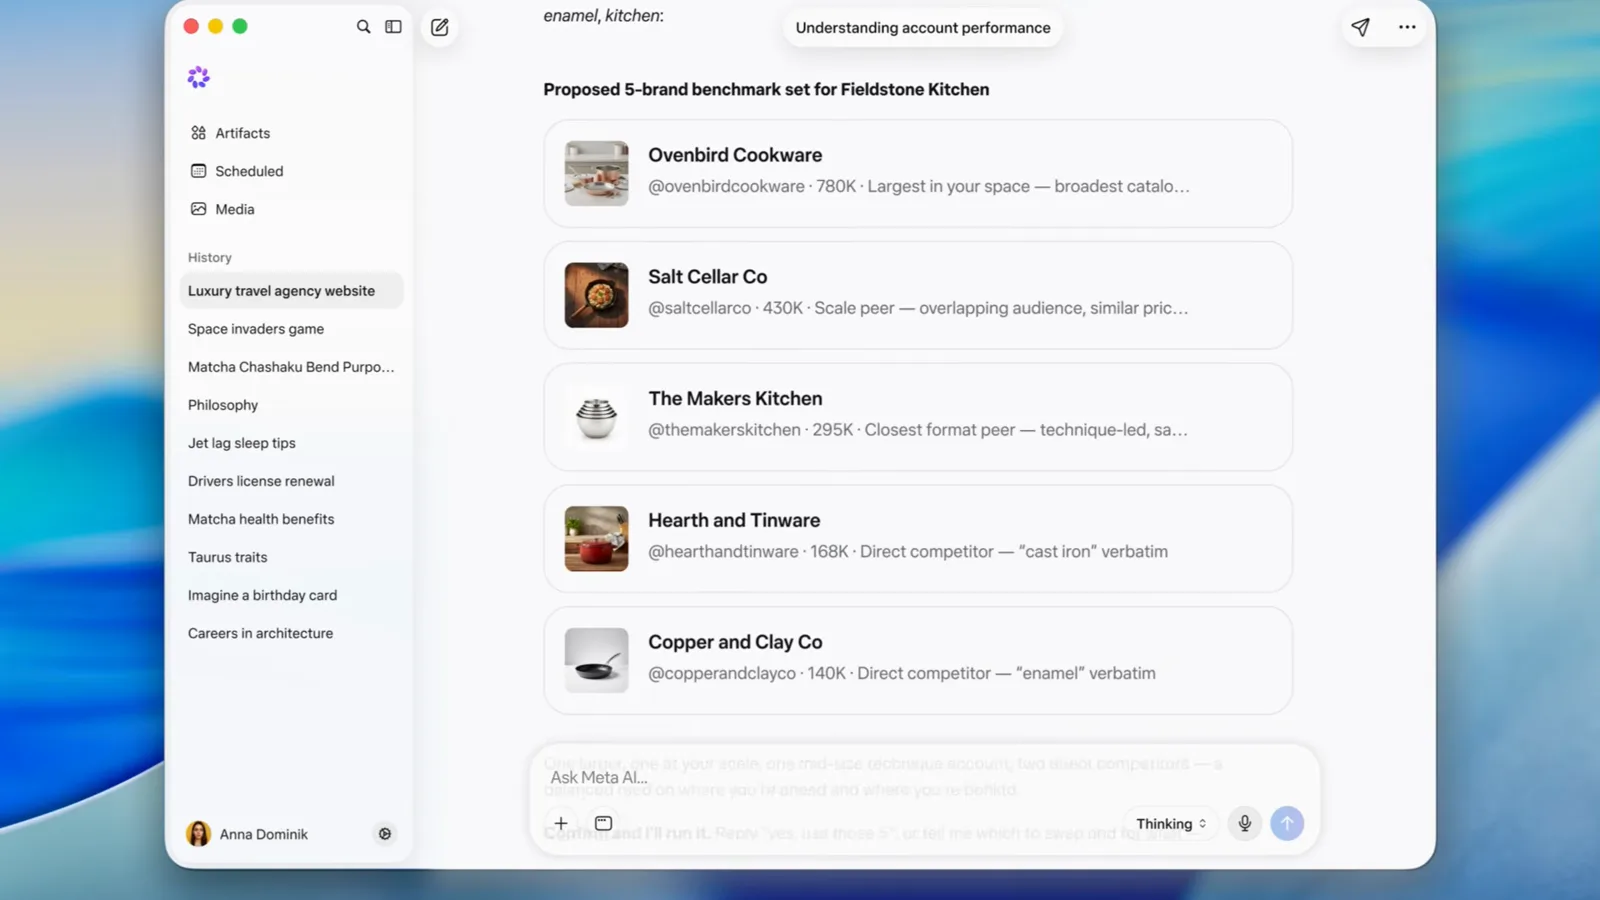
Five brands, five reasons — the agent shows its homework before doing the work.Watch at 7:09 - 7
Confirm, then let it run
Muse closes its proposal with an instruction: Confirm and run it. Reply Yes, use those 5 — and it waits. Only after your confirmation does the agent fan out across the accounts, pull the last 28 days of Instagram, Facebook and Threads activity, and assemble the comparison. That stop-and-ask behavior is the default for anything consequential, and it is why you can hand Muse real work without handing over judgment.
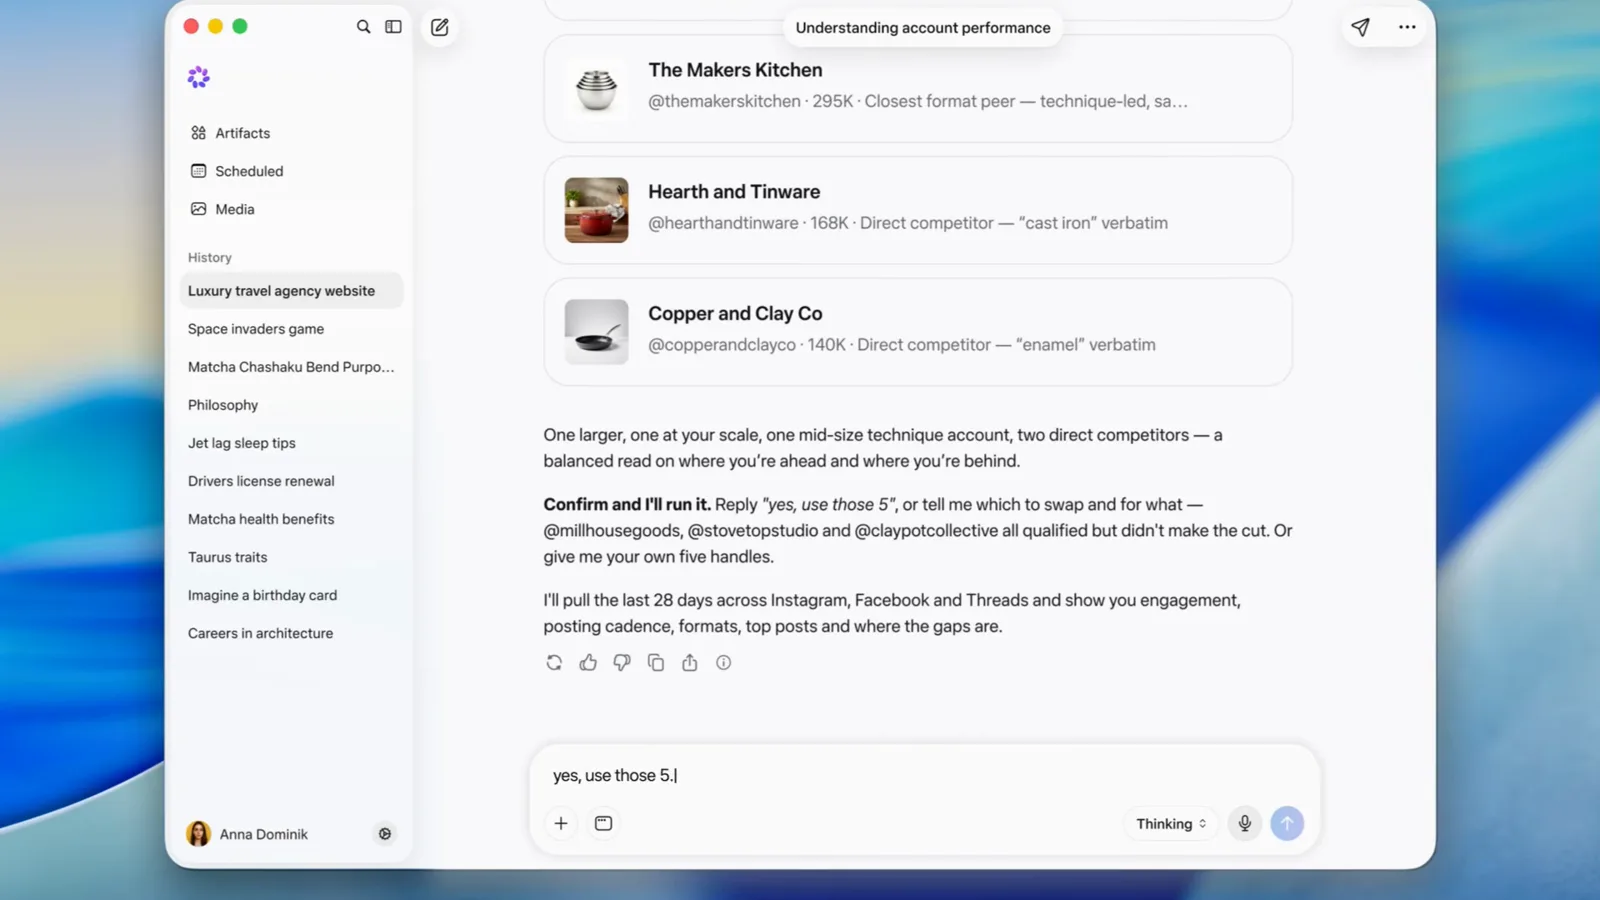
The agent stops at the gate — one reply sets it running.Watch at 7:15 - 8
Read the results and push follow-ups
The reply lands as structured data: a Follower growth, last 28 days table — 512,000 followers, 7,850 net engagement, 23 posts published, 22,500 top post — followed by a How you stack up vs. the 5 you confirmed breakdown per brand. From here, keep the thread alive: ask why one account outranks yours, or turn a finding into next week's content plan. Muse keeps the whole benchmark in memory within the conversation.
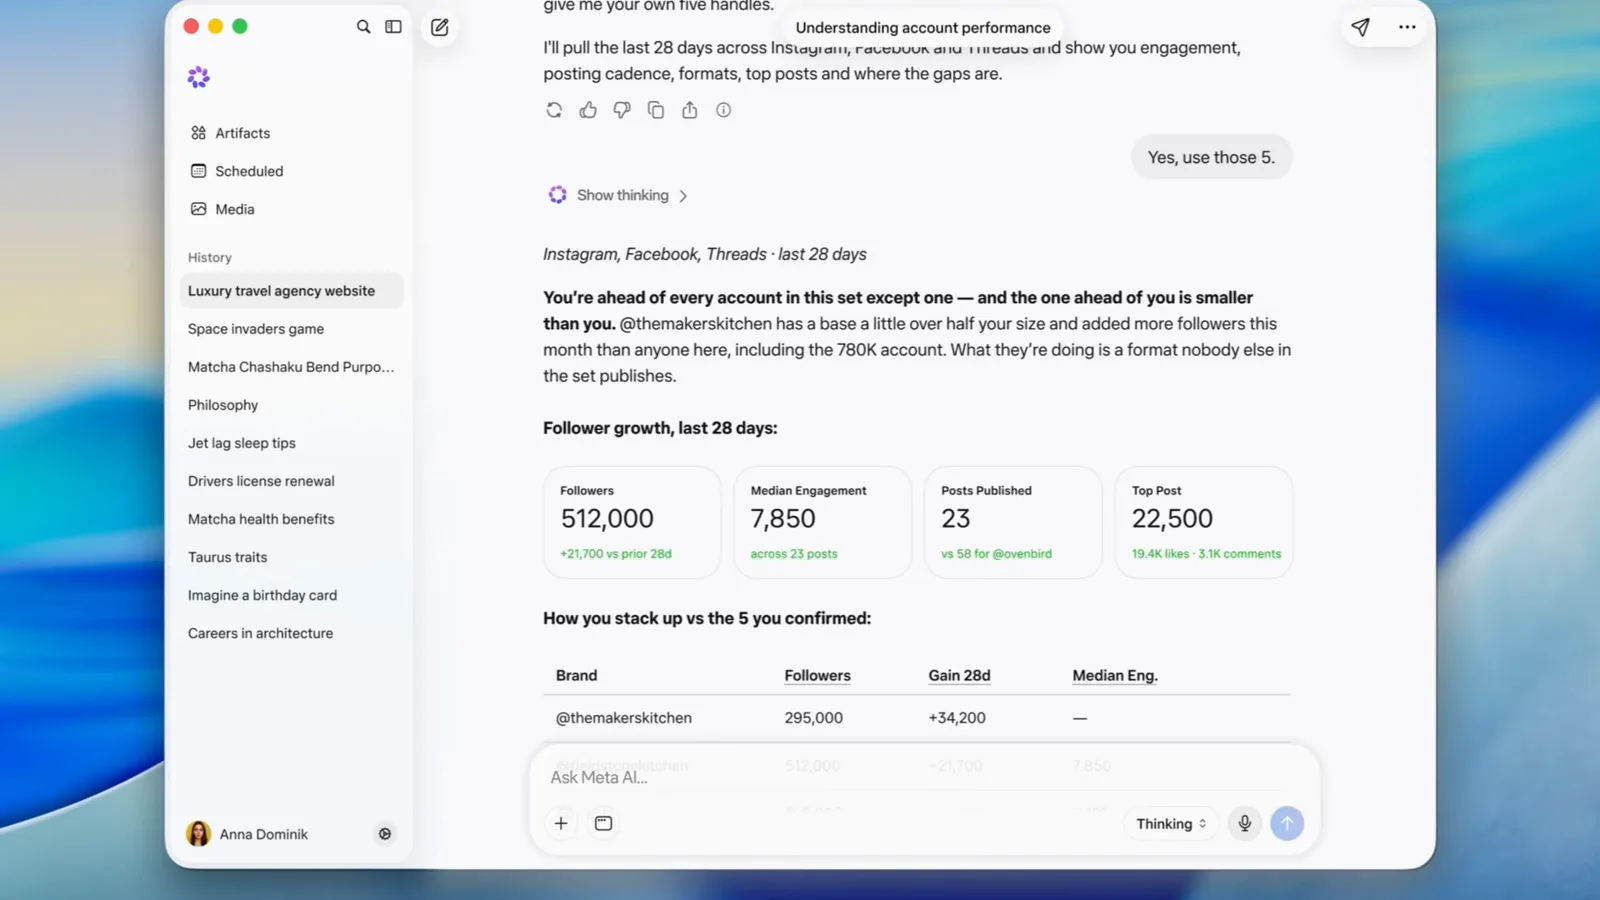
Numbers first, narrative second — and the thread stays open for follow-ups.Watch at 7:18
Talk instead of typing, share a window
- 9
Hold the shortcut and talk anywhere
Dictation is the feature you will use without thinking: hold the shortcut you set in Settings, speak, and the transcription types itself into whatever app has your cursor — Mail, Notes, Slack, a text message. The walkthrough shows it filling a Notes document live, with the waveform meter showing Muse is listening. Release the key and the text is just text; no copy-pasting from a dictation app.
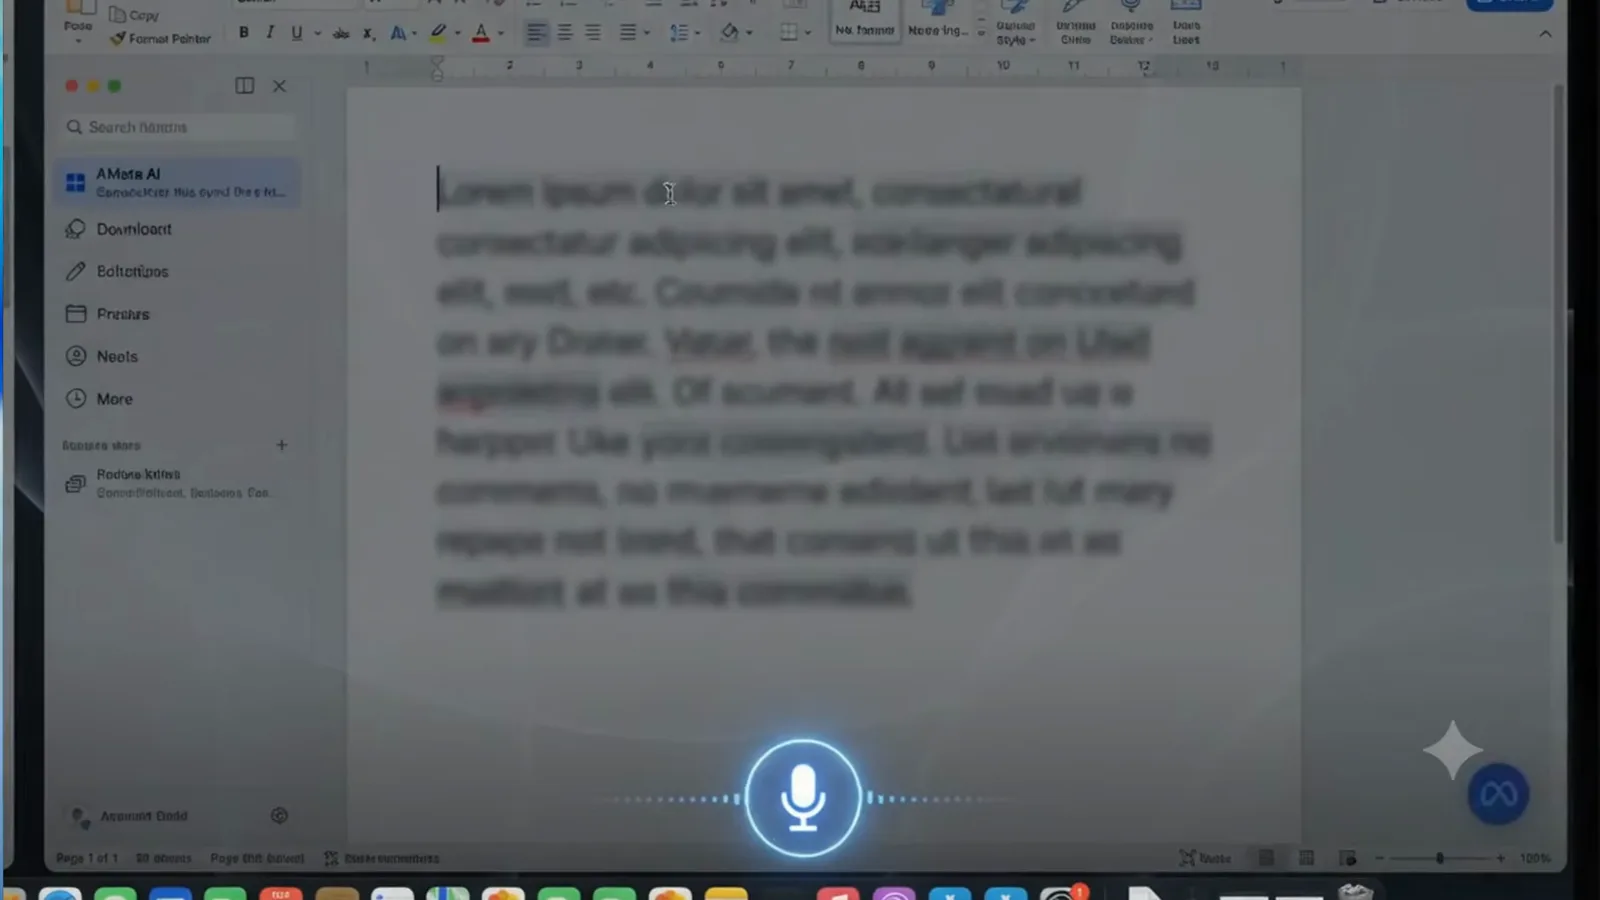
The cursor is the destination — dictation lands wherever you already are.Watch at 0:09 - 10
Attach a window for on-screen context
When a task depends on what is on your screen, click the window icon next to the composer. The Attach a window picker lists every open app — Calendar, Safari, Telegram, Warp, Activity Monitor — and says plainly that a screenshot of this window will be shared with Meta AI. Pick one and Muse reads that window's contents, so you can ask about a message thread or a calendar week without describing any of it.
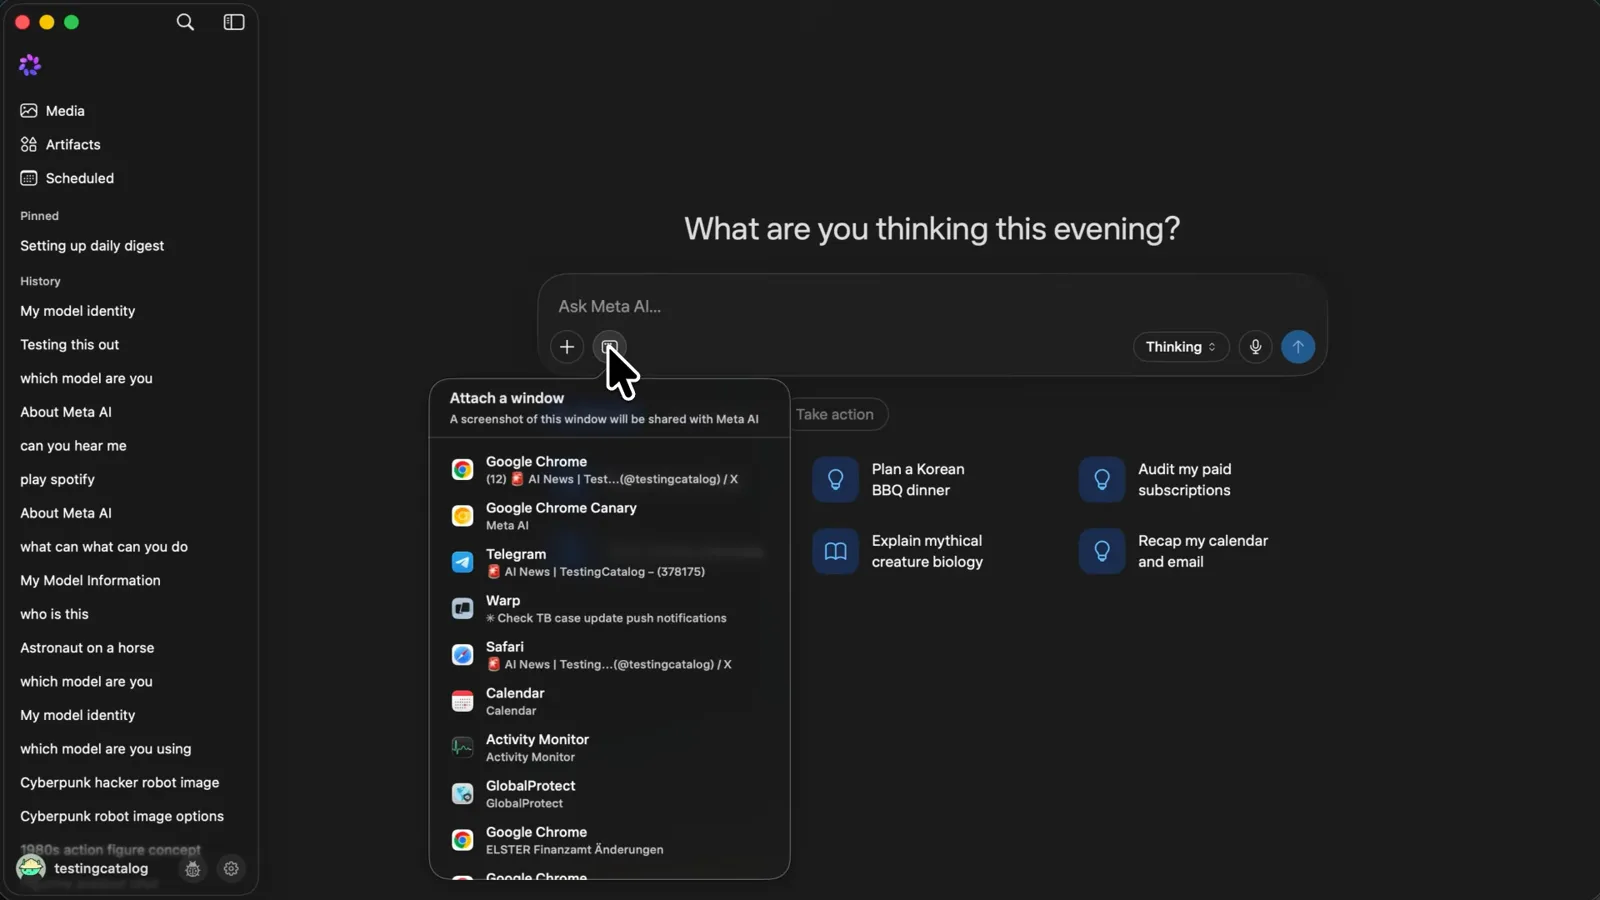
Point at the window instead of describing it — Muse reads the screenshot.Watch at 6:06 - 11
Enable window attachment and its permissions
Window attachment has its own Settings pane with an Enable window attachment toggle and two macOS permissions: Screen Recording, so the screenshot can be captured, and Accessibility, so Muse can relate what it sees to your request. If attaching a window ever fails, this pane is the fix — the toggle off or a denied permission is almost always the cause.
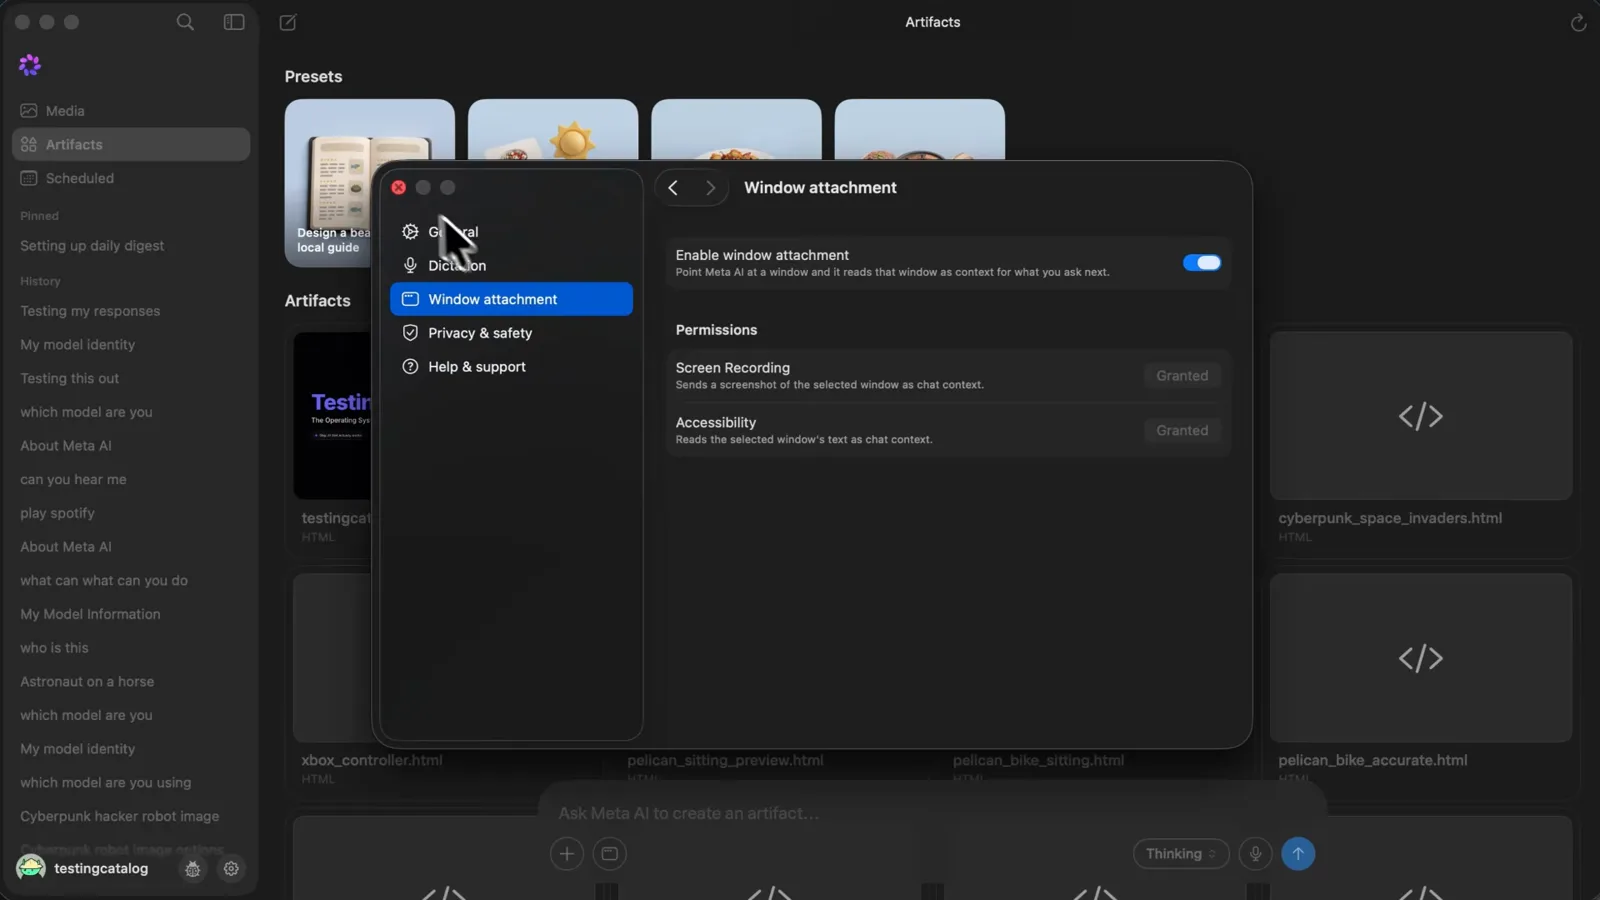
Two macOS permissions behind one toggle — grant them here if window sharing misbehaves.Watch at 4:37
Collect what Muse builds: artifacts, presets and media
- 12
Open the web pages Muse builds for you
Ask for a deliverable with structure — a landing page, a one-pager, a report — and Muse returns an artifact: a small web page rendered inside the app. The walkthrough's TestingCatalog AI artifact is a complete single-page site with its own navigation dots, built and previewed without leaving the conversation. Click any artifact to open it full-window, where it scrolls and links like a real page.
A full web page, generated and previewed in place — no editor, no export step.Watch at 5:25 - 13
Keep everything in the Artifacts library
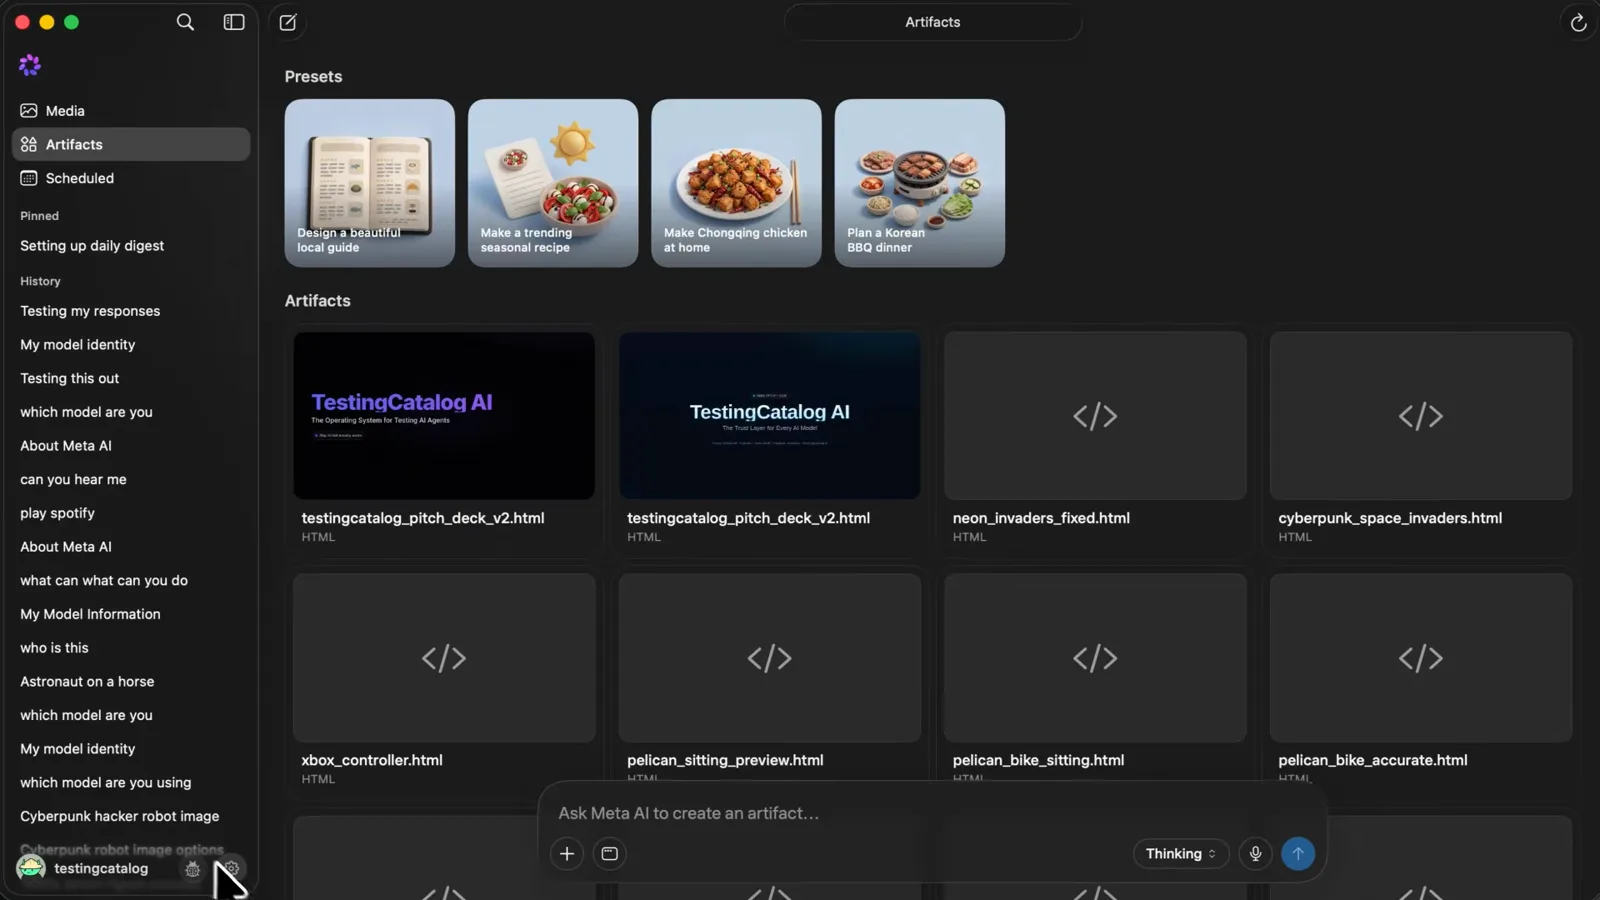
Everything Muse builds collects in the Artifacts tab: the html pages it generated, plus reusable Presets — recipe cards, report layouts, branded templates — shown as a grid above the composer. The walkthrough's library holds multiple TestingCatalog variants alongside empty slots for code files. Presets are the quiet productivity play: rerun a proven format with new inputs instead of re-prompting from scratch.

Generated pages below, reusable formats above — the library is where repeat work gets cheap.Watch at 5:23 - 14
Find images and video in Media
The Media tab is the gallery half of the workspace: a Presets row on top and a Creations grid below holding every image and video Muse has generated — the walkthrough's grid mixes news-style thumbnails, illustrations and video clips with play buttons. Click any tile to reopen it at full size, and treat the grid as your generation history across sessions.
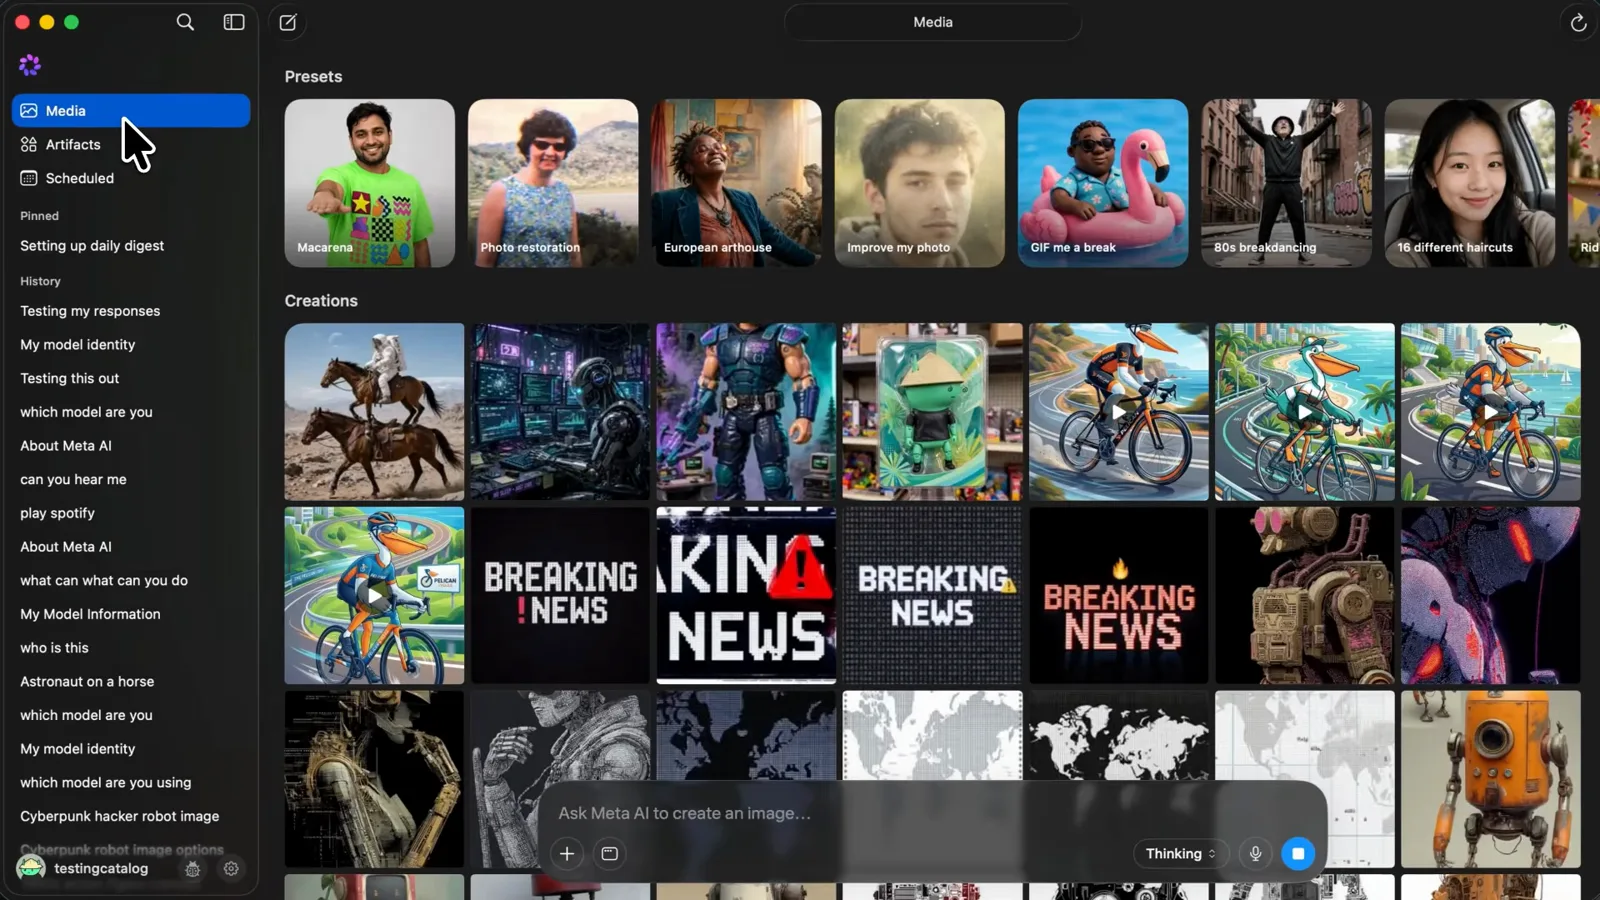
Every image and clip the agent makes lands here, one grid, all sessions.Watch at 6:10
Connectors, permissions and data controls
- 15
Connect your calendar and email
Muse's Connectors are what turn it from a chat window into an agent that knows your week. From the home chips — Recap my calendar and email is one — or through settings, you connect the apps you use daily: officially that list covers email, calendar and Instagram, with Gmail, Google Calendar, Google Workspace, Spotify, OpenTable and Ticketmaster among the named integrations, and Apple's own apps reachable on the Mac. For each connection you choose the depth of access — read-only is fine for a calendar recap, while sending email on your behalf needs more. If a task needs a connector that does not exist yet, Meta says Muse builds the tool itself.
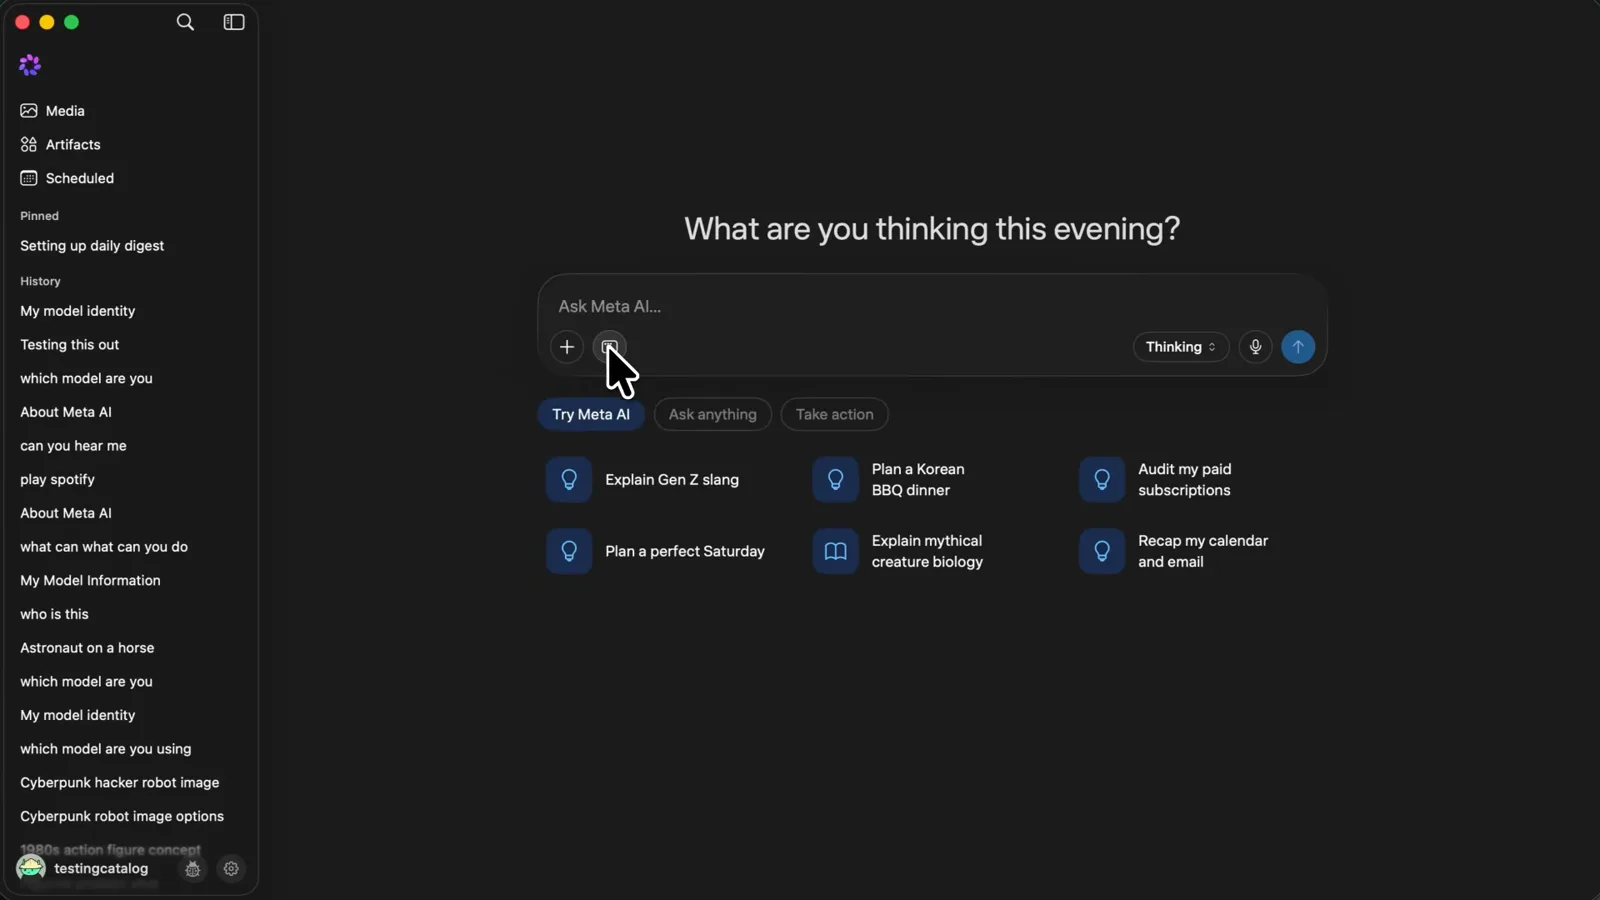
The calendar chip is the doorway — connect once, and recaps become one click.Watch at 5:16 - 16
Stay in control of access and training
Meta's own framing for the agent is AI that keeps you in control, and the controls are concrete: sensitive actions stop for your confirmation, every completed and planned action leaves an audit trail, and you can disconnect a service or tell Muse to forget a specific detail at any time. Muse never sees your passwords or payment methods — credentials go to secure storage it can use without reading — and conversations are not shared with Meta's ad systems. Training on your interactions is opt-out, and the switch lives in your Meta AI settings, so decide before you delegate.
Confirmation gates, an audit trail, and a training opt-out — check all three before delegating.Watch at 7:02
Frequently asked questions
Keep exploring
- Meta Muse tool profile: pricing, features and alternatives
- New to Muse? Start with the Muse Spark mobile guide
- Meta One vs Meta Verified: which plan to pick
- More picks: the best AI tools for productivity
- Meta Muse tips & tricks: 16 use cases worth setting up
- Meta Muse use cases: what people actually use it for