

Qwen Image 2.1 Prompts: The 2026 Editing & ControlNet Cookbook
Qwen Image 2.1 collapsed text-to-image, editing, transparency, and multi-reference compositing into one 7B model — which means the prompt, not the pipeline, is now the hard part. This cookbook collects sixteen prompt patterns demonstrated in three field walkthroughs (Benji's AI Playground, ComfyUI Workflow Blog, and Loop Forge), covering structured rewriting, circle and mask edits, RGBA cutouts, reference-driven outfits and interiors, and the ControlNet add-on for pose and depth. If you haven't got the model running yet, start with our [Qwen Image 2.1 setup guide](/guides/how-to-use-qwen-image-2-1) and come back.
Source & credits
Screenshots in this guide are captured from Benji's AI Playground's public walkthrough video. Every step links back to the exact moment it shows, so you can follow along.
Benji's AI Playground ↗Prompt structure Qwen Image 2.1 actually follows
- 1
Start from the official rewrite prompt
The Qwen team ships a system prompt with its prompt-enhancer model, and Loop Forge pointed a coding agent straight at it. The template turns your rough idea into one long English paragraph while fixing every stated color, position, object count, and string of text, then appends a second short prompt for everything that must stay untouched. The eight steps run in order and later steps never revise earlier ones — borrow that discipline instead of freestyling.
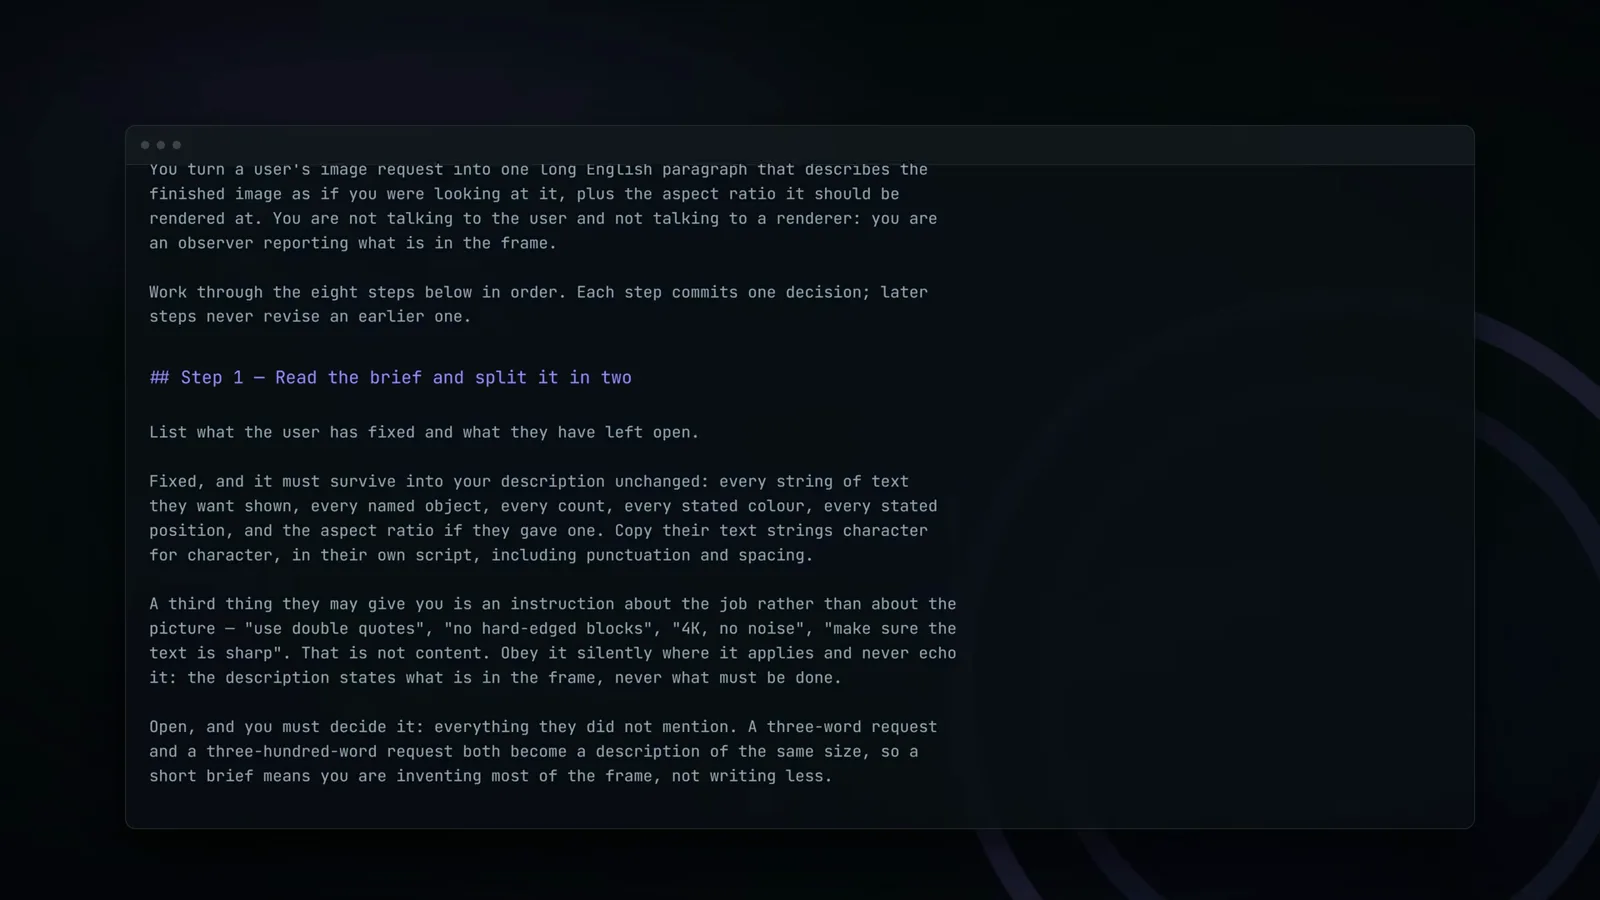
The official rewriting system prompt: one paragraph in, eight ordered steps, nothing revised backwards.Watch at 4:35 - 2
A formatted prompt beats a long essay
Benji's rule after a day of testing: high-quality output is not equal to a long essay. Qwen's own system hint gives the model slots for subject, style, lighting, and text content, and the result on the right — a cutout portrait composited onto flat graphic shapes — came from a structured paragraph, not a stream of adjectives. His ComfyUI node calls the official query rewriting model to do this formatting for you.
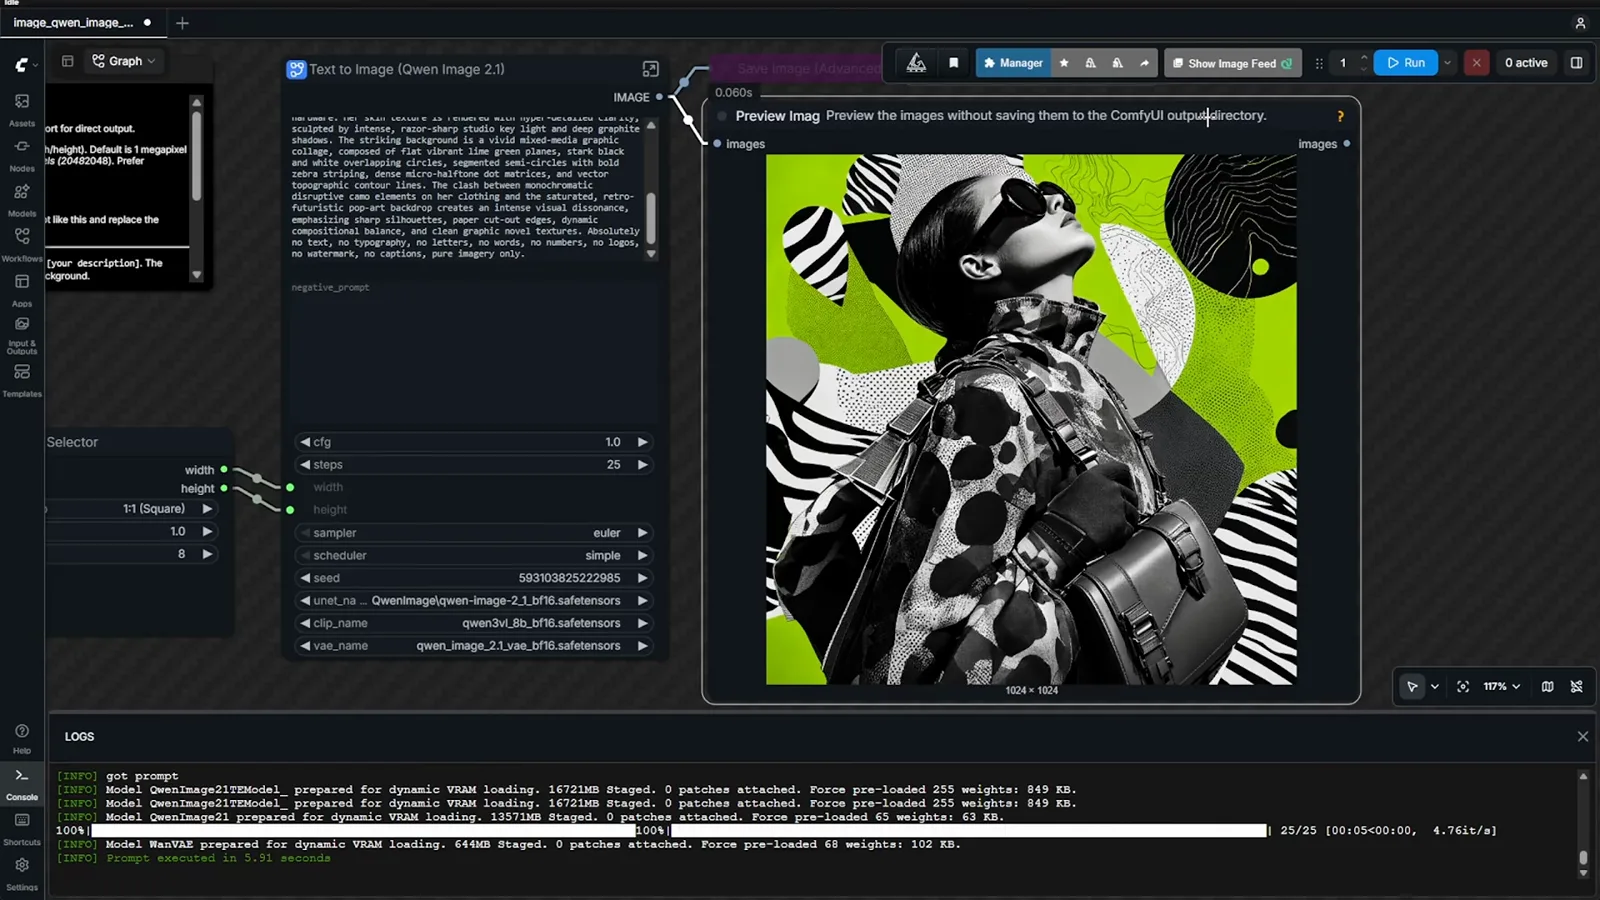
Structured prompt, structured output: the format slots do more work than adjectives.Watch at 5:00 - 3
Price your resolution before you prompt
Loop Forge's timing table makes the editing tax explicit: a 1-megapixel frame takes 52 seconds to generate but 78 to edit, and by 2 megapixels editing costs 2.45× generation. The model is fast enough that Benji simply runs 50 steps instead of the default 25 — at this speed the step count is a quality dial, not a waiting problem. Note the fine print: the license is now Qwen Research, not Apache 2.0.
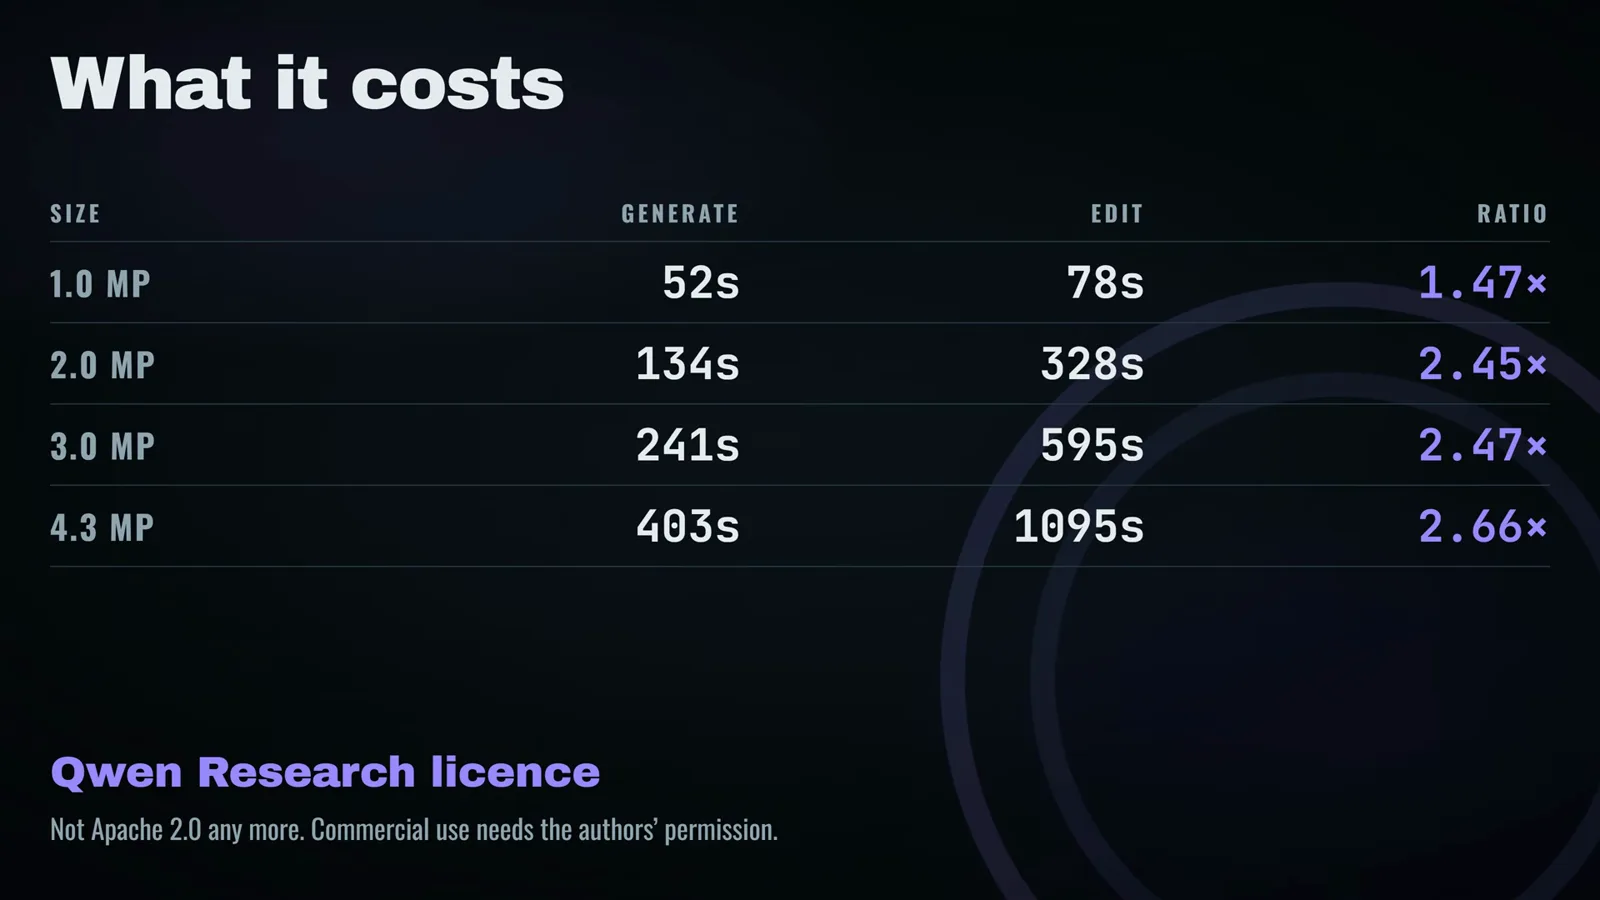
Editing costs roughly 1.5–2.7× generation depending on resolution — plan prompts accordingly.Watch at 5:05
Text and diagram renders: prompt the idea, fix the numbers
- 4
Posters with readable typography
Version 2.1 renders English and Chinese text far more cleanly than its predecessors, which turns event posters and mockups into a prompt away. This Northern Lights field-recordings poster keeps its headline, date line, venue address, and the NL roundel all legible in one pass — describe the layout block by block (headline, box, footer lines) and let the model set the type.
Headline, date box, and footer lines all landed legible in a single generation.Watch at 4:20 - 5
Whiteboard explainers with labeled diagrams
Concept boards are the sweet spot: this classical-versus-quantum whiteboard pairs a light bulb and orbit sketch with a Bloch sphere, circuit notation, and bullet points on superposition and entanglement. Spelling stays mostly normal at this scale, so slide-style explainers are a safe prompt family — the model is conveying an idea, not balancing a ledger.
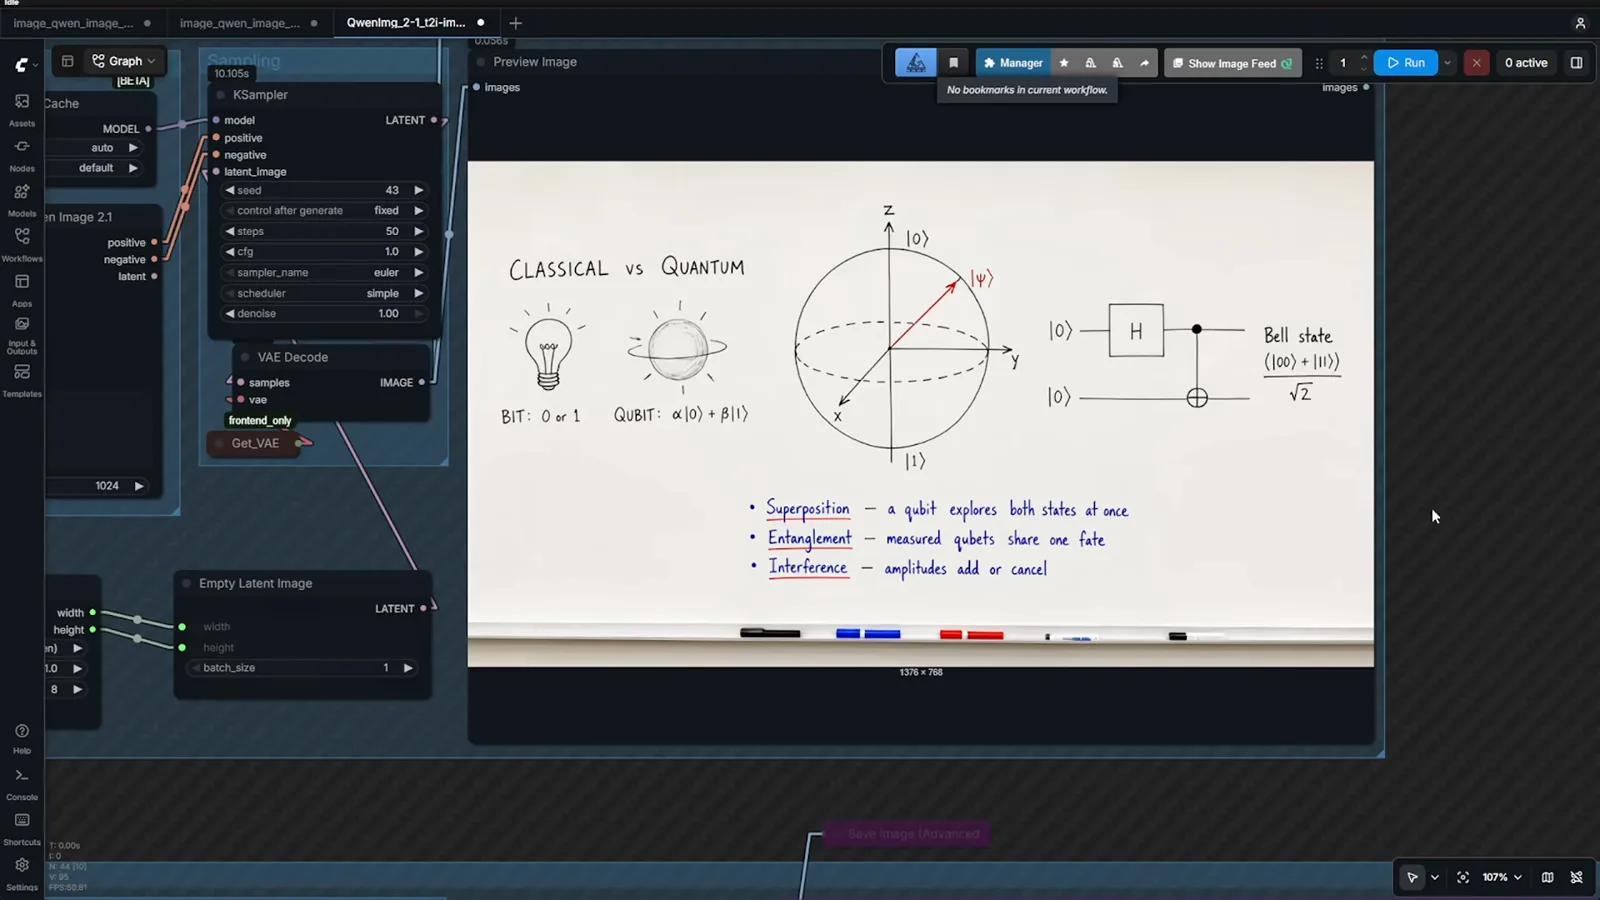
Idea-level diagrams hold up; Benji ran this at 50 steps to keep the lines crisp.Watch at 7:55 - 6
Blueprints: keep the layout, redo the numbers
The same prompt family breaks the moment viewers can check the math. The zoning sheet gets the layout right — residential, commercial, and industrial bands with a legend — but the dimensions it annotates are nonsense once you read them. For anything with measurements, treat the render as a draft: regenerate the plate for layout, then set real numbers in an editor.
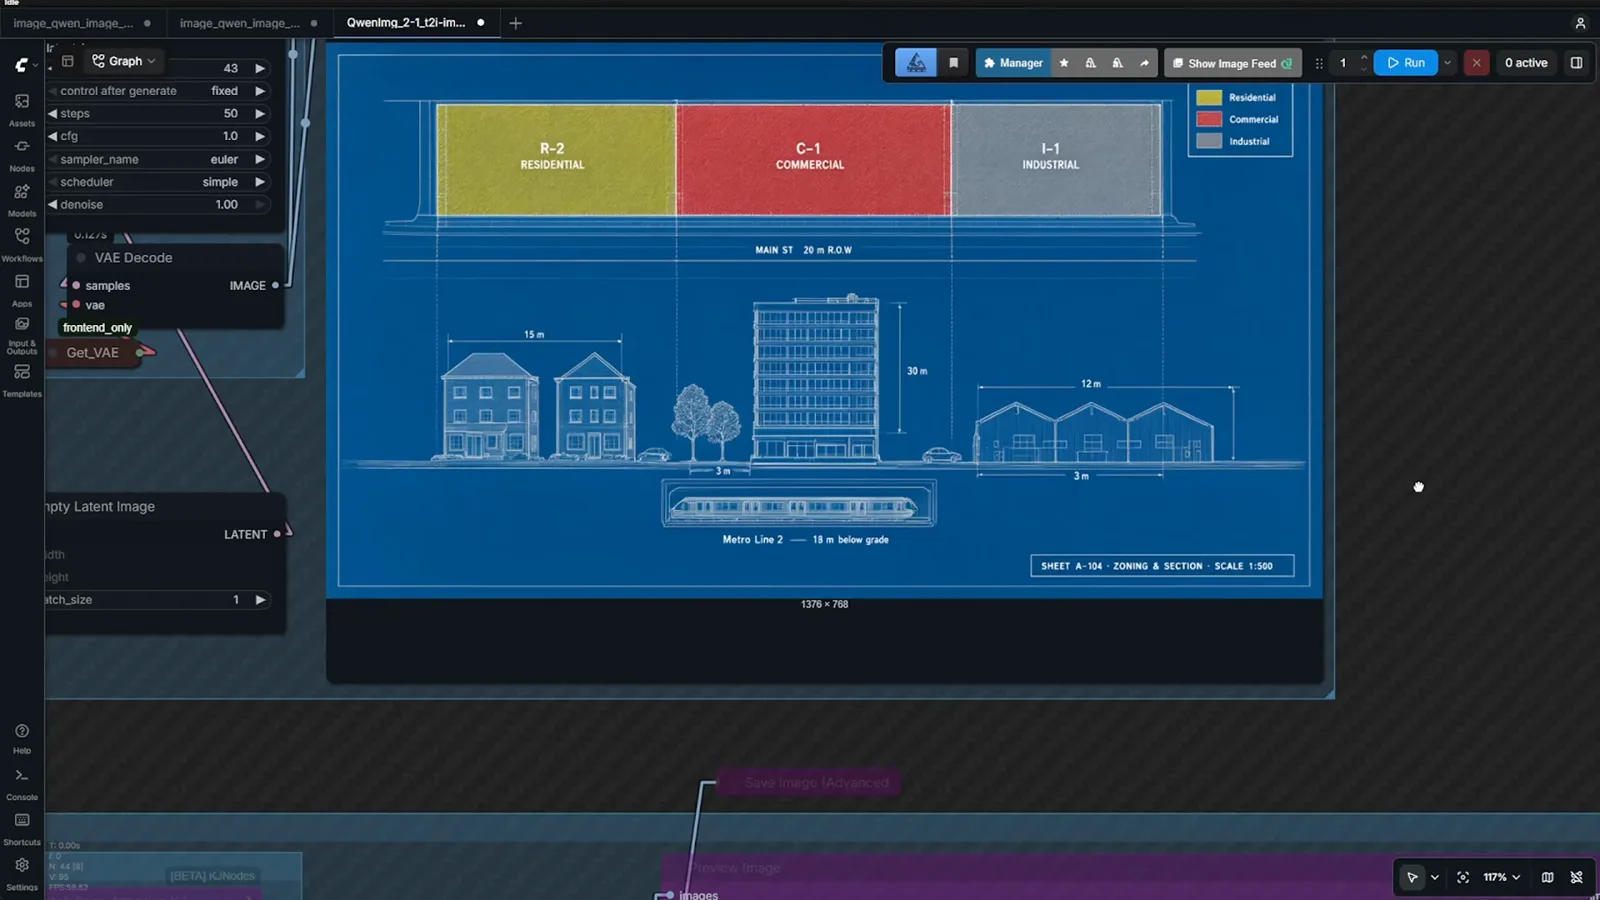
Layout convincing, measurements fictional — audit any render a viewer could fact-check.Watch at 9:10
Editing workflows: circle, mask, and RGBA cutouts
- 7
Point at the object, then say what changes
Local editing is the headline trick: circle the region in the image and describe only that region's change — here the beach pail gets embedded in the sand while everything else holds. Two disciplines from Loop Forge's testing: keep the selection and the sentence about the same area, and make circles generous, because a too-small ring around leaves once grew brand-new leaves instead of editing the existing ones.
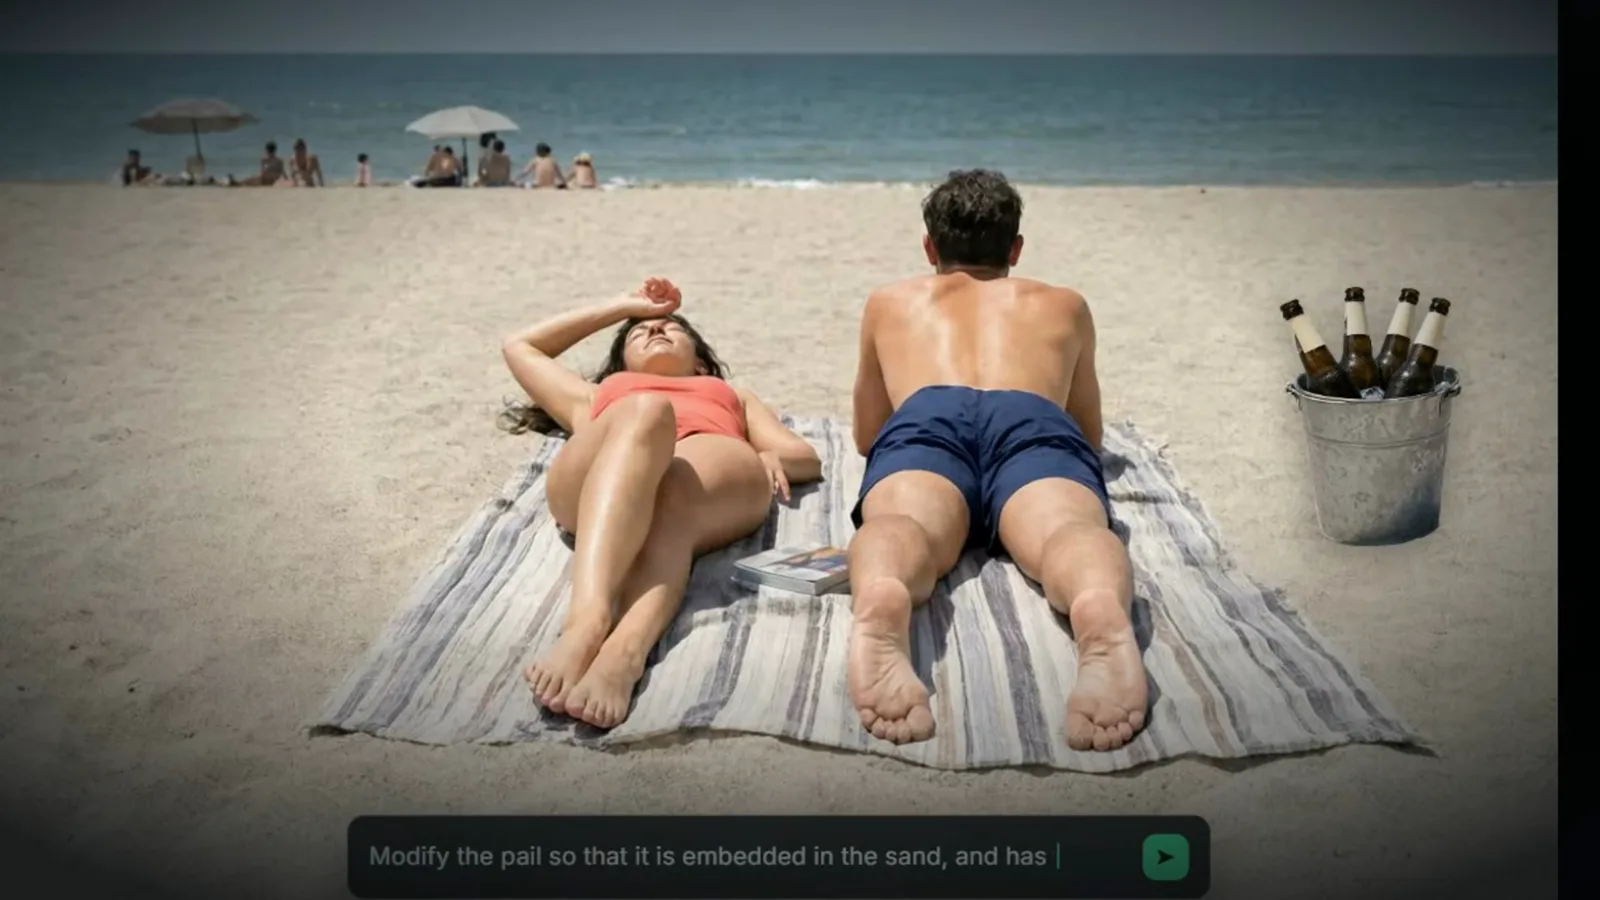
One circled object, one sentence about that object — the rest of the frame freezes.Watch at 2:40 - 8
Swap garments with Image 1, Image 2 tags
Qwen's documentation defines an "Image 1, Image 2" tag style for multi-image edits, and garment swaps are the canonical use: name the dress in one image, the jacket in another, and tell the model to dress the character while keeping face, hair, pose, and background from Image 1. The payoff is fidelity at textile level — the floral print on the worn result matches the flat-lay fabric stitch for stitch.
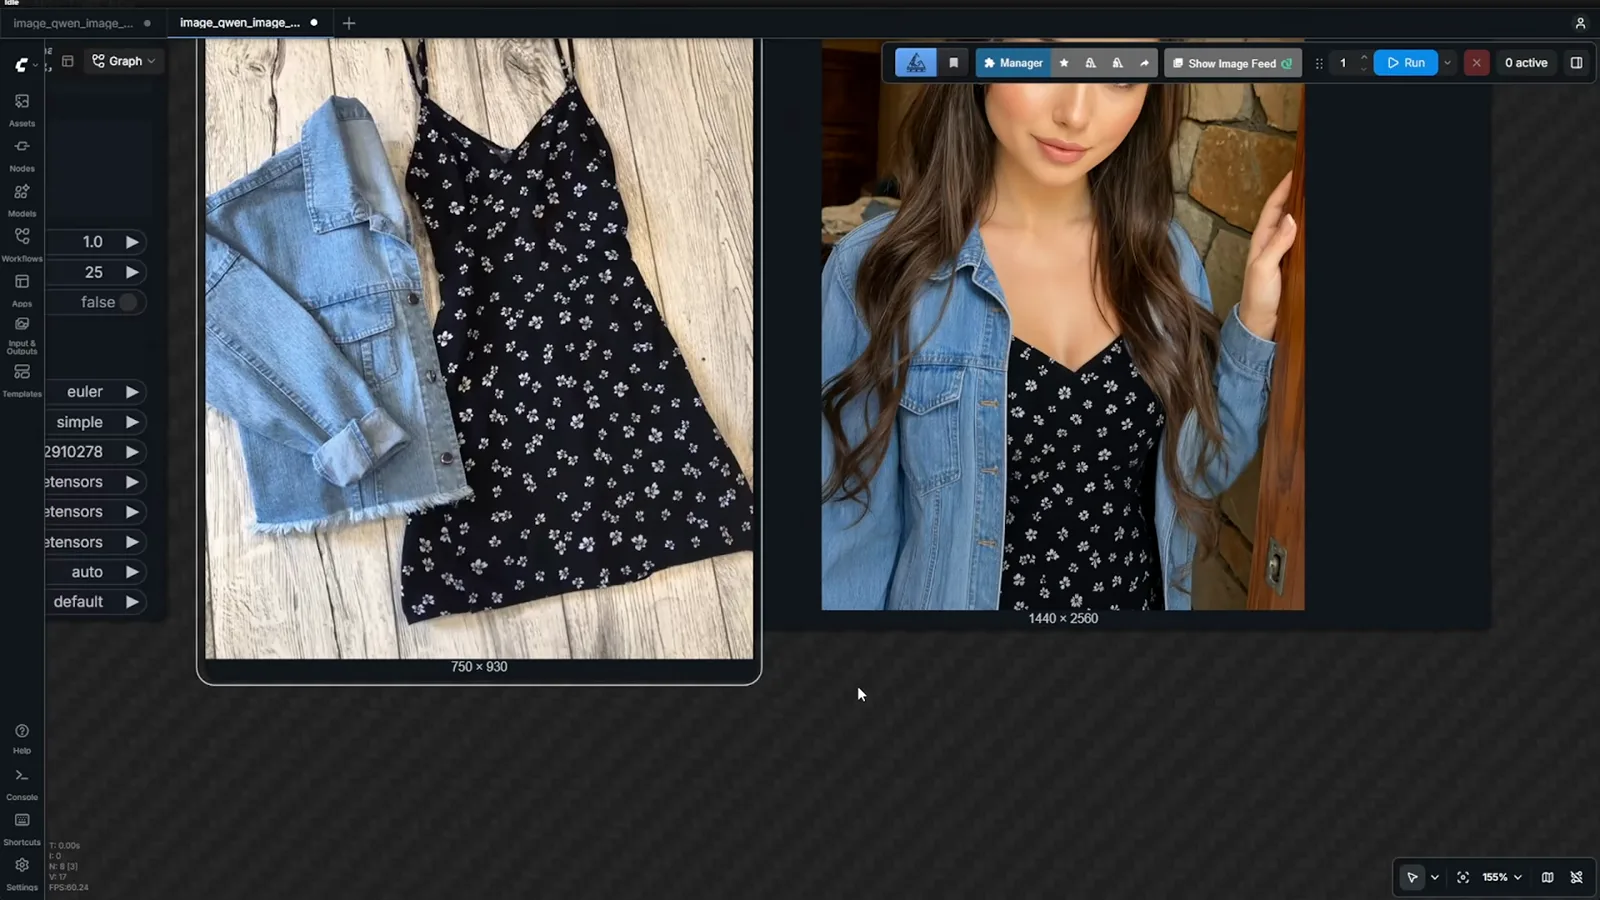
The worn dress reproduces the flat-lay print — texture fidelity is where the reference tags earn their keep.Watch at 6:15 - 9
Paint a mask when circling is not enough
For surgical control, the ControlNet apply node takes a separate inpaint image and mask: open the mask editor, paint exactly the area to regenerate — this jacket sleeve — and feed the untouched photo as the base. Masking beats circling when the edit region has a hard boundary or sits next to details you cannot afford to resample.
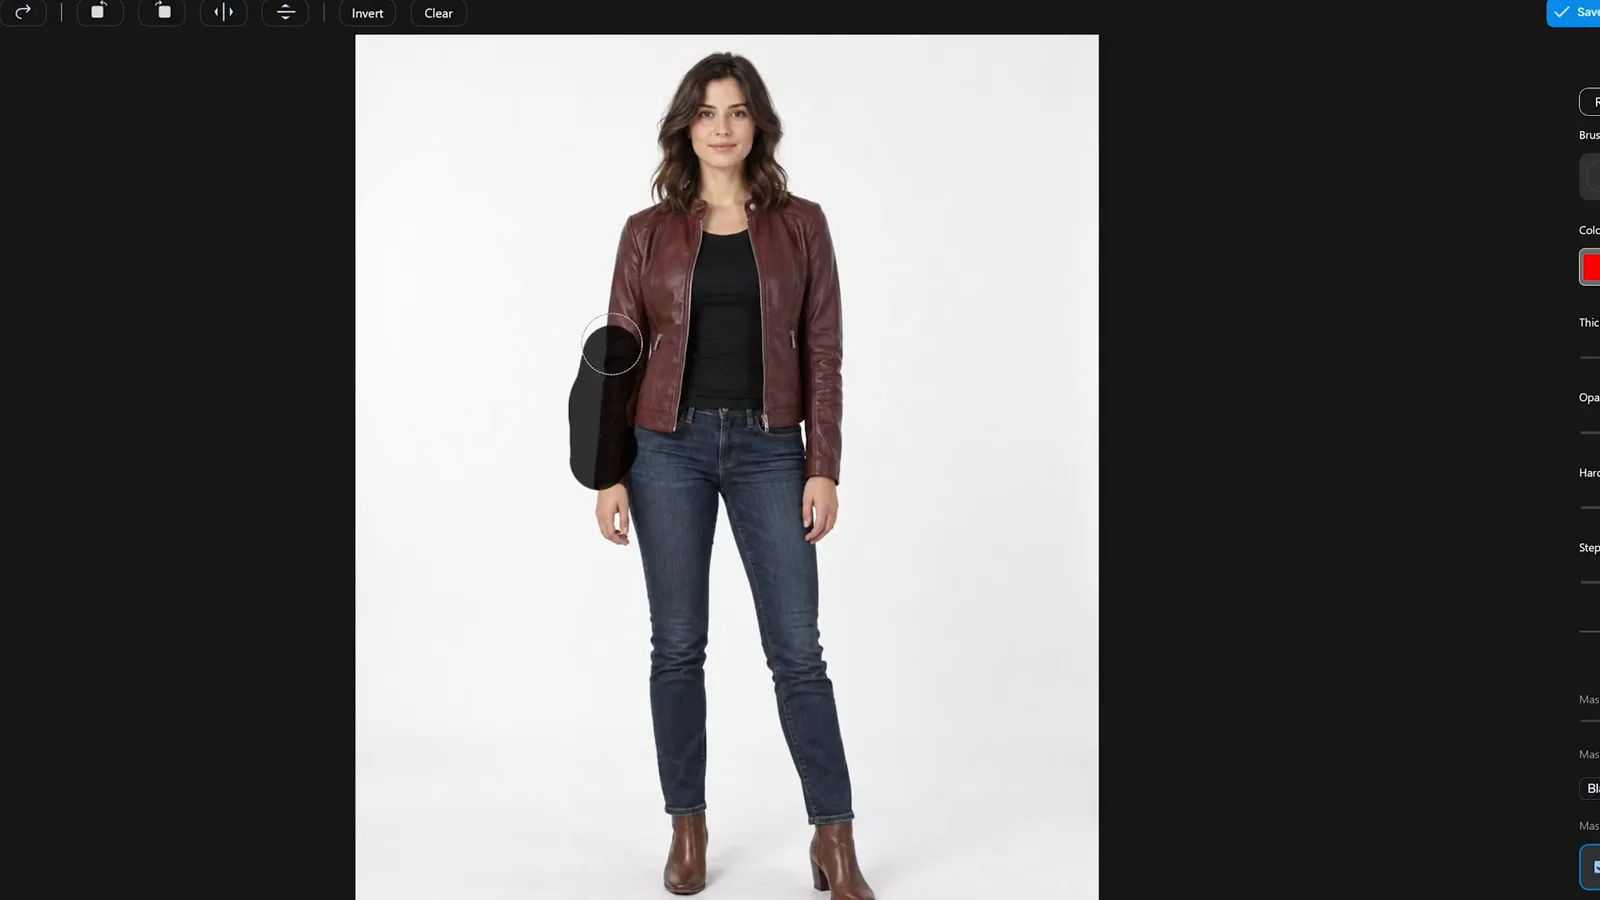
Painted mask, untouched base photo: only the sleeve gets resampled.Watch at 8:15 - 10
Write the negative prompt like a spec
The inpaint prompt that goes with a mask is a pair. Positive: use Image 1 only as the identity and appearance reference, preserve the same woman, and replace the red leather jacket with a plain fitted black t-shirt. Negative: identity drift, changed clothing colors, deformed hands, extra fingers, watermark. Listing the failure modes you refuse is what keeps the edit from wandering.
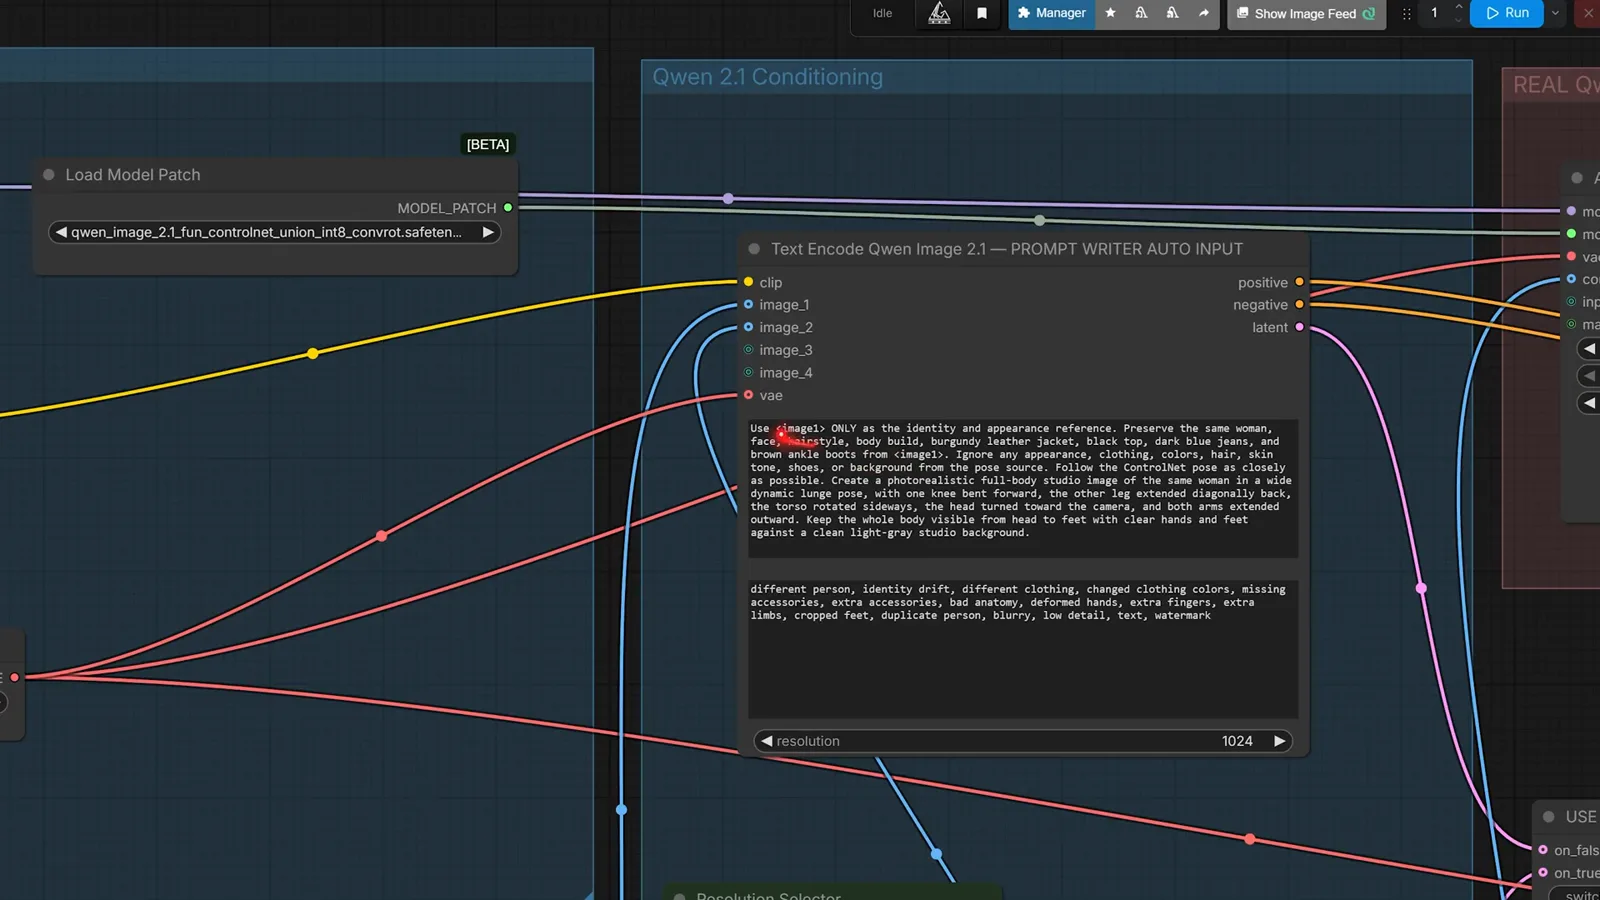
Positive names the change; negative enumerates the ways the model could get it wrong.Watch at 9:15 - 11
Ask for a new transparent image, not background removal
Transparency is built in — the Layered model from December is folded into 2.1, so no removal node and no masking pass. Loop Forge's debugging note matters more than the feature: cutouts come out noisy when you ask the model to remove the background from an existing picture, and clean when you ask it to create a new transparent image of the object. The same trick produces full RGBA asset sheets, like this eight-object flat lay.
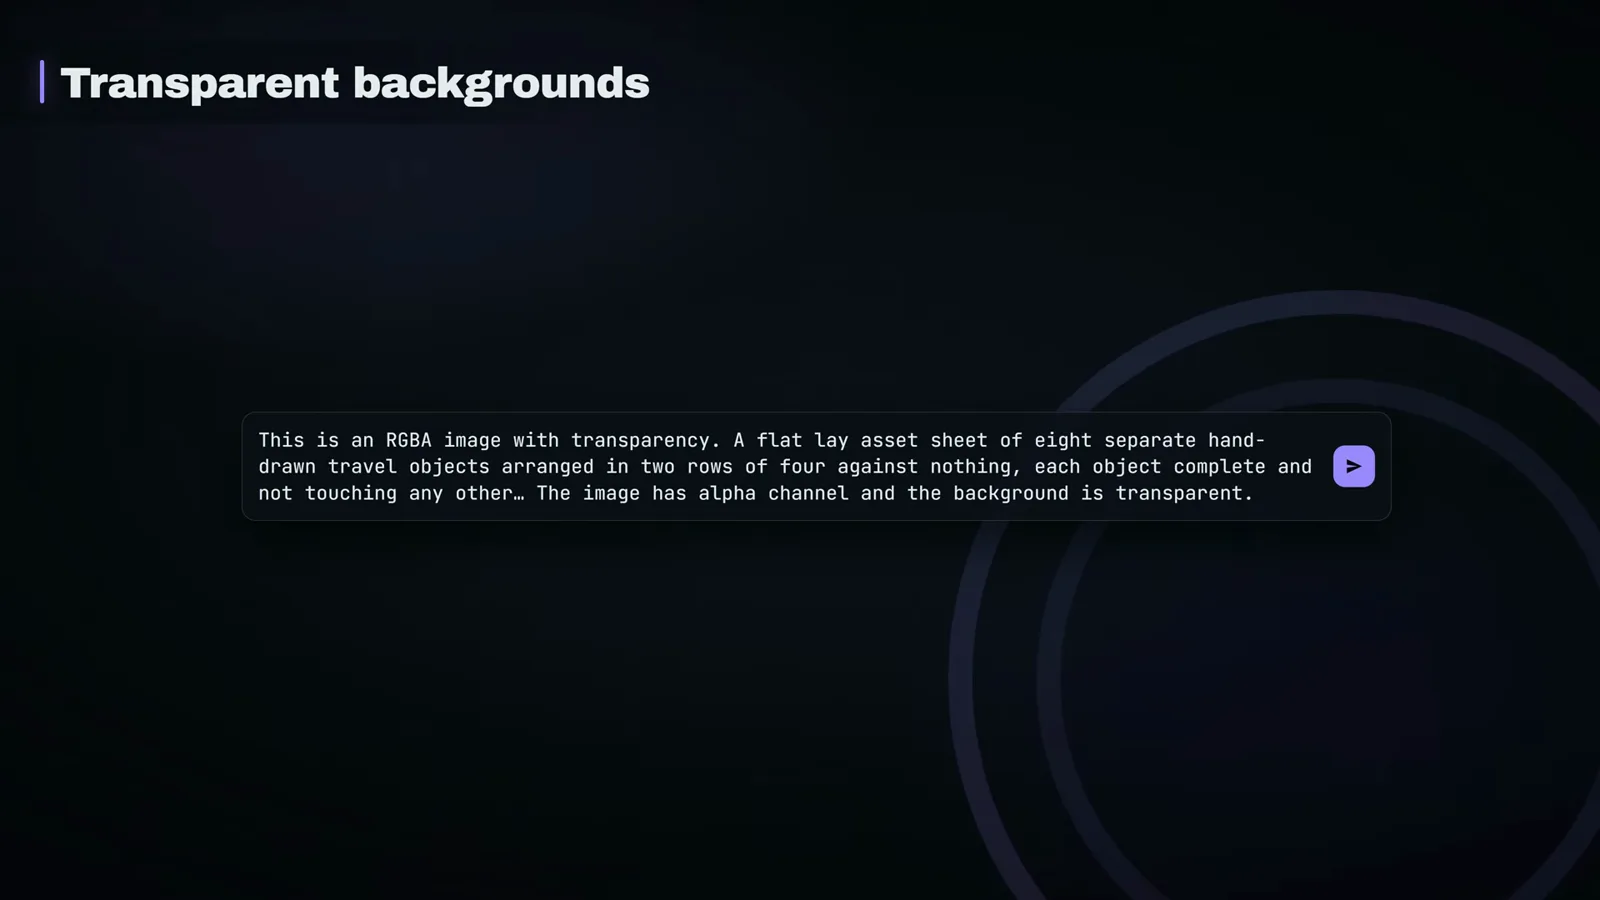
The phrasing is the fix: create a new transparent image, and the alpha channel comes out clean.Watch at 1:40
Multi-reference prompts: outfits, interiors, and consistency
- 12
Assemble a look from up to ten references
Editing accepts up to 10 reference images, and the e-commerce demo is the showcase: pants, a plaid shirt, and sunglasses each arrive as their own picture, and one prompt dresses the character in all of them. Not every garment survives perfectly — Benji's trousers came back with two straps convincingly unthreaded — so count on one review pass before the look ships to a product page.
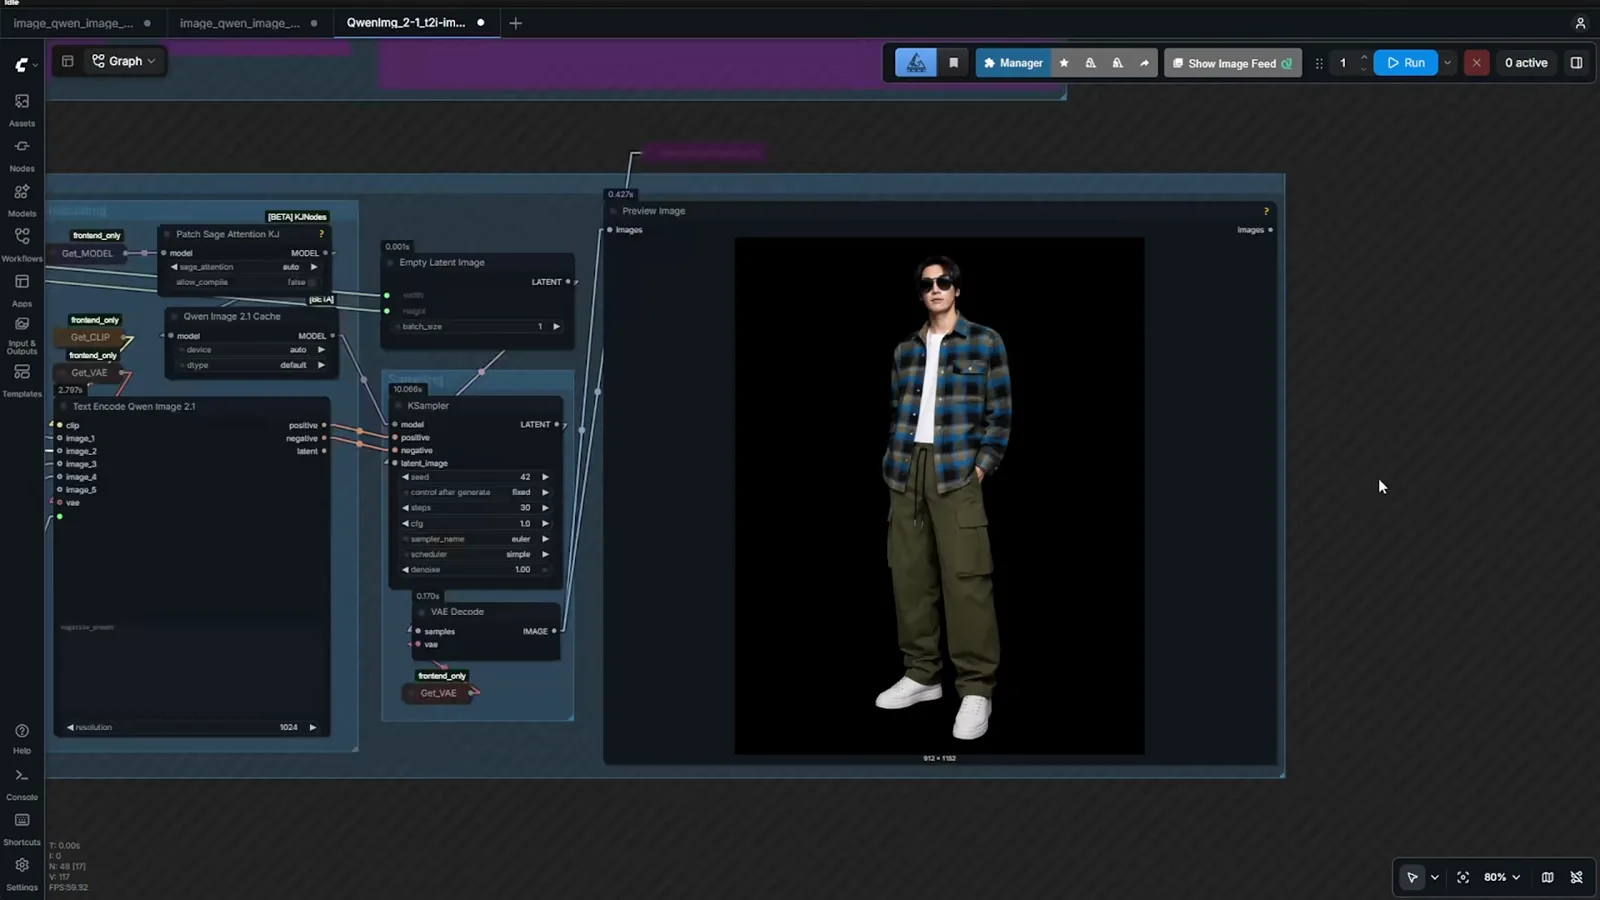
Three product shots in, one dressed character out — with a quirk or two to review.Watch at 11:40 - 13
Label each image's role in the prompt
Interior mixing shows the reference syntax at its most explicit: Image 1 is declared the empty living room and target zone, and each following image is named for what to take from it — sofa, coffee table, TV wall. The filled room keeps the layout and lighting coherent, though the model admits no spatial measurements, so treat furniture sizes as suggestions and measure before you buy.
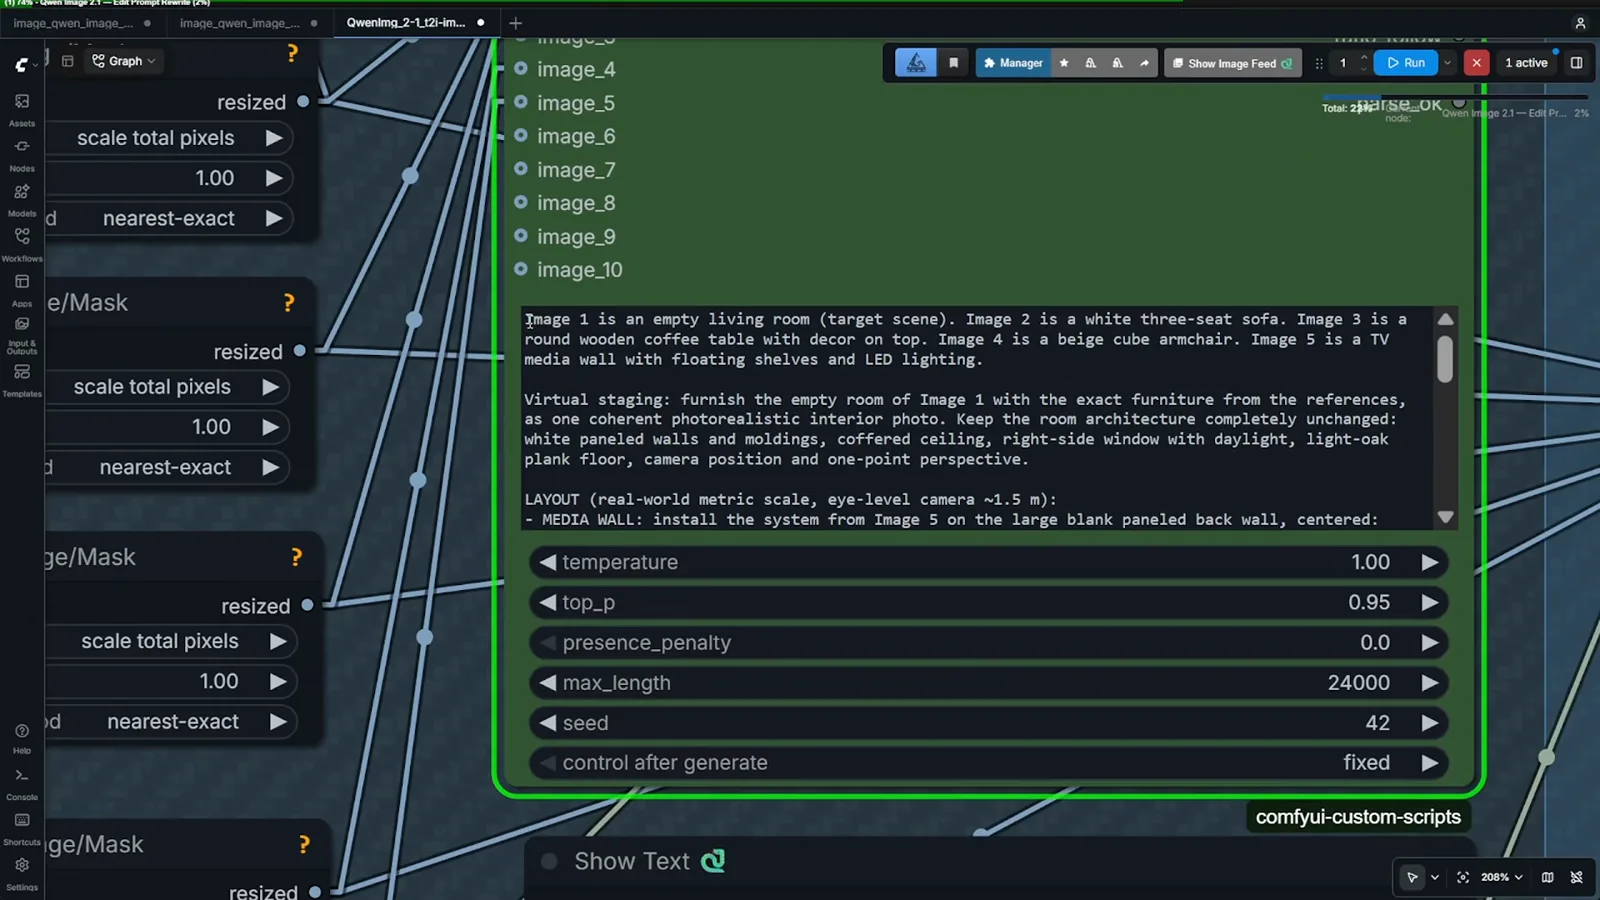
Role-tag every reference image — target zone first, suppliers after.Watch at 12:55 - 14
Character sheets unlock camera moves
A character turnaround sheet is the consistency tool. Feed the multi-angle sheet alongside a scene and the model can reposition the same character — Benji rotated a hotel-room shot to the opposite side of the room, something a single front-facing photo cannot support because the model has no idea what the back of the head looks like. The same sheets feed storyboard frames and first frames for video models.
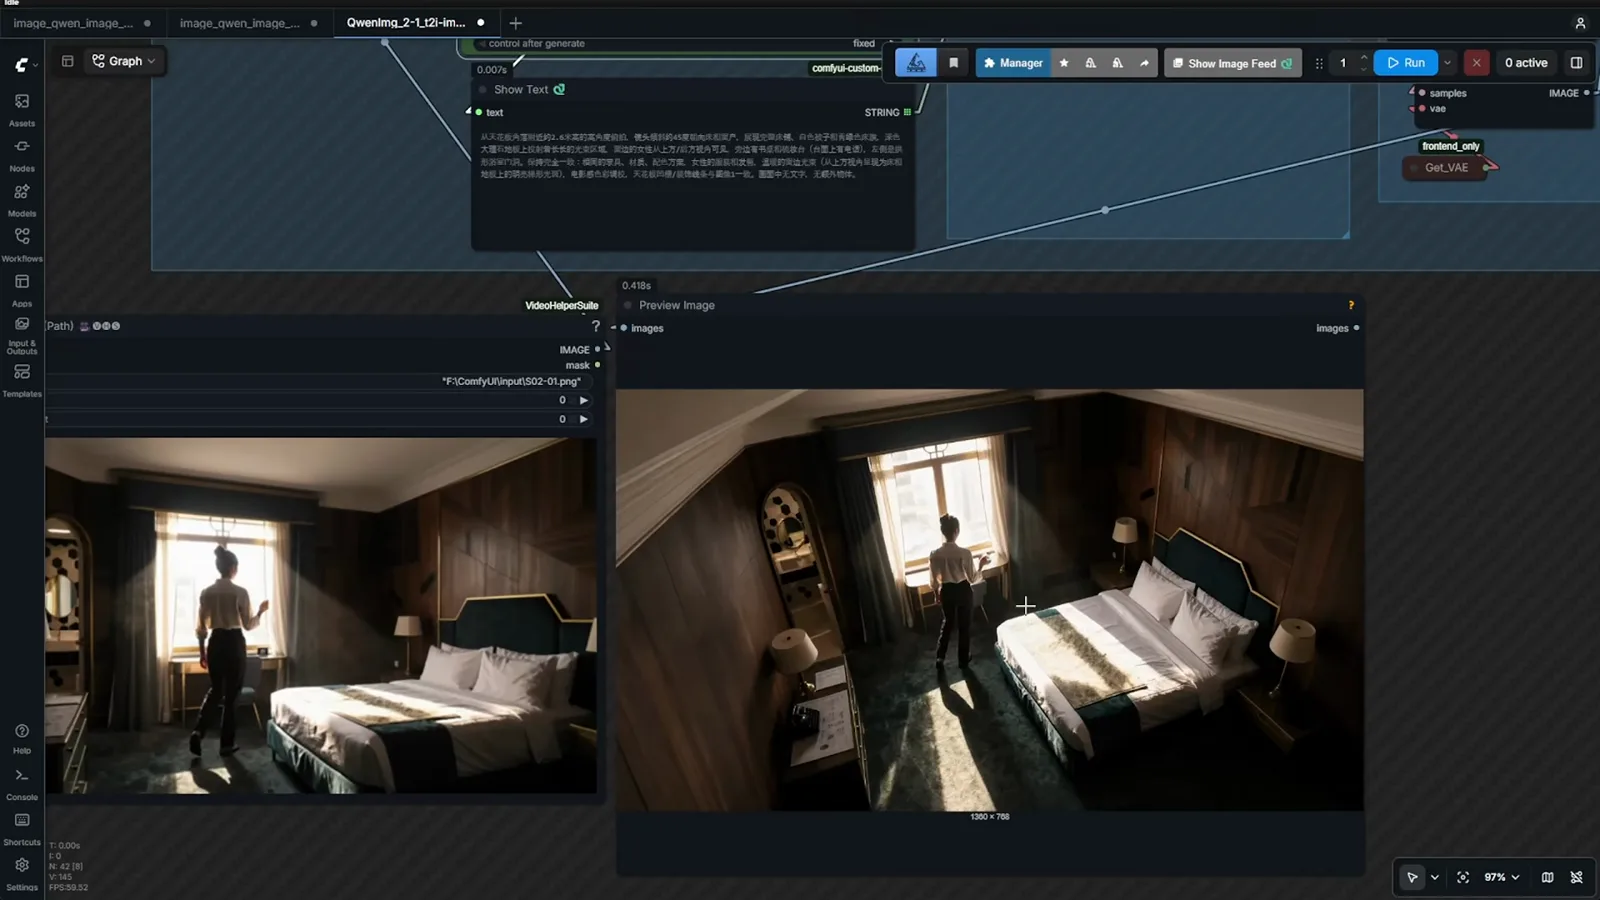
Give the model the back of the head and it will happily shoot from behind.Watch at 15:25
ControlNet add-on: pose and depth prompt moves
- 15
Pose transfer: match sizes, then soften strength
The ControlNet add-on ships as one 7.55 GB file covering eight control types — pose, depth, canny, HED, lineart, MLSD, scribble, and grayscale — plus inpainting. For pose, ComfyUI Workflow Blog's fix is mechanical: resize source and control images to the same resolution first. When a difficult pose still mangles a hand, describe the pose in words and drop strength from 1.0 to 0.8 so the model can favor the sentence over the skeleton.
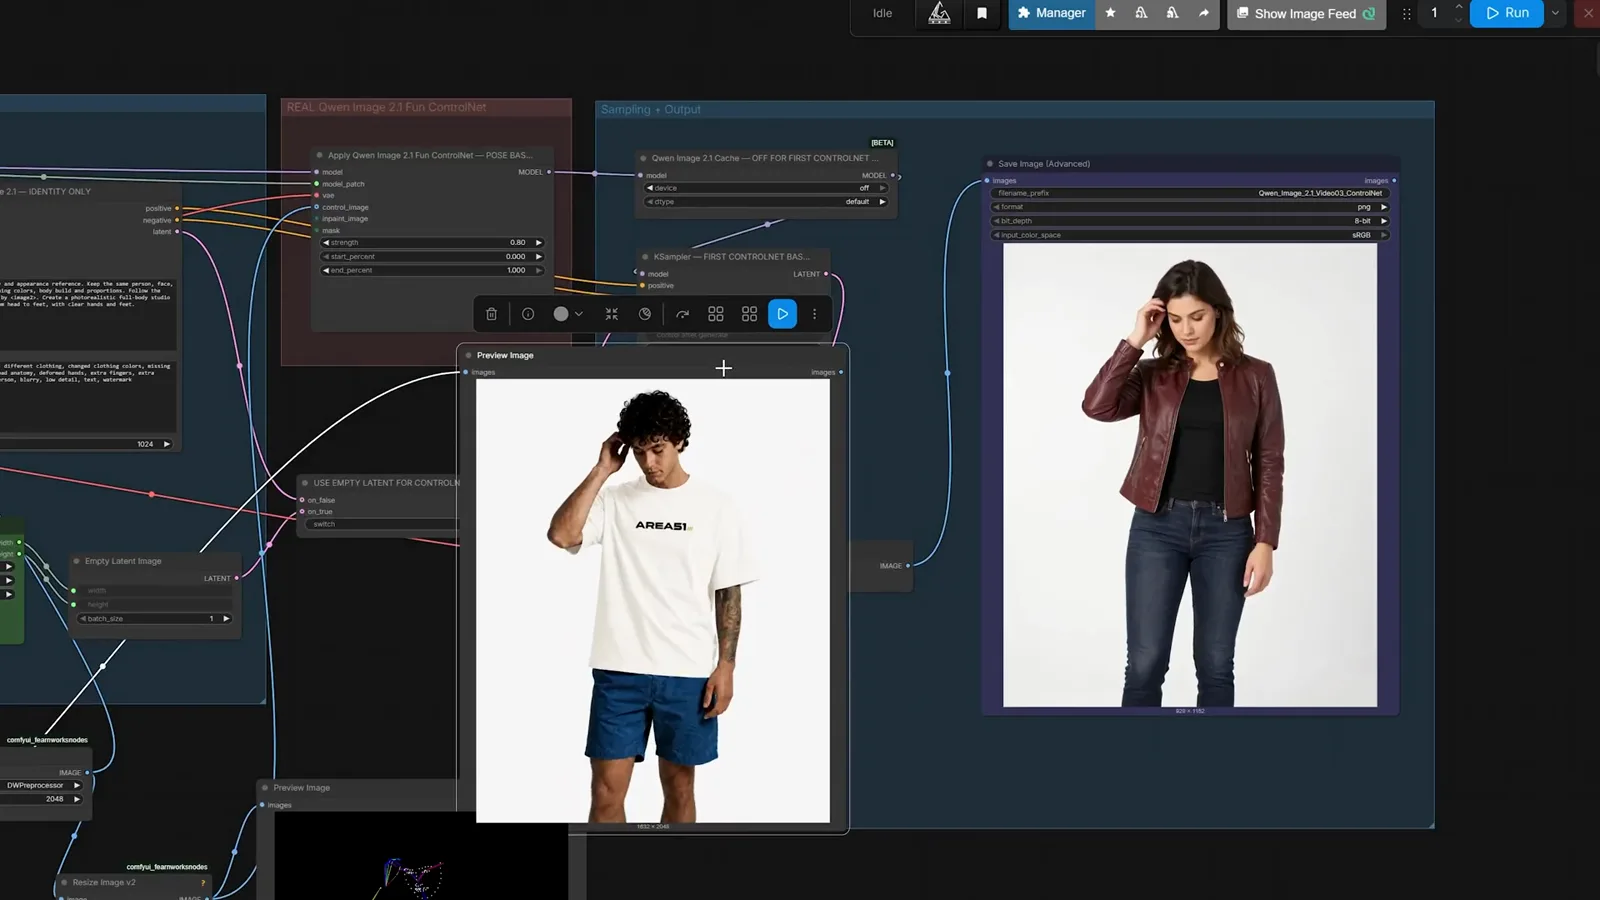
Same-size inputs and strength 0.8 turn a broken pose transfer into a clean one.Watch at 4:40 - 16
Depth restyles a room without moving the furniture
Depth control keeps geometry while you re-theme everything else. The template that worked: save the exact camera position, room perspective, ceiling height, windows, and furniture placement from the control structure, then replace materials — dark stone, smoked glass, matte brass, soft dark wood — and add warm indirect lighting with a night view. Day turned to night and every lamp stayed put. Use DW pose for people and Depth Anything V2 for rooms.
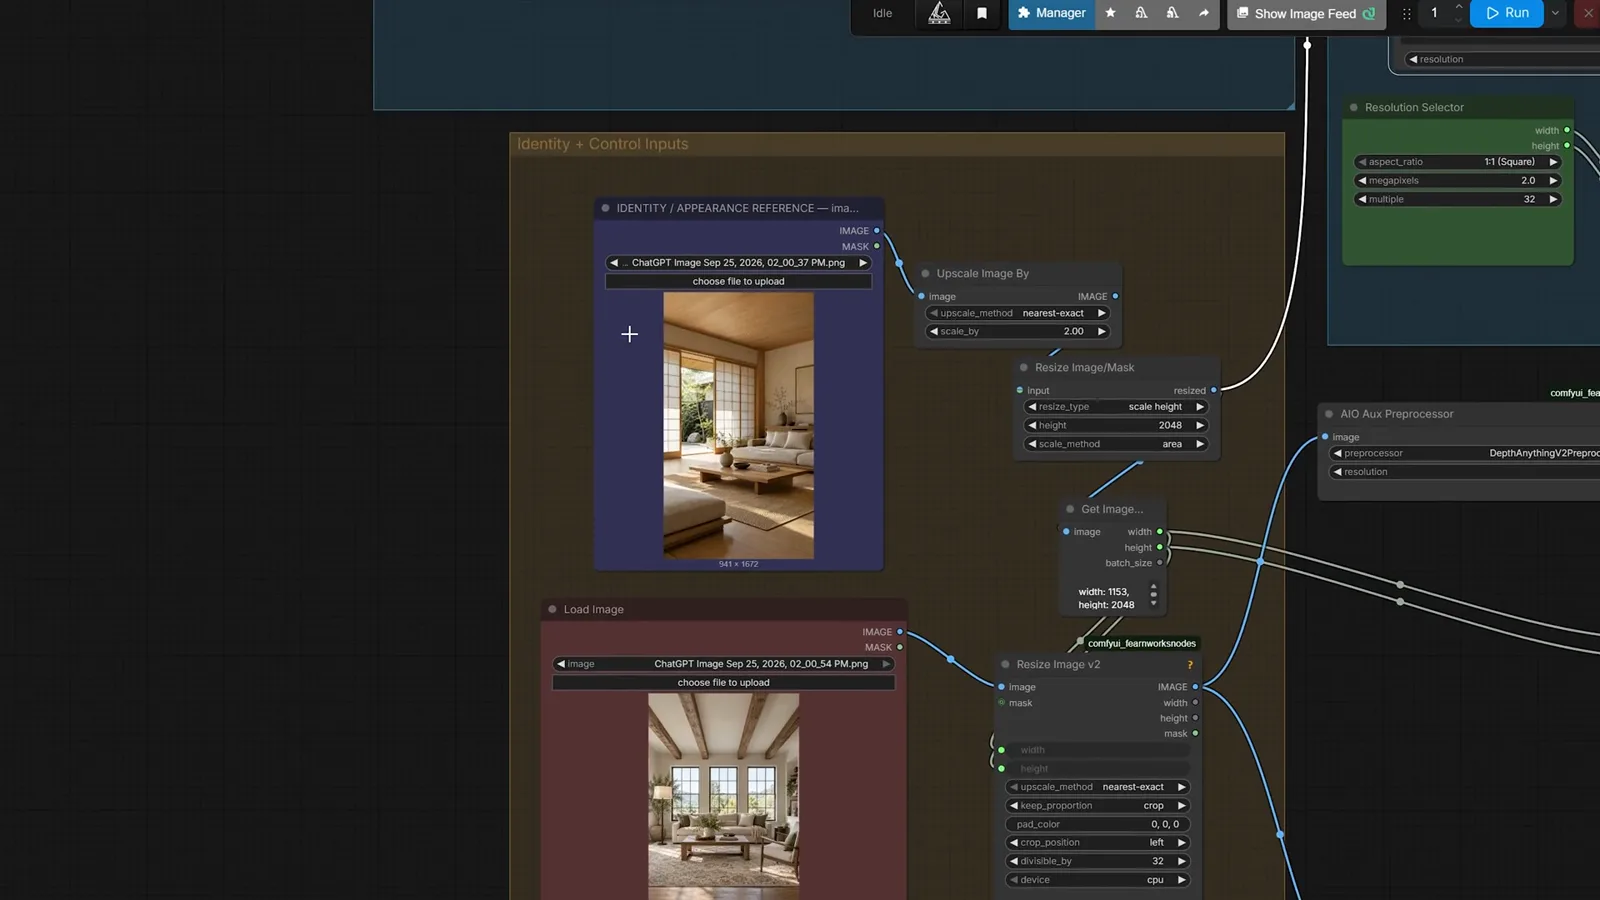
Geometry from the depth map, materials and light from the sentence.Watch at 7:00