

How to Use Midjourney: The 2026 Beginner's Guide to the Web App
Midjourney is still the name most people picture when they picture AI art, and in undefined the whole workflow lives on the web at midjourney.com — no Discord server required. The catch for beginners is surface area: a prompt bar with hidden settings, four-image grids, upscale and variation buttons, an animate mode, and an Organize tab that quietly becomes your asset library. This guide walks the entire first-day workflow in 16 steps, from picking a subscription to batch-downloading a month of images. Every screenshot comes from two recent walkthrough videos — Wade McMaster's full July undefined beginner tutorial supplies the workflow, and How to Digital's overview fills in sign-up and plan pricing. You will write your first prompt (a man with an old television for a head), learn the subject-scene-style-layout formula with a Shaolin monk example, set aspect ratios like 16:9, choose between model versions, Raw and HD, tame Stylization, Weirdness and Variety, upscale subtle or creative, vary and remix the keepers, animate a still into a clip, steer results with image, style and omni references, and finally explore, organize, bulk-download and track your GPU hours. Work through the steps in order and you can reproduce every result shown here.
Source & credits
Screenshots in this guide are captured from Wade McMaster - Creator Impact's public walkthrough video. Every step links back to the exact moment it shows, so you can follow along.
Wade McMaster - Creator Impact ↗Subscribe and post your first prompt
- 1
Sign up at midjourney.com and pick a plan
There is no meaningful free tier anymore, so start at midjourney.com, click Sign up, and authenticate with a Google or Discord account. The Purchase a Subscription page bills yearly at a 20 percent discount: Basic $8 a month (about 200 image jobs), Standard $24 (15 fast GPU hours plus unlimited slow generations), Pro $48 (30 fast hours) and Mega $96 (60 fast hours plus Stealth mode). Monthly billing runs $10, $30, $60 and $120 for the same tiers. The source video's author recommends Standard so you always have Relax mode as a fallback.
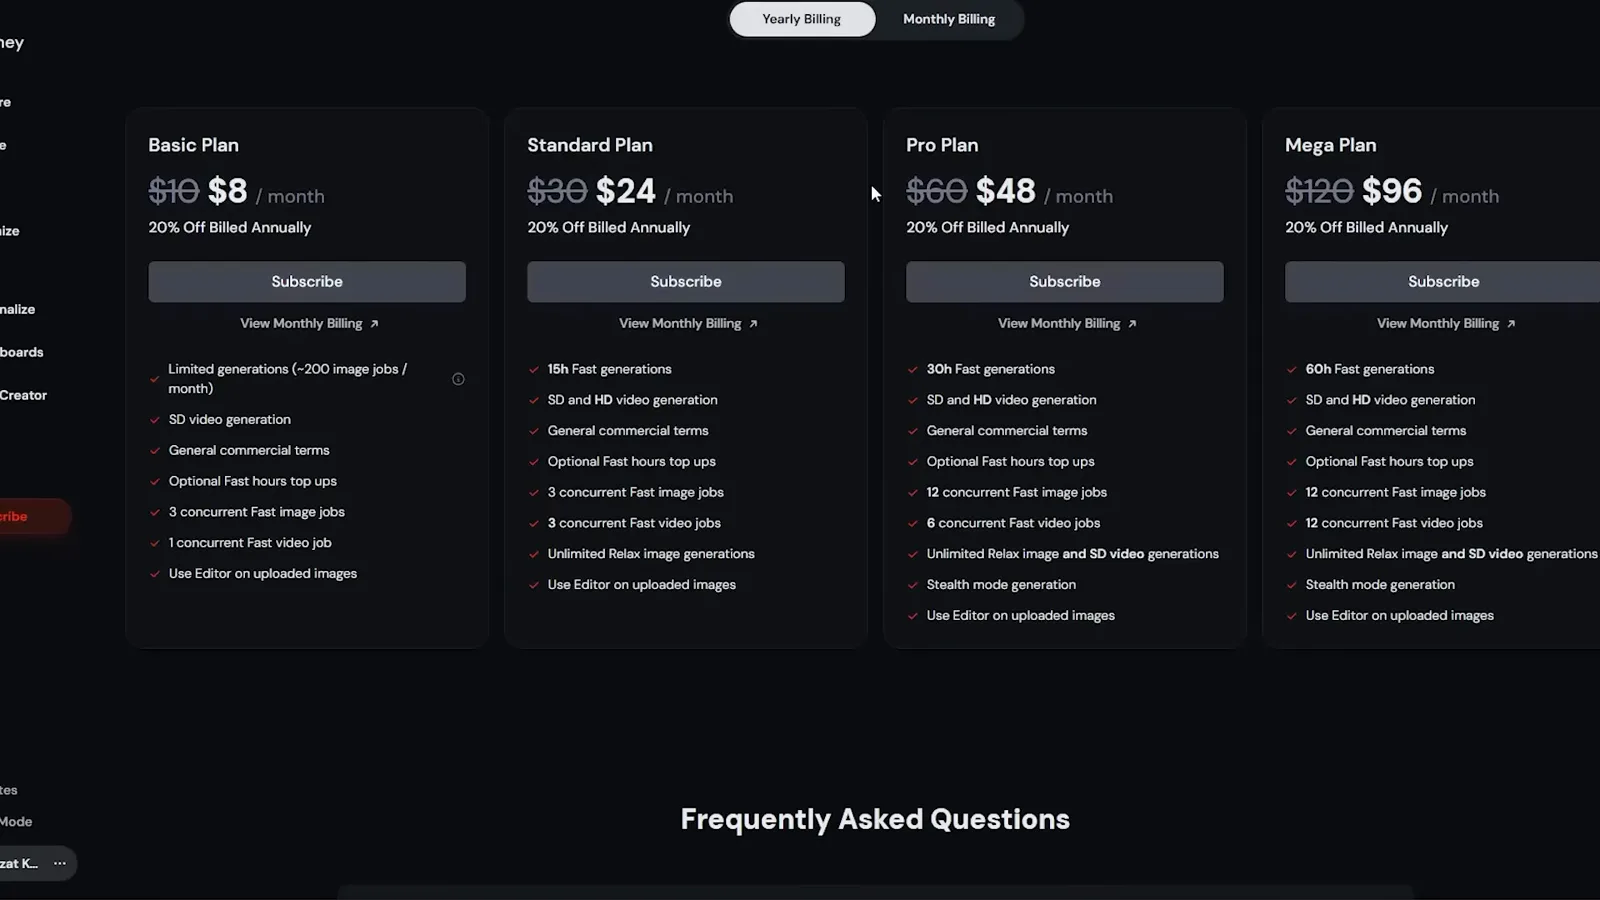
Four plans, yearly pricing: Standard at $24 a month is the sweet spot for beginners.Watch at 4:46 - 2
Write your first prompt in the top bar
Every page of the web app keeps a prompt bar at the top — it asks "What will you imagine?". Type a plain description and press Enter or the send arrow. The demo prompt in the source video is deliberately odd: a man in a business suit, but he has an old television for a head, with static and noise onscreen. Odd is fine; Midjourney handles surreal combinations well. Submit, and the job moves to the Create tab while the four images render.
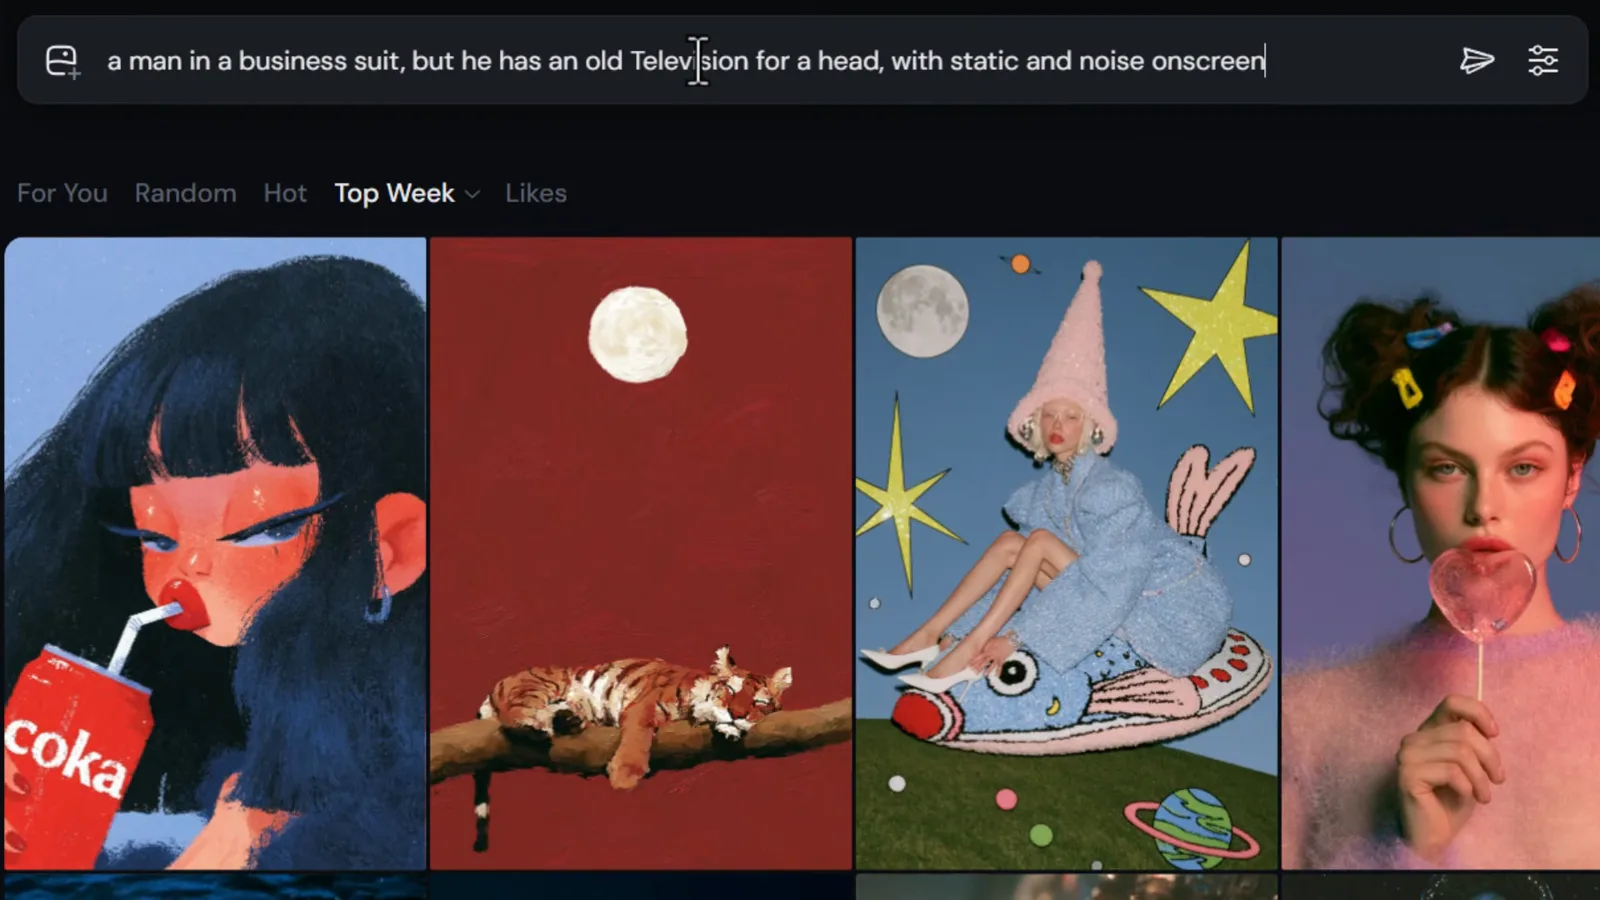
One line of text is enough for a first run — the four results land in the Create tab.Watch at 1:14 - 3
Read the four-image grid in the Create tab
Midjourney always returns a grid of four takes on your prompt, and the Create tab stacks every job chronologically so you can watch results pop in. Click any image to open it full size, then use the on-screen arrows or your keyboard to flip through the four variations and compare details. This is the judgement step: pick the grid that matches what you meant, because the next section's settings only help once your wording is close.
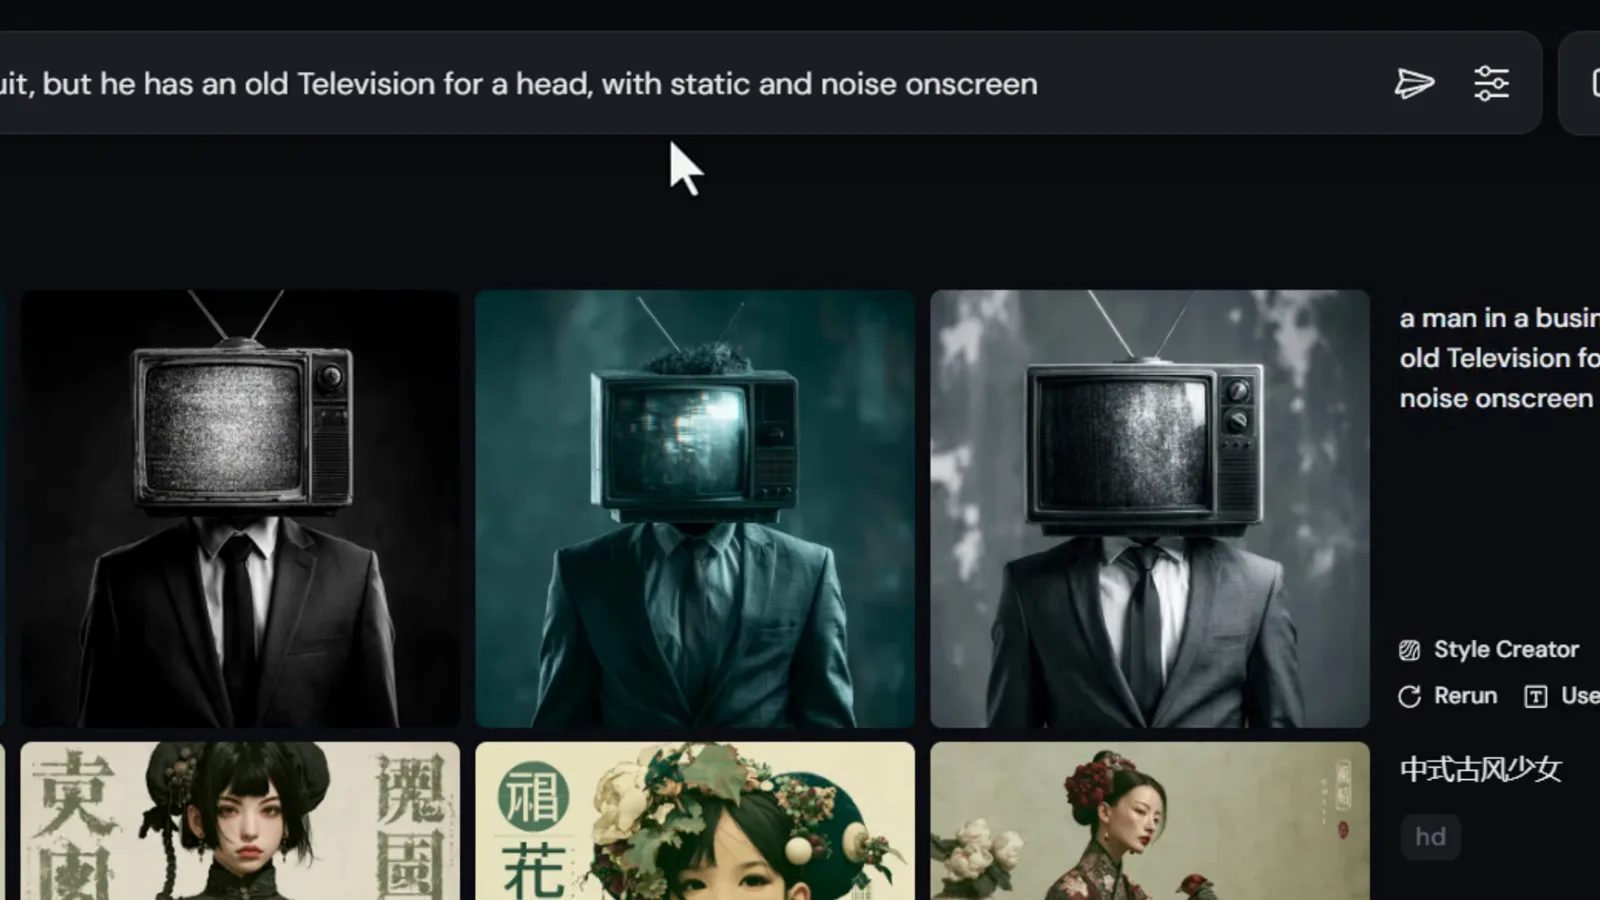
Four takes per prompt — open each one full size before deciding which to keep.Watch at 2:08
Steer the look: prompt formula and settings
- 4
Structure prompts: subject, scene, style, layout
Random adjectives get random results. The source video builds a prompt in explicit slots: main subject, scene or location, style of image, then layout and composition, with colors, lighting and finer details as optional garnish. Watch it fill the bar: a shaolin monk, in a futuristic temple, unreal 3D videogame cinematic, a wide shot showing the full body of the monk. Swap the style slot — professional photography shot on 35mm film — and the same subject comes back with film grain. Unhappy with a grid? Hit Rerun to resubmit the identical prompt for four fresh takes.
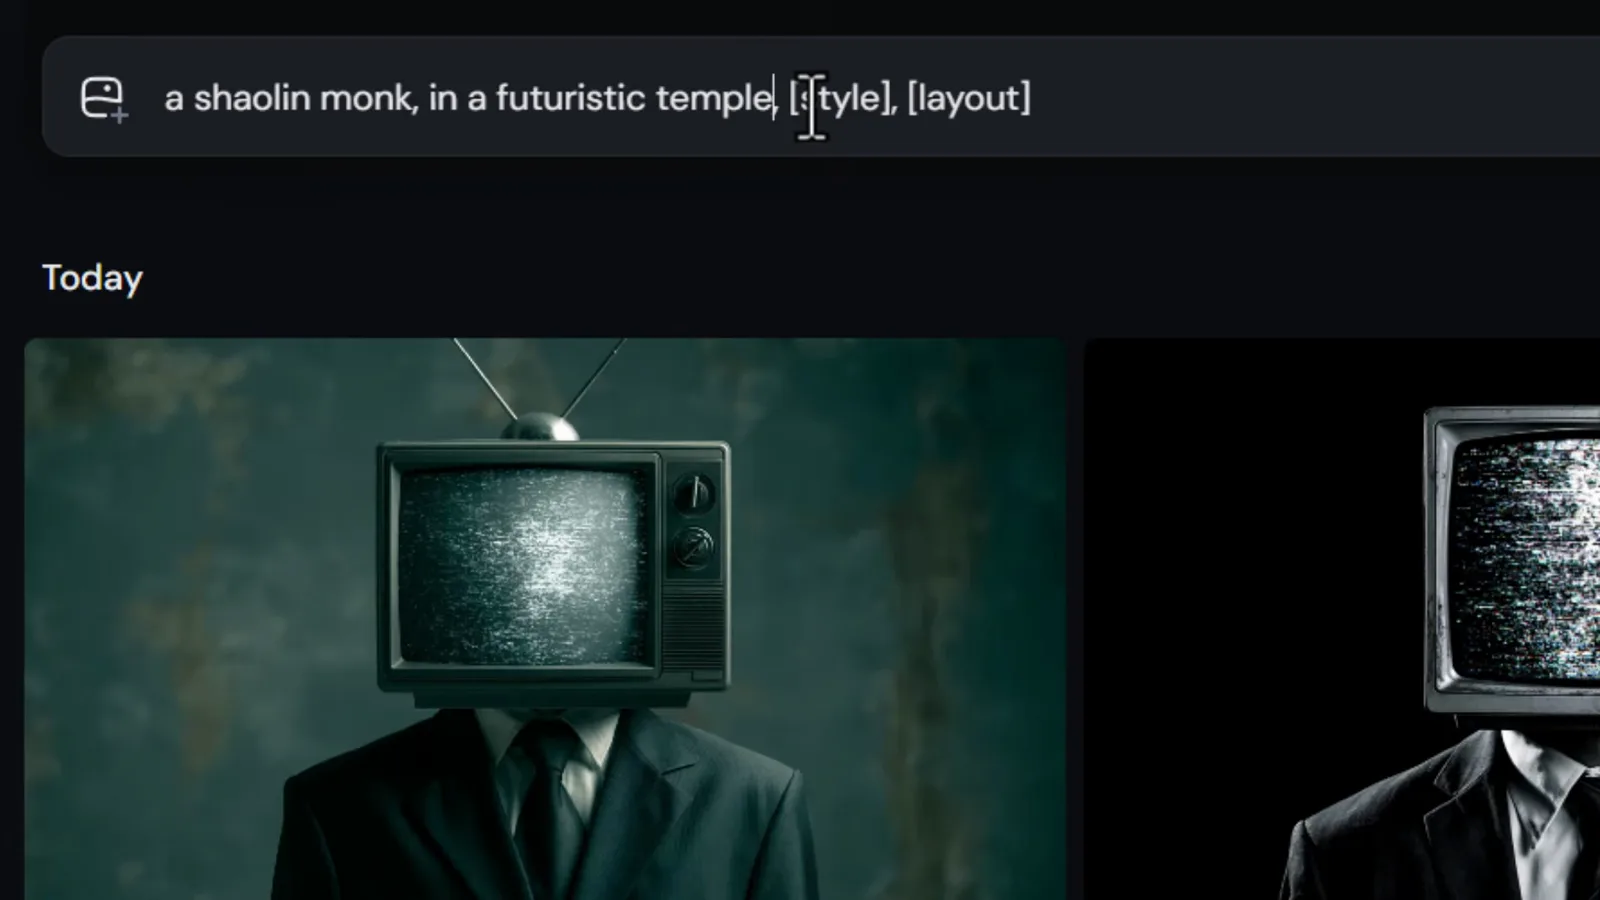
Fill the slots in order: subject first, then scene, then style, then layout.Watch at 8:30 - 5
Set the aspect ratio before you submit
The settings icon next to the submit arrow opens a panel that travels with your prompt. Under Aspect Ratio you get Portrait, Square and Landscape presets plus a drag slider: the video walks from the default 1:1 square through 9:16 phone format and settles on 16:9, the TV-shaped ratio used for the rest of the walkthrough. Aspect ratio changes the native pixel size too — a standard square is 1024 by 1024, while a 16:9 render comes out around 1456 by 816.
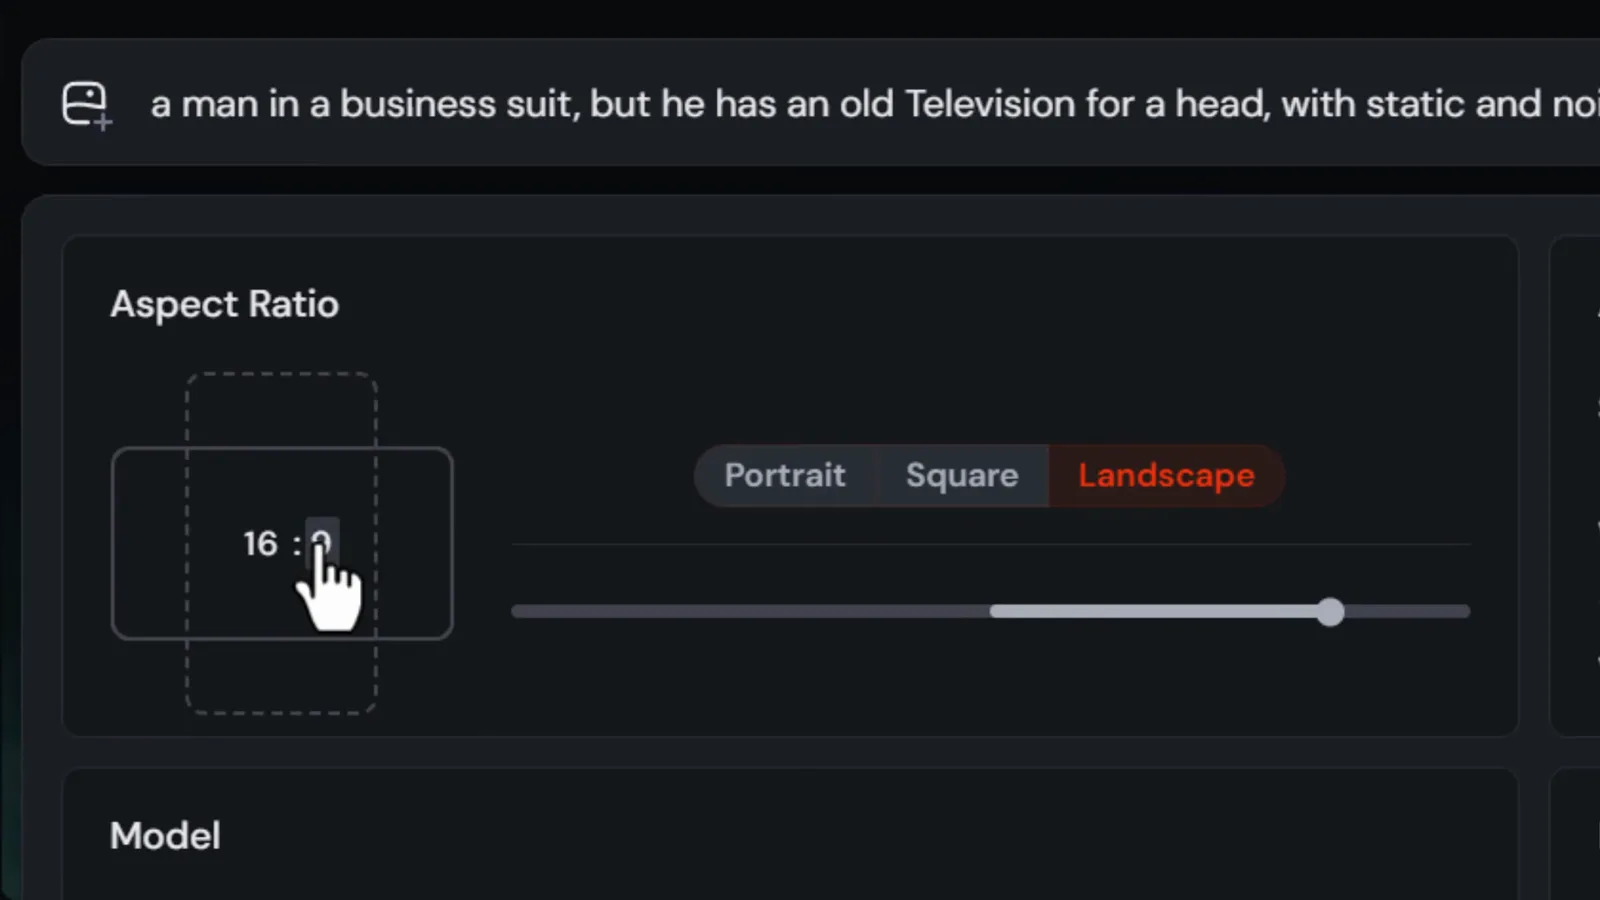
16:9 selected: the solid outline previews the frame shape before you spend GPU time.Watch at 3:10 - 6
Choose a model version, Raw mode and HD
The same settings panel holds the Model section. Version defaults to 8.1, the current flagship — version 8 is being retired, and older models down to Niji for anime are still selectable when you want a period look. Raw mode strips away Midjourney's opinionated color grading so the image follows your prompt more literally. HD doubles the resolution — a square renders at 2048 by 2048 instead of 1024 — but burns more GPU time, and the video prefers the Run batch as HD button afterwards, which re-renders just the four images you liked.
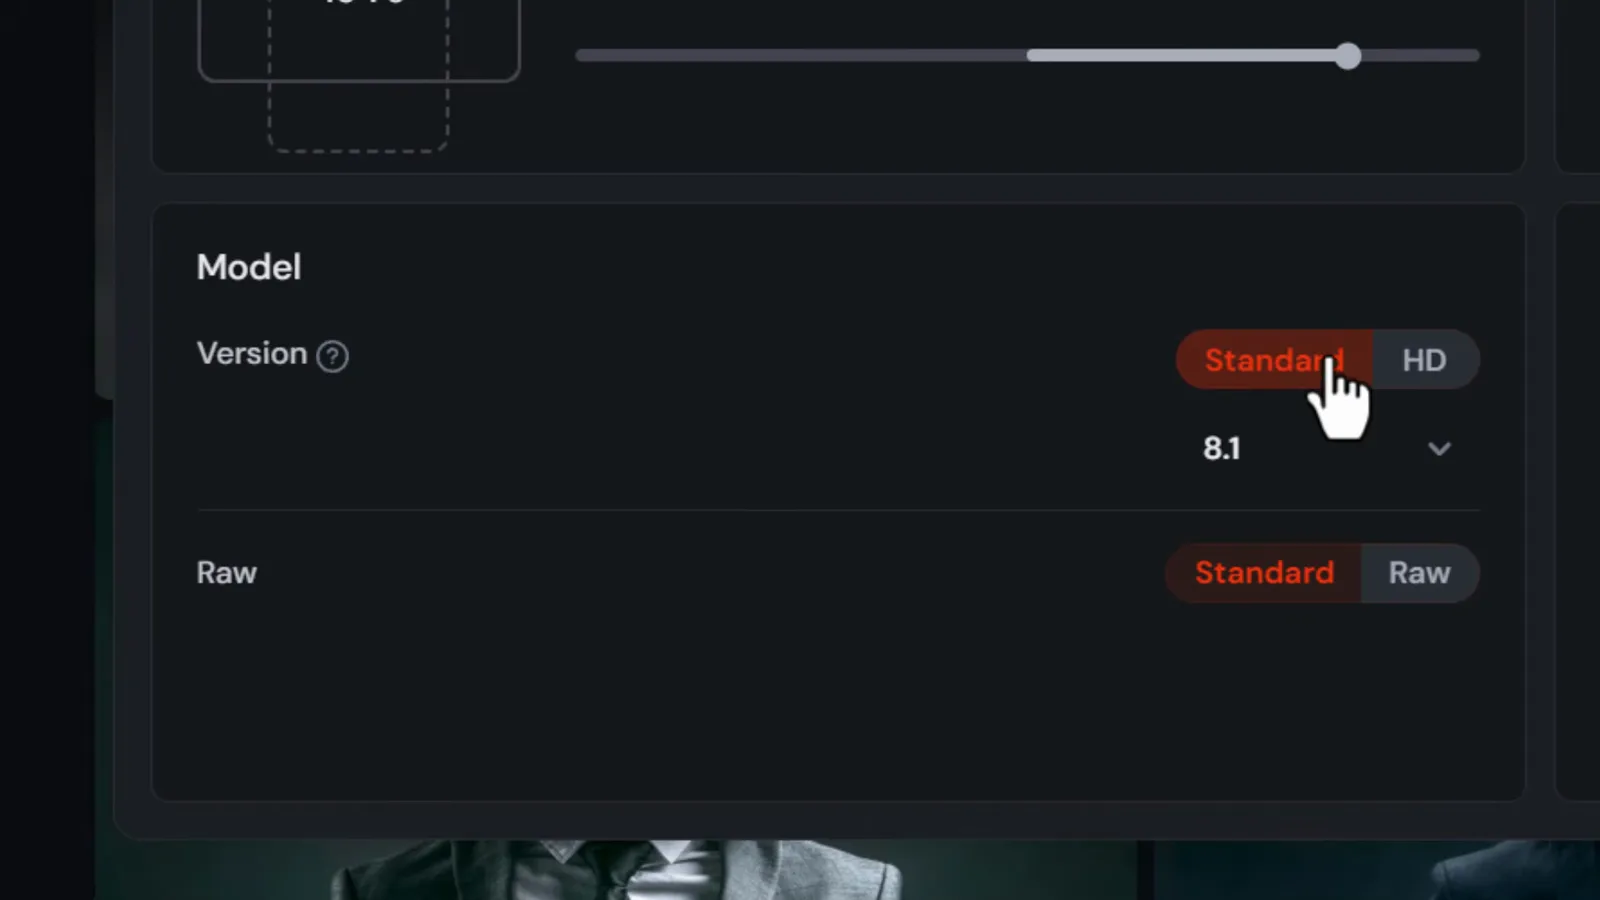
HD doubles pixel dimensions; Run batch as HD applies it only to the grid you liked.Watch at 4:25 - 7
Dial Stylization, Weirdness and Variety
The Aesthetics block tunes how much Midjourney imposes its own taste. Stylization runs 0 to 1000 with a default of 100: at zero the model obeys your wording literally, cranked to the maximum it returns the house look — the video notes a green-and-red tint creeping into every image. Weirdness goes up to 3000 for genuinely strange outputs. Variety, also known as chaos, changes how different the four images in a grid are from each other; around 20 adds spread while keeping your subject, while the maximum can replace your monk with random strangers.
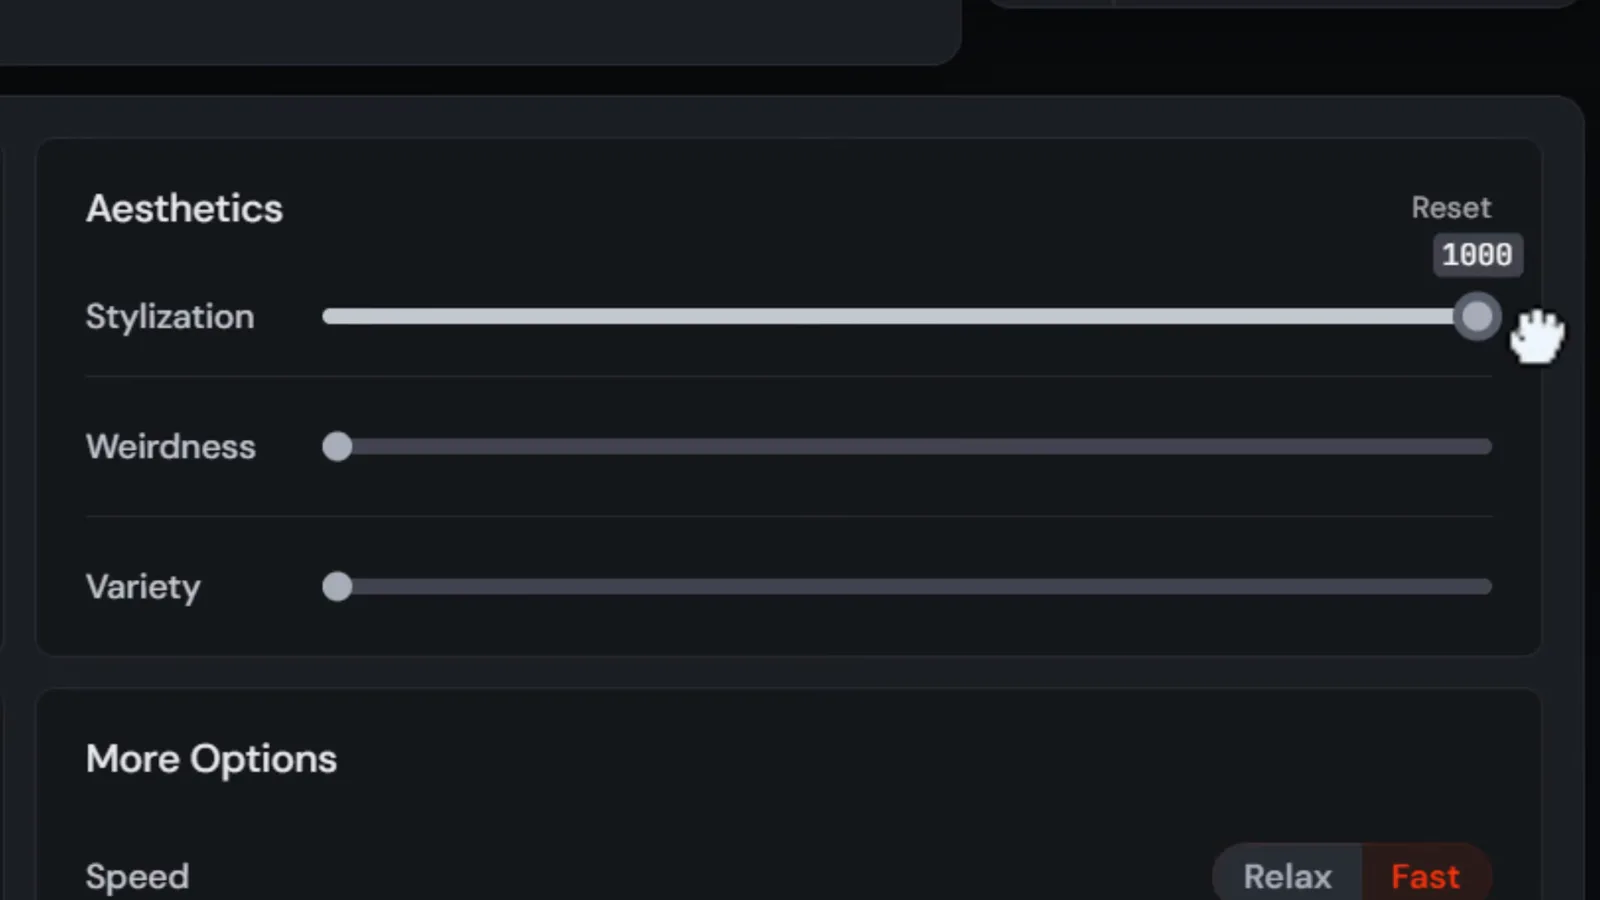
Stylization at 1000: maximum Midjourney house style, minimum prompt obedience.Watch at 12:13
Inspect, upscale and vary the keepers
- 8
Open an image full size and download it
Click a result and Midjourney opens a full-screen viewer with the rest of the batch as a filmstrip down the right edge, so comparing variations takes one click each. The top bar shows the exact prompt and parameters that produced the image, plus the download control — the video's habit is to grab the keeper immediately, before moving on to upscales or variations that would bury it in the feed.
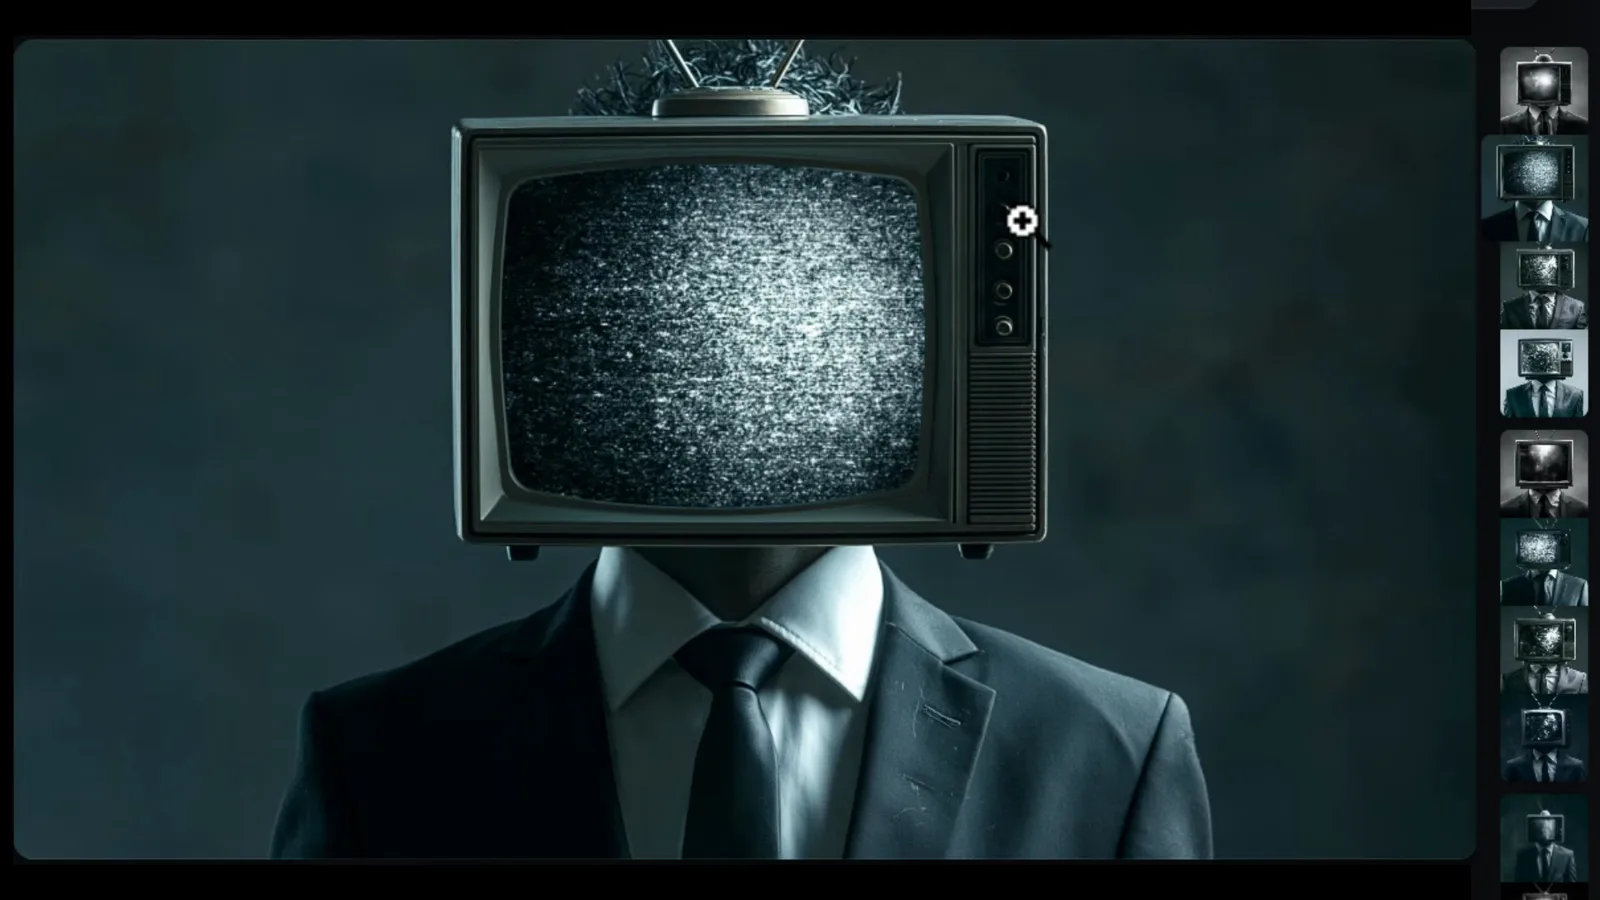
The lightbox: your image, the batch filmstrip, and the download control up top.Watch at 5:40 - 9
Upscale with Subtle or Creative
With an image open, the Creation Actions panel offers two upscales. Upscale Subtle raises the resolution while keeping the picture effectively identical; Upscale Creative allows the model to invent a little extra detail as it enlarges. The video runs both on the same television-head image and compares: results come back labeled Upscale S and Upscale C in the Create feed, resolution doubled, composition intact. This is the cheap route to 2K — no HD re-render, no surprise re-development of the scene.
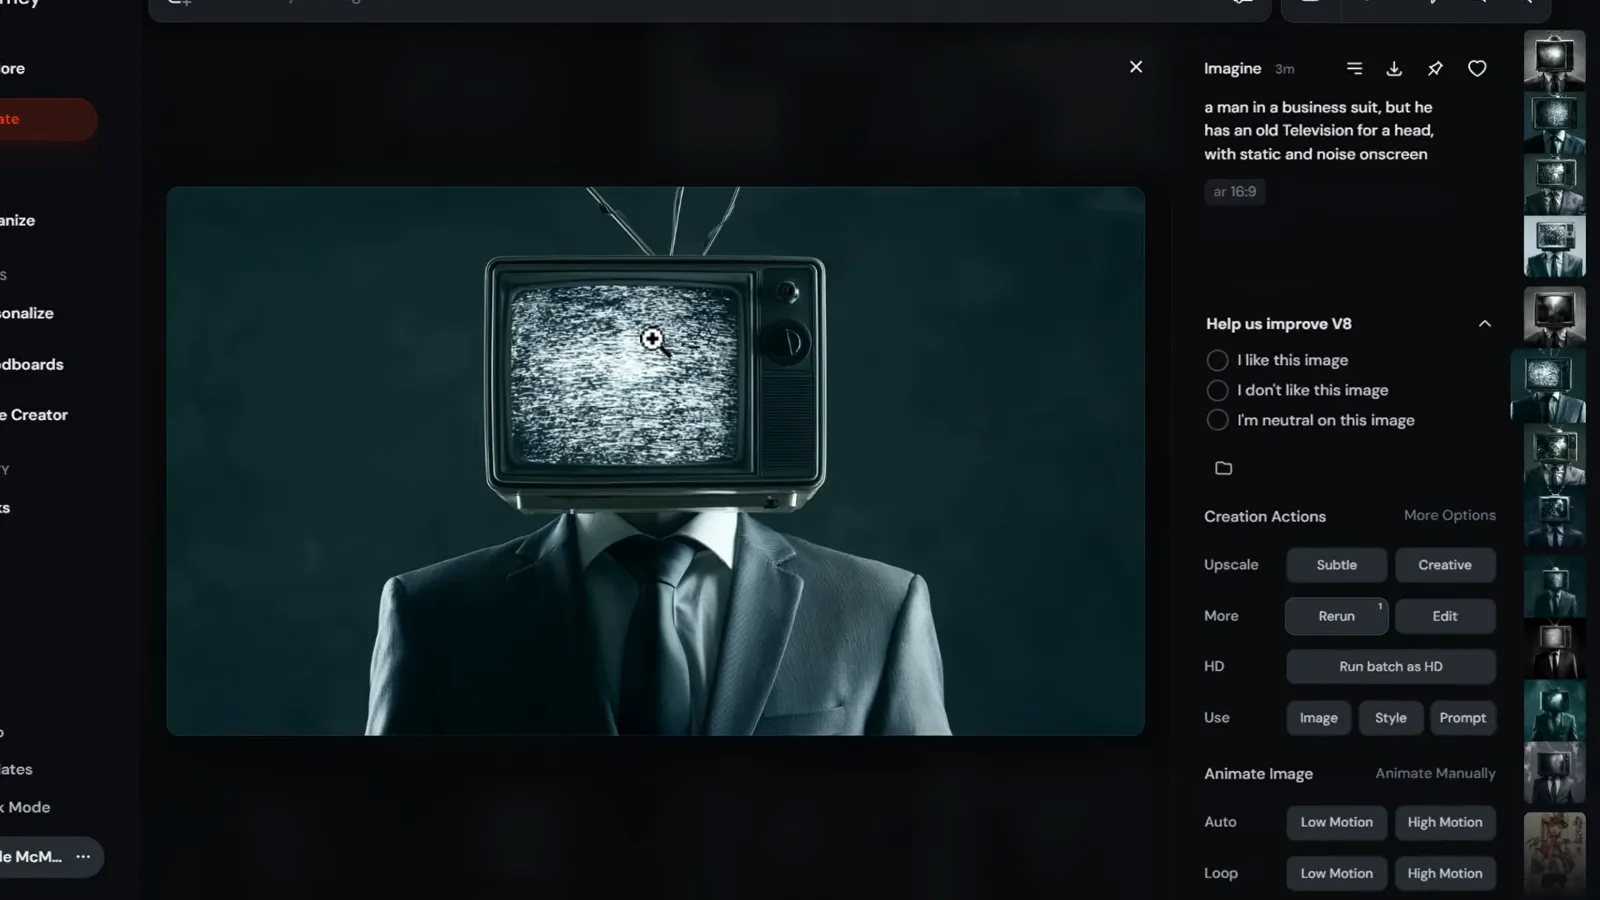
Subtle keeps the pixels faithful; Creative lets Midjourney embellish while enlarging.Watch at 5:55 - 10
Vary and remix what is almost right
Hover any grid image and Vary Subtle and Vary Strong appear underneath. Subtle generates new takes that stay within a few details of the original — the video calls it the move for a grid that is 95 percent right; Strong keeps the palette and layout but wanders further. Turn on Remix in More options and varying also edits the prompt: the demo changes a shaolin monk to a samurai warrior and resubmits, keeping the temple and mood while swapping the figure.
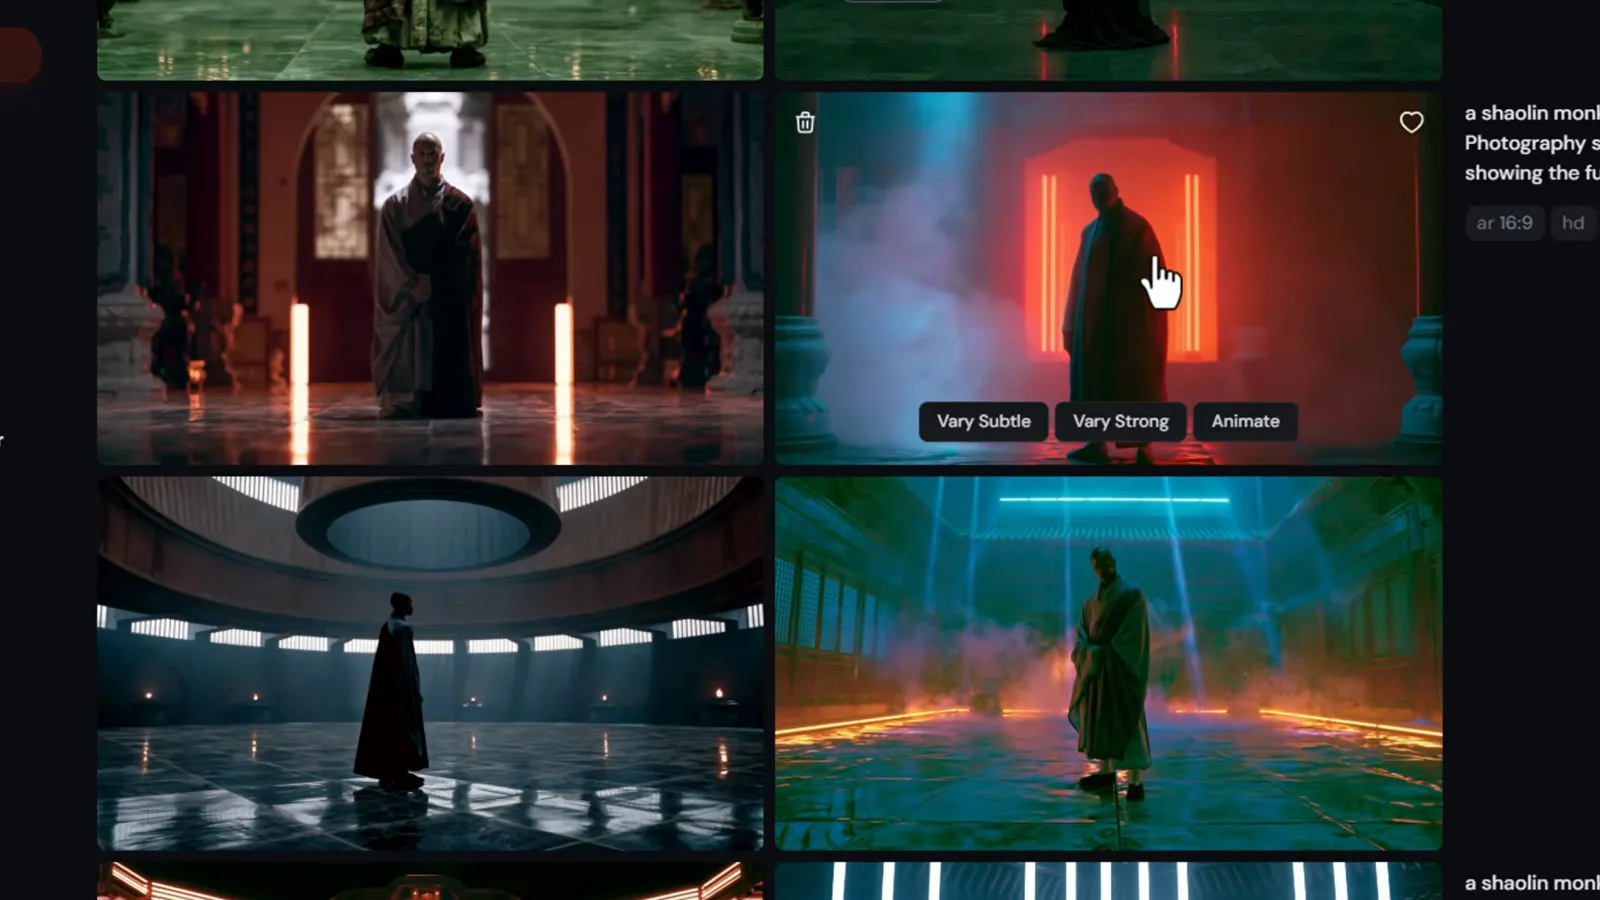
Vary buttons under every image: Subtle for fine tuning, Strong to wander, Remix to rewrite.Watch at 28:35
Animate images and steer with references
- 11
Animate a still into a video clip
The Animate button turns any image into video. Animate manually is the controllable route: your image becomes the start frame, and you write the motion — the demo uses a Shaolin monk who turns to face us, then runs toward the camera as lightning strikes in the temple. Choose Loop or set an end frame, pick low or high motion, and note the video settings: HD renders 720p clips, SD 480p, and dropping the batch from four videos to two saves credits. Extend adds roughly four seconds per pass — the demo grows a 5-second clip into 9 — and finished clips download as MP4.
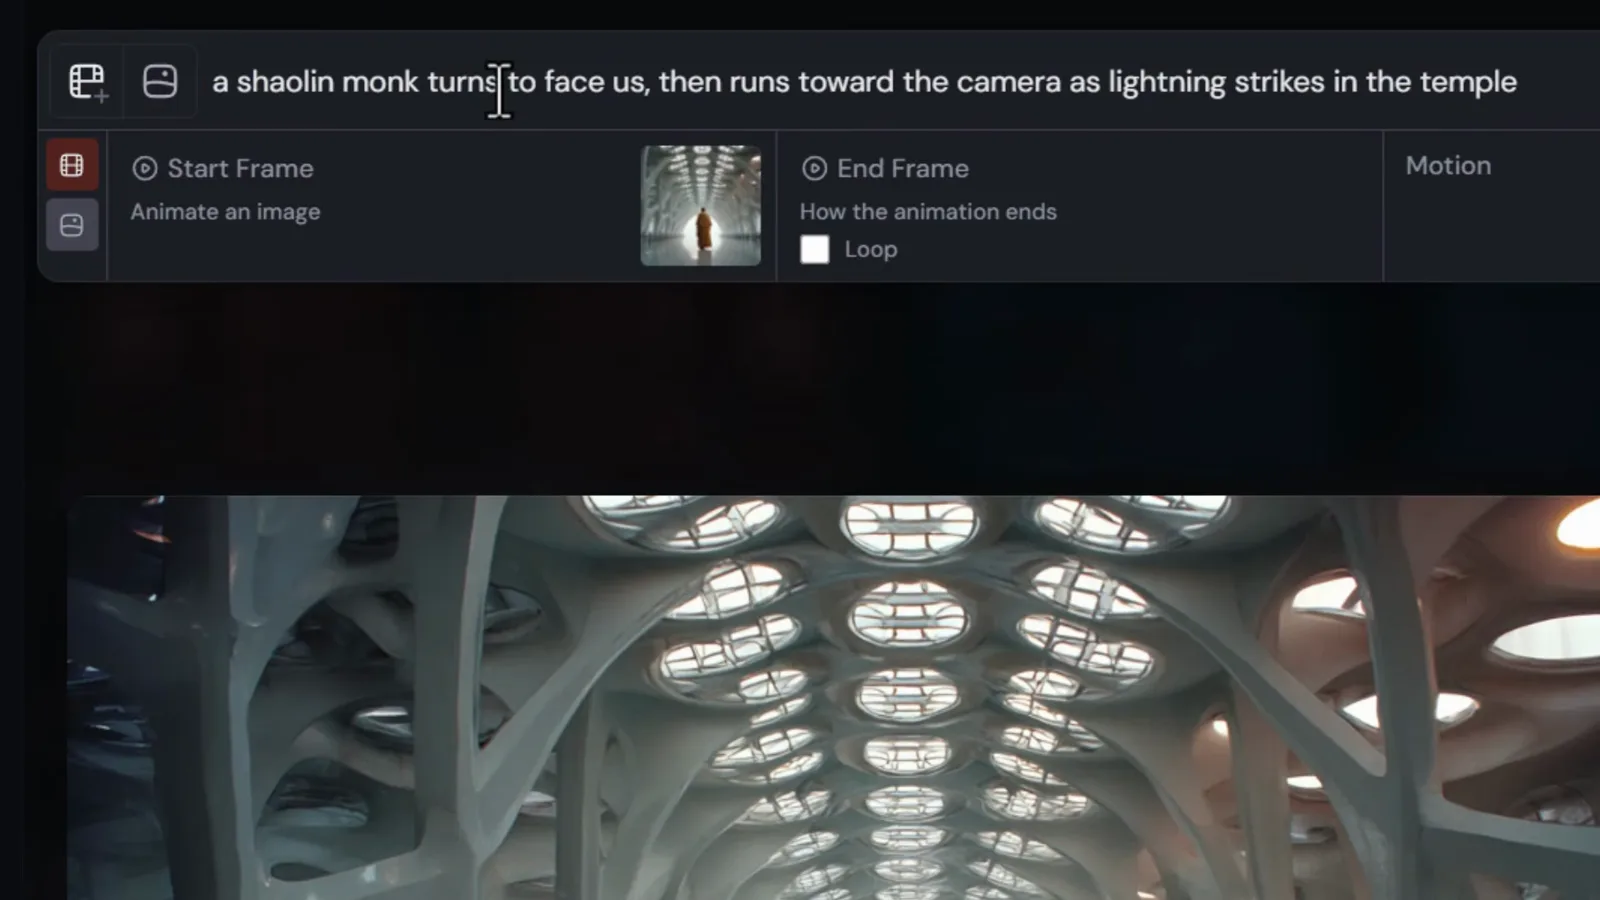
Start frame, motion prompt, loop toggle: the still becomes a directed clip.Watch at 22:03 - 12
Steer results with image and style references
Drag any image into the prompt bar and Midjourney asks which role it should play, via three chips. Image Prompts use the elements of an image as raw material; Style References copy the look — colors, grading, mood — onto your prompt; Omni Reference is covered in the next step. The demo attaches a sneaker photo to a close up of some pink and black shoes, in a city street at night, and the new grid borrows the shoe's colors and the photo's layout without duplicating it.
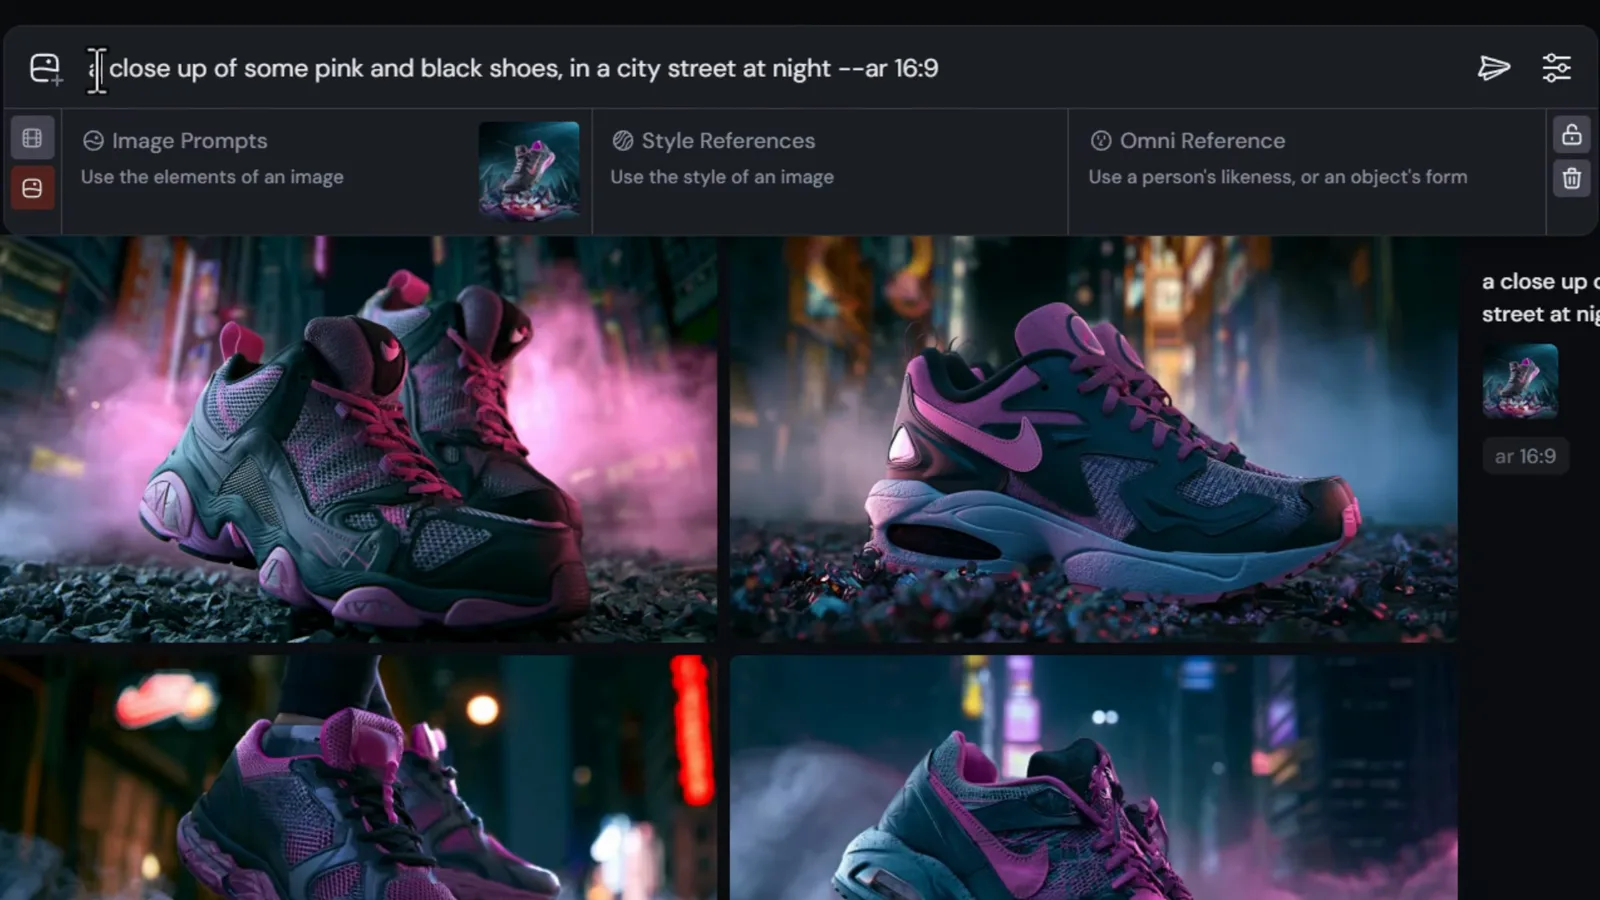
Three chips, three roles: elements, style, or a specific object to preserve.Watch at 25:55 - 13
Keep one exact object with Omni Reference
Omni Reference is the strongest of the three: it reproduces a specific object's form — or a character's likeness — inside new scenes, as long as the prompt mentions it. The strength dial defaults to 100; raising it pulls in more of the reference, lowering it lets the scene breathe. The video's sneaker test lands noticeably closer to the original shoe than a plain image prompt. One caveat from the walkthrough: omni jobs currently render on version 7, even if you normally generate on 8.1.
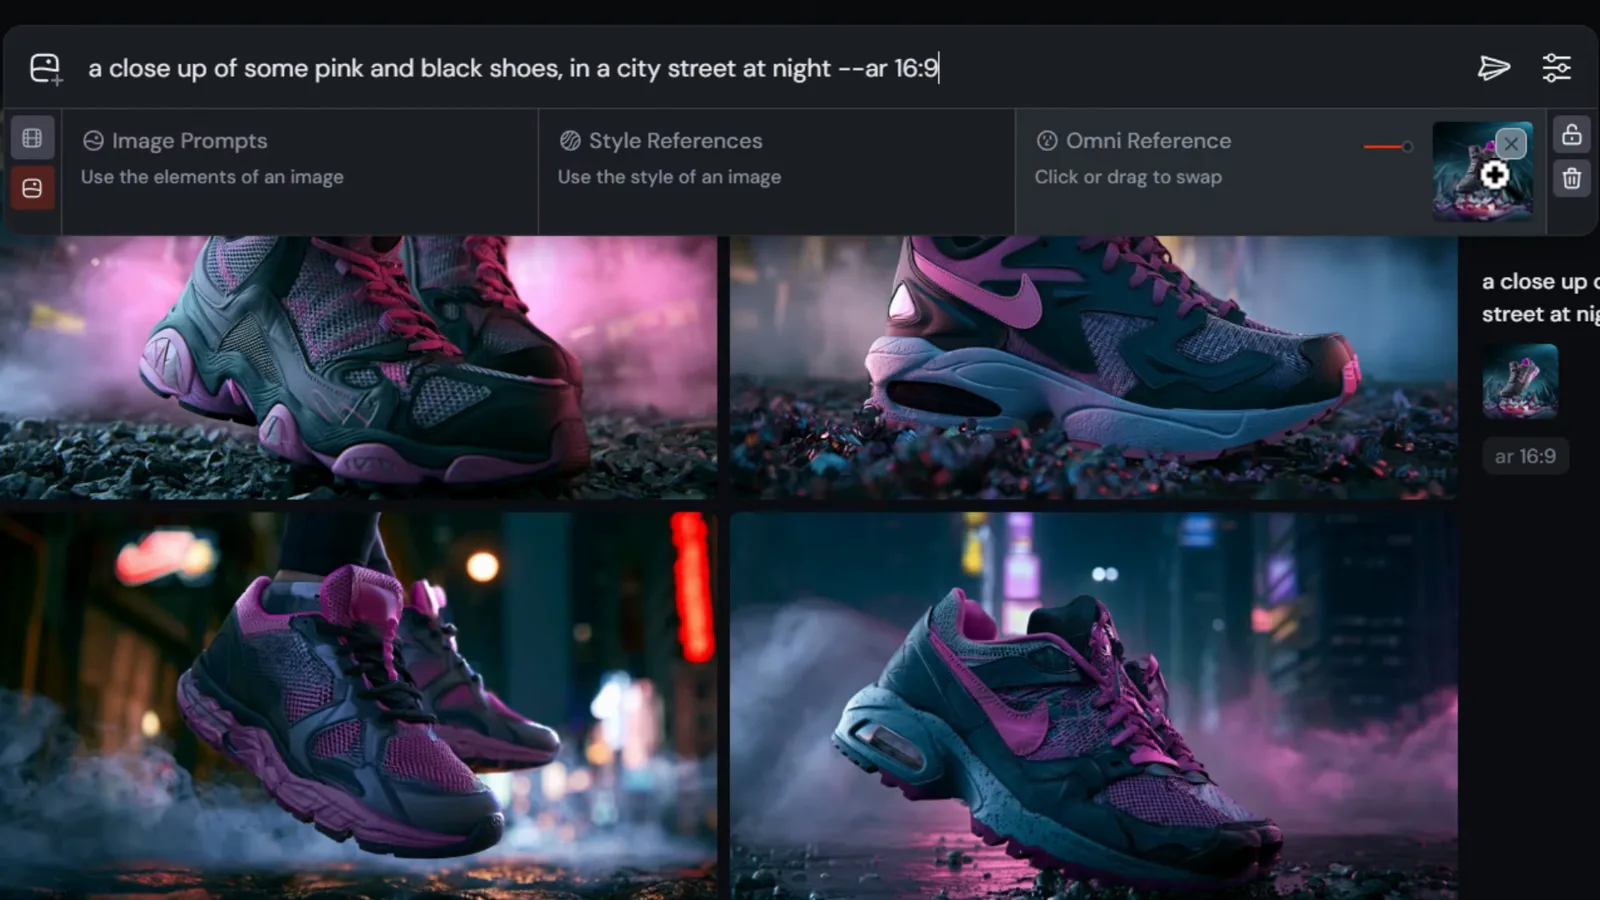
Omni Reference at strength 100: same shoe, new scene, rendered on version 7.Watch at 26:05
Explore, organize and download everything
- 14
Mine the Explore page for prompts that work
Explore is Midjourney's public gallery: trending and top images and videos, searchable by style or category, with a heart button that saves anything you like into your Likes. The real value is forensic — open any image and the viewer shows its full prompt, every parameter and the style reference codes behind it, plus the creator's profile. The video treats it as a free prompt-formula library: find a look you want, read its recipe, adapt the slots to your own subject.
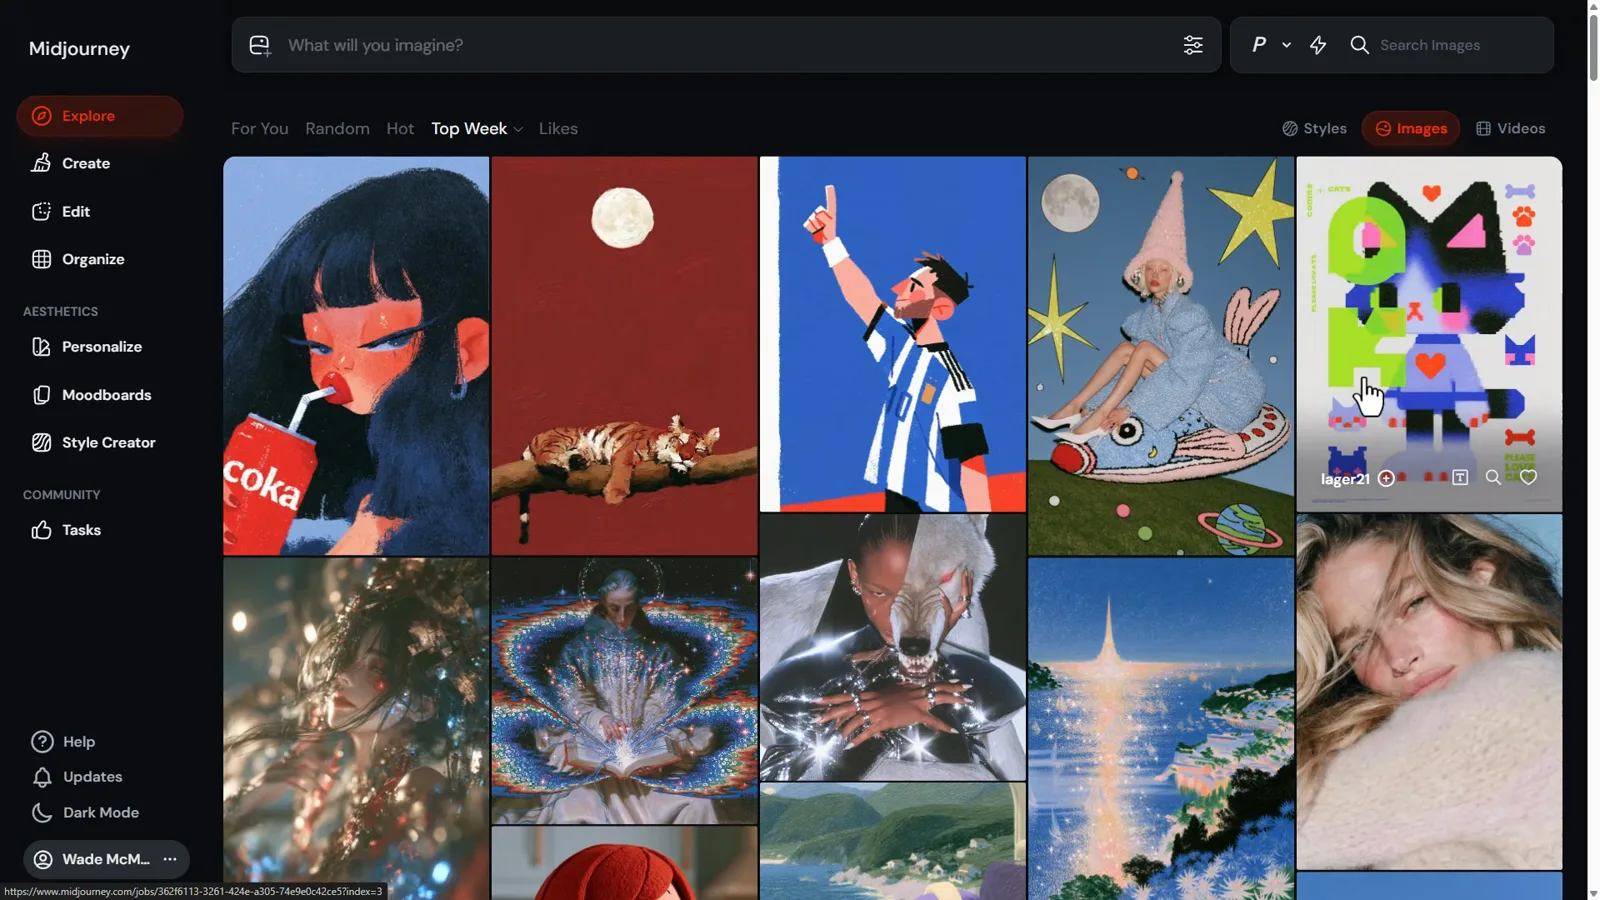
Every Explore image is a readable recipe: prompt, parameters and style codes included.Watch at 32:30 - 15
Select and bulk-download in the Organize tab
Downloading one by one does not scale, so the Organize tab collects everything you have made with filters for model version, media type and orientation. Click the plus symbol on a date to select an entire day's work, hold Shift to tick or untick individual images, or drag a box across a group. The download button then ships the whole selection as one zip — the video's example pulls 174 images and videos in a single archive, a routine monthly cleanup rather than a stunt.
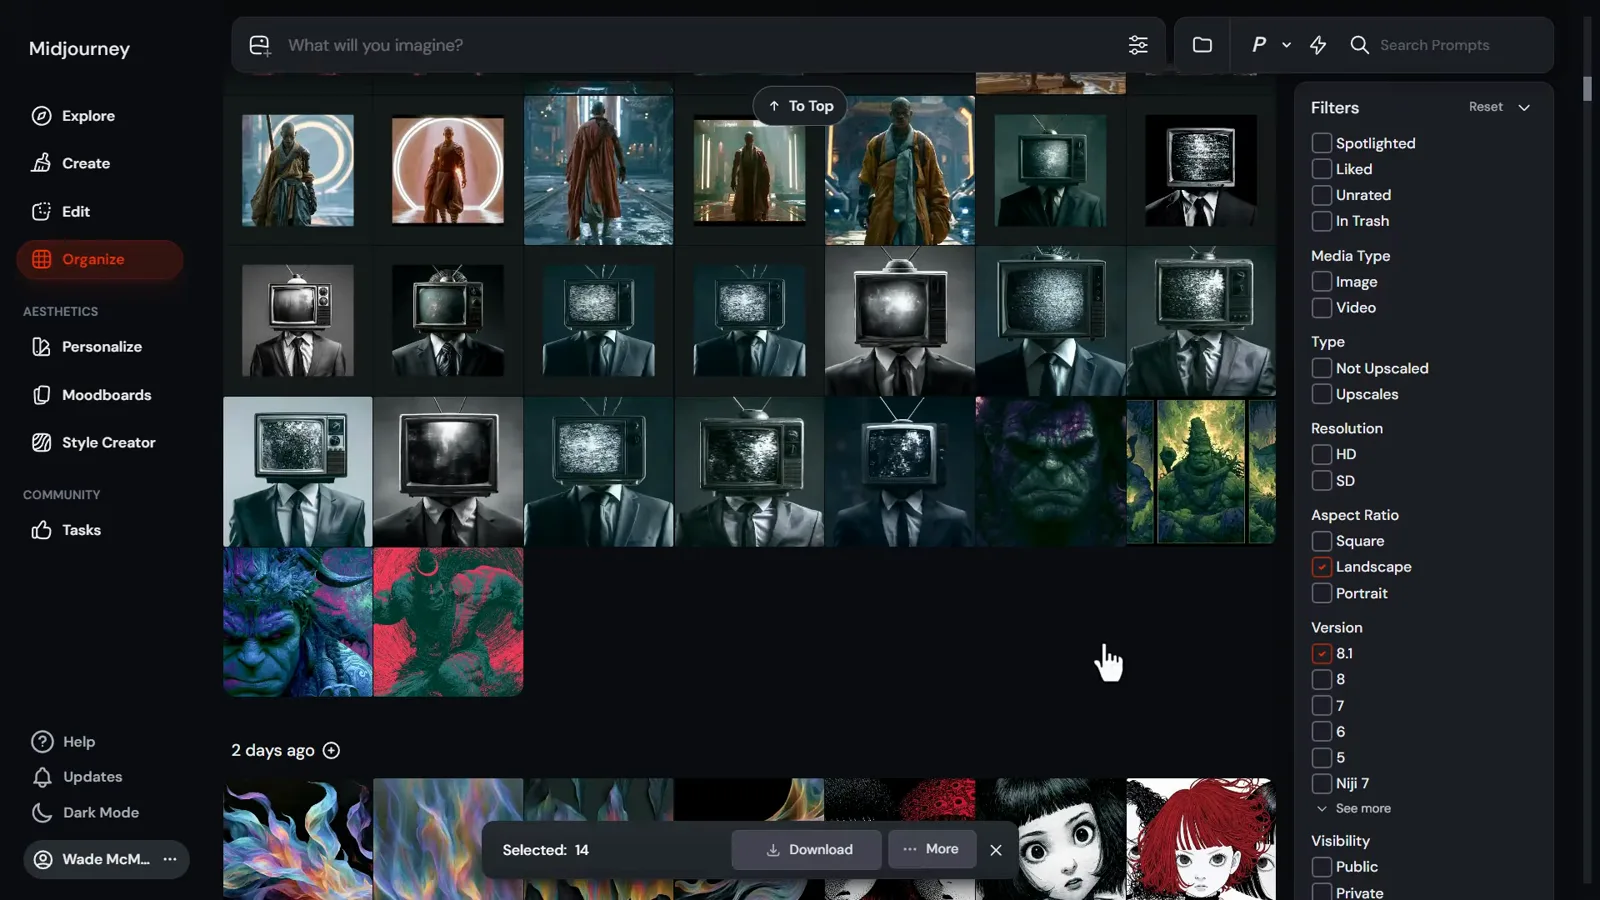
Select by day, prune with Shift, download the rest as a single zip archive.Watch at 34:30 - 16
Track GPU hours and manage your plan
Open the profile menu and choose Manage subscription to find the page that matters most month to month: Usage Details. It shows remaining fast GPU hours — the video's Pro account sits at 13h 27m of 30 — when those hours refresh, and which plan features are active. The same page handles switching, upgrading or downgrading plans and flipping between monthly and yearly billing. Check it whenever generations start feeling slow: you are probably out of Fast hours, and Relax mode is the workaround.
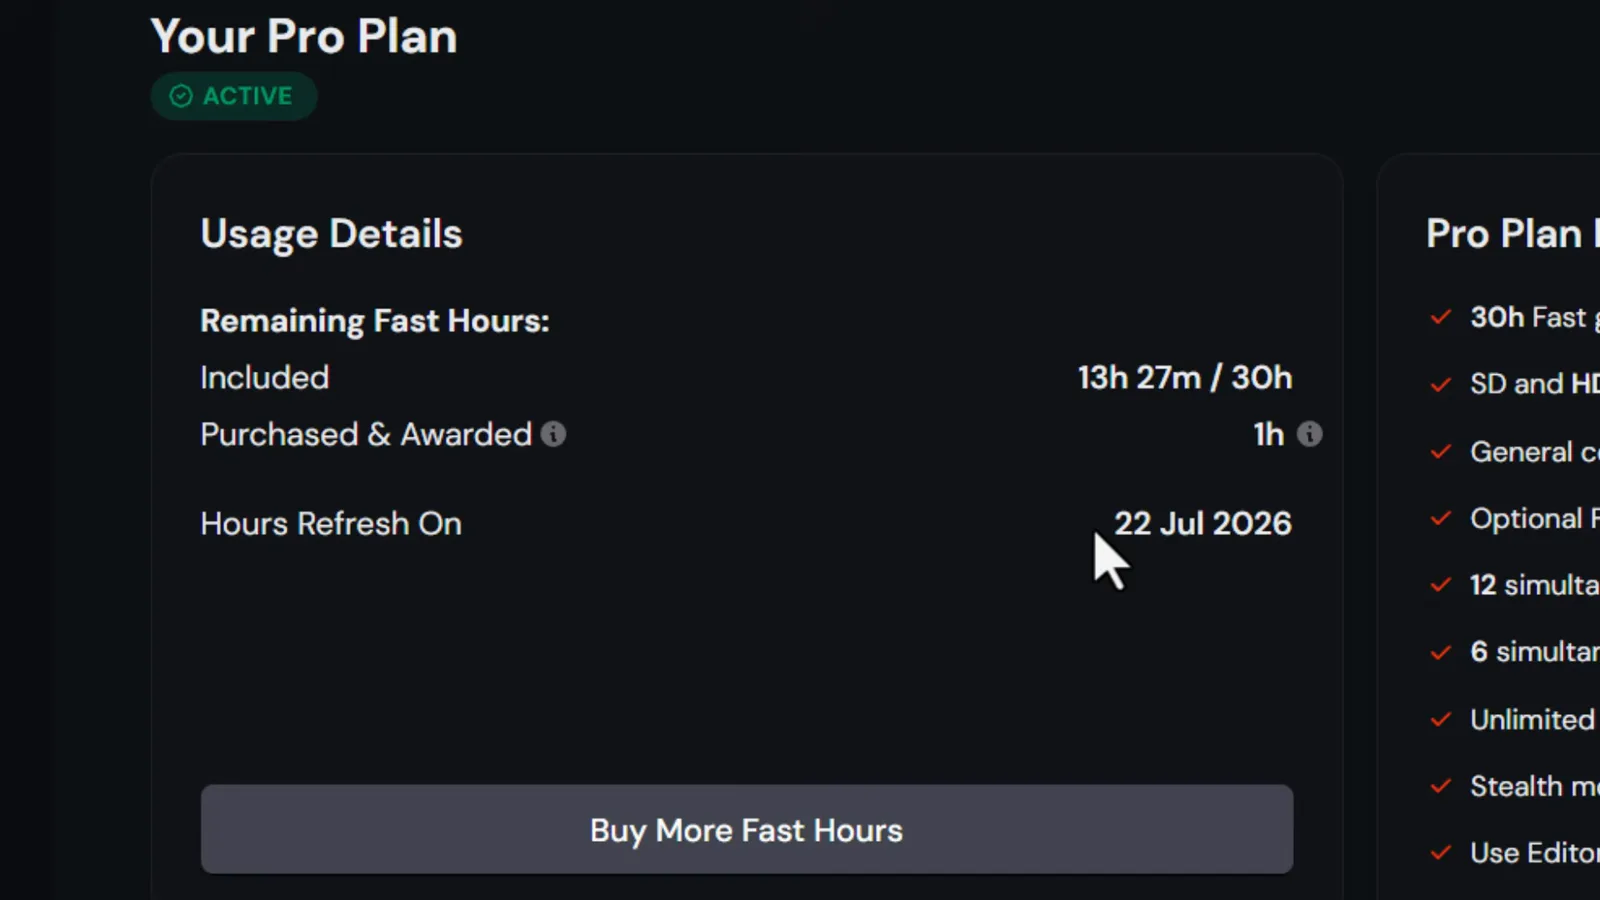
Usage Details: what is left of your fast hours and when the counter resets.Watch at 36:00